CPRIAdvisor Installation Guide
41
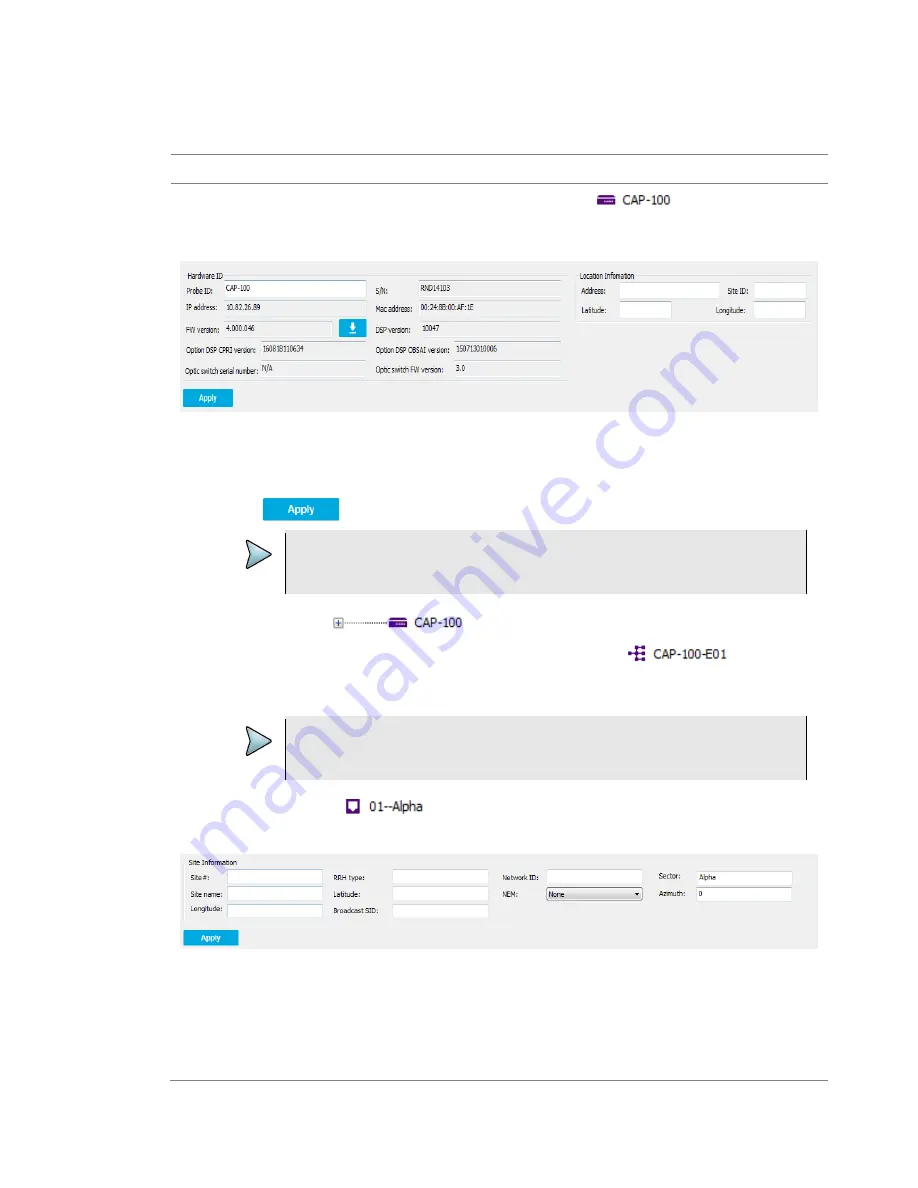
Managing your CAP-100 Information
Procedure
1
After completing the Probe initialization, click the Probe icon,
on the
Probe
Information Management
pane.
2
Assign Probe ID in Hardware ID section and complete Location Information fields below.
3
After completing each field with a proper value, press the
Enter
key on your keyboard.
a
Select a value of IP version from the following choices: IPv4, IPv6, and IPv46. A
default value is set to IPv4.
4
Click
button to apply the setting value.
NOTE
The greyed fields are read-only. The values are preset from the CAP-100 you have.
5
Click +
button in
on the
Probe Information Management
pane.
a
If you initialize Expansion, the following Expansion icon,
appears.
b
Click the icon and check the Expansion Information on the
Result View
pane.
NOTE
The greyed fields are read-only. You can only check the Expansion Information.
6
Click the port icon,
on the
Probe Information Management
pane.
7
Complete the Site Information below.
8
After completing each field with a proper value, press the
Enter
key on your keyboard.
a
Input a proper value in Sector field based on your need. A default value is set to
Alpha.
b
Select a value of Azimuth from the following choices: from 0 to 359 degrees. A
default value is set to 0.


