5 Installation
10
Installation and maintenance instructions HOME 0020224355_00
4.9
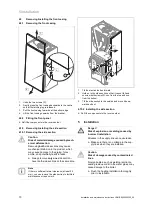
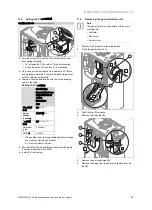
Removing/installing the front casing
4.9.1
Removing the front casing
B
C
A
1
1
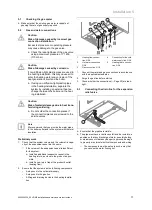
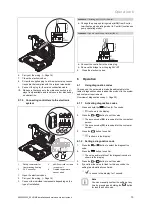
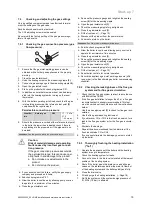
1.
Undo the two screws
(1)
.
2.
Gently press the front casing backwards in the centre
so that the latching lug is released.
3.
Pull the front casing forwards at the bottom edge.
4.
Lift the front casing upwards from the bracket.
4.9.2
Fitting the front panel
▶
Refit the components in the reverse order.
4.10
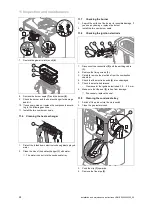
Removing/installing the side section
4.10.1 Removing the side section
Caution.
Risk of material damage caused by mech-
anical deformation.
Removing
both
side sections may cause
mechanical distortion in the product, which
may cause damage to the piping, for ex-
ample, and potentially result in leaks.
▶
Always remove
only one
side section
–
never both side sections at the same time.
Note
If there is sufficient lateral clearance (at least 50
mm), you can remove the side section to facilitate
maintenance or repair work.
2x
1
A
B
C
D
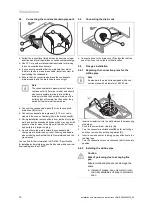
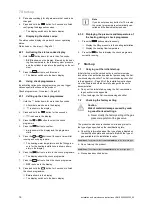
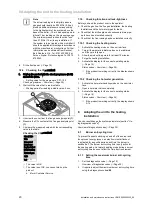
1.
Tilt the electronics box forward.
2.
Hold on to the side section so that it cannot fall and
unscrew both screws
(1)
, one from the top and one
from the bottom.
3.
Tilt the side section to the outside and move it down-
wards and out.
4.10.2 Installing the side section
▶
Refit the components in the reverse order.
5
Installation
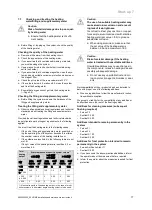
Danger!
Risk of explosion or scalding caused by
incorrect installation.
Stresses in the supply line can cause leaks.
▶
Make sure there is no voltage in the sup-
ply lines when they are installed.
Caution.
Risk of damage caused by contaminated
lines.
Foreign bodies, such as welding remnants,
sealing residue or dirt in the water pipes, may
cause damage to the boiler.
▶
Flush the heating installation thoroughly
prior to installation.
Summary of Contents for home combi
Page 51: ......


