Chapter 7: Field Service Components
00.053.101, Revision C SonixMDP/SP/OP Service Manual
7-32
3.
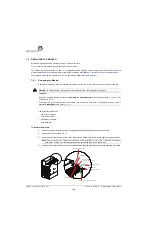
Open the door wider to expose the Side EMI Strip. Using the #2 Phillips screwdriver, from the exterior of the
modulo, remove the two (2) screws fastening the Side EMI Strip over the door hinges.
4.
Remove the modulo door hinge cover from inside the modulo and expose the two (2) hinges.
5.
To remove the door, use the #2 Phillips screwdriver to undo the two (2) hinges (two (2) screws per hinge).
6.
The Front Block/Ultrasound Module can now be removed.
Note:
The arrows (above) mark the two (2) screws on the top hinge.
Intake Side EMI Strip
UXID: 00.030.340
M4x6 Flat Head Screw (x2)
Tool: #2 Phillips screwdriver
M4x6 Flat Head Screw (x4)
Tool: #2 Phillips screwdriver
Summary of Contents for SonixMDP
Page 1: ...SonixMDP SP OP Ultrasound System Service Manual...
Page 2: ......
Page 4: ......
Page 10: ...Table of Contents 00 053 101 Revision C SonixMDP SP OP Service Manual vi...
Page 12: ...List of Service Drawings 00 053 101 Revision C SonixMDP SP OP Service Manual ii...
Page 44: ...Chapter 4 Performance Testing 00 053 101 Revision C SonixMDP SP OP Service Manual 4 4...
Page 48: ...Chapter 5 Software 00 053 101 Revision C SonixMDP SP OP Service Manual 5 4...
Page 124: ...Chapter 9 Network Configuration 00 053 101 Revision C SonixMDP SP OP Service Manual 9 8...
Page 142: ...Chapter 11 Maintenance 00 053 101 Revision C SonixMDP SP OP Service Manual 11 16...
Page 150: ...Chapter 12 Troubleshooting Issues 00 053 101 Revision C SonixMDP SP OP Service Manual 12 8...
Page 166: ...Appendix C Ultrasonix Limited Warranty 00 053 101 Revision C SonixMDP SP OP Service Manual C 2...
Page 168: ...Appendix D Service Drawings 00 053 101 Revision C SonixMDP SP OP Service Manual D 2...


