97
Clean the brake shoes of dust and dirt and sand them if they get greasy.
Replace greasy linings or keep them in gasoline for 20-30 minutes and
grind them with sand paper or wire brush.
Replace the linings and the shoes in case of the linings excessive
wear (the rivets are sunk less than 0.5 mm). Grind the installed linings,
so that their diameter is 0.2–0.4 mm less than the brake drum diameter.
Despite the labyrinth seal of release and adjusting mechanisms they
gradually collect dirt, therefore dismantle and clean the mechanisms
(especially the release mechanism), adding fresh grease. Do not let the
grease contact the drum and the linings.
The brake shall be adjusted
when the brake lever travel gets more
than the half of its maximum travel and when the braking effect becomes
insufficient.
Adjust air gaps between the shoes and the drums (for worn
linings) as follows:
1. Shift the transfer case lever into the neutral position and switch
off the front axle.
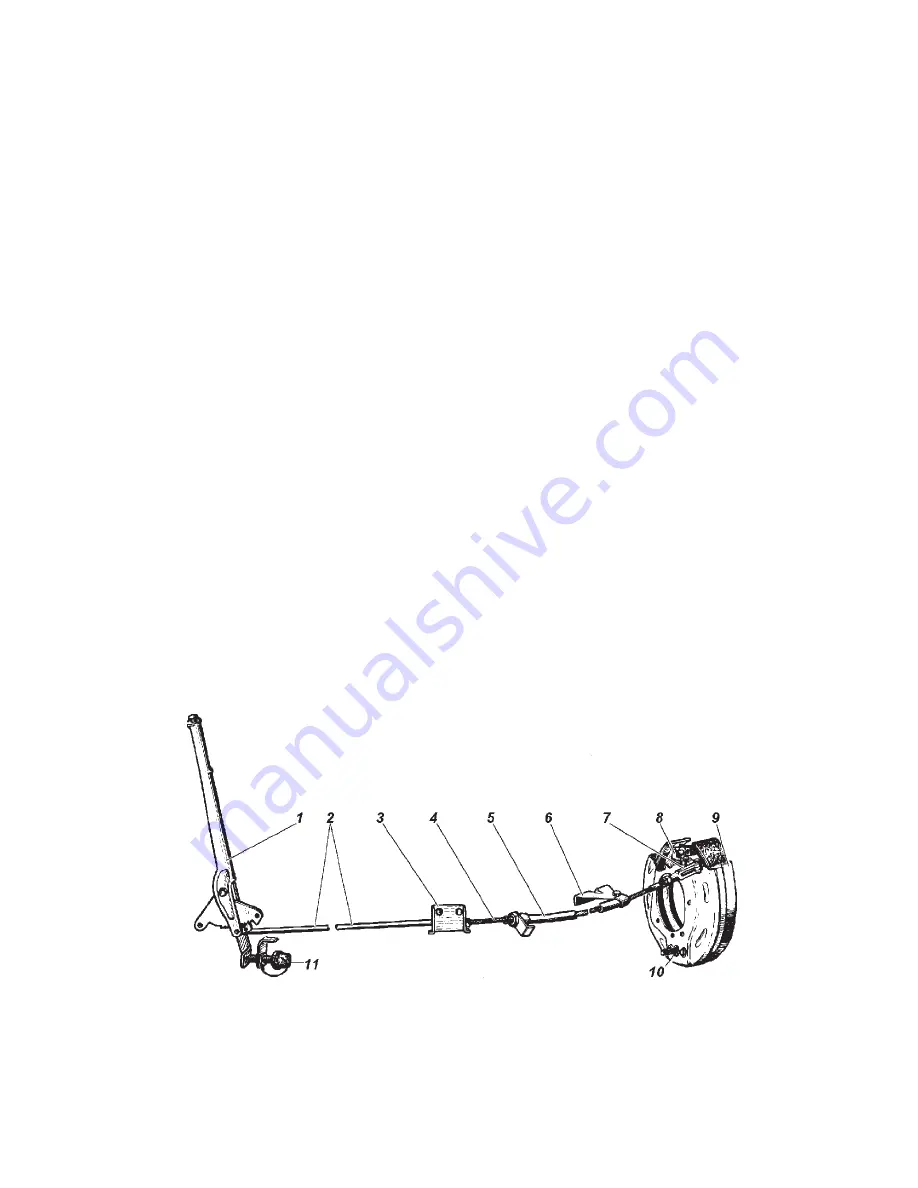
2. Move parking brake lever 1 (Fig. 9.34) into its extreme front position.
3. Jack up the vehicle from the rear wheel side.
4. Tighten adjusting screw 10, so that the brake drum cannot be
turned by hand.
5. loosen adjusting screw 10 by 4–6 clicks (1/3–1/2 of a turn), so
that the drum revolves freely.
Fig. 9.34. Parking Brake Drive:
1 — drive lever; 2 — rod; 3 — bracket; 4 — cable; 5 — protective tube; 6 — protective
tube bracket; 7 — cable yoke; 8 — lever; 9 — parking brake drum; 10 — adjusting screw;
11 — signal lamp switch


