103
lighting System, light and Audio Alarm
Despite the good sealing, dust may penetrate into the beam unit.
Without dismantling the beam unit wash it with clean water through the
unit orifice, and then dry the unit.
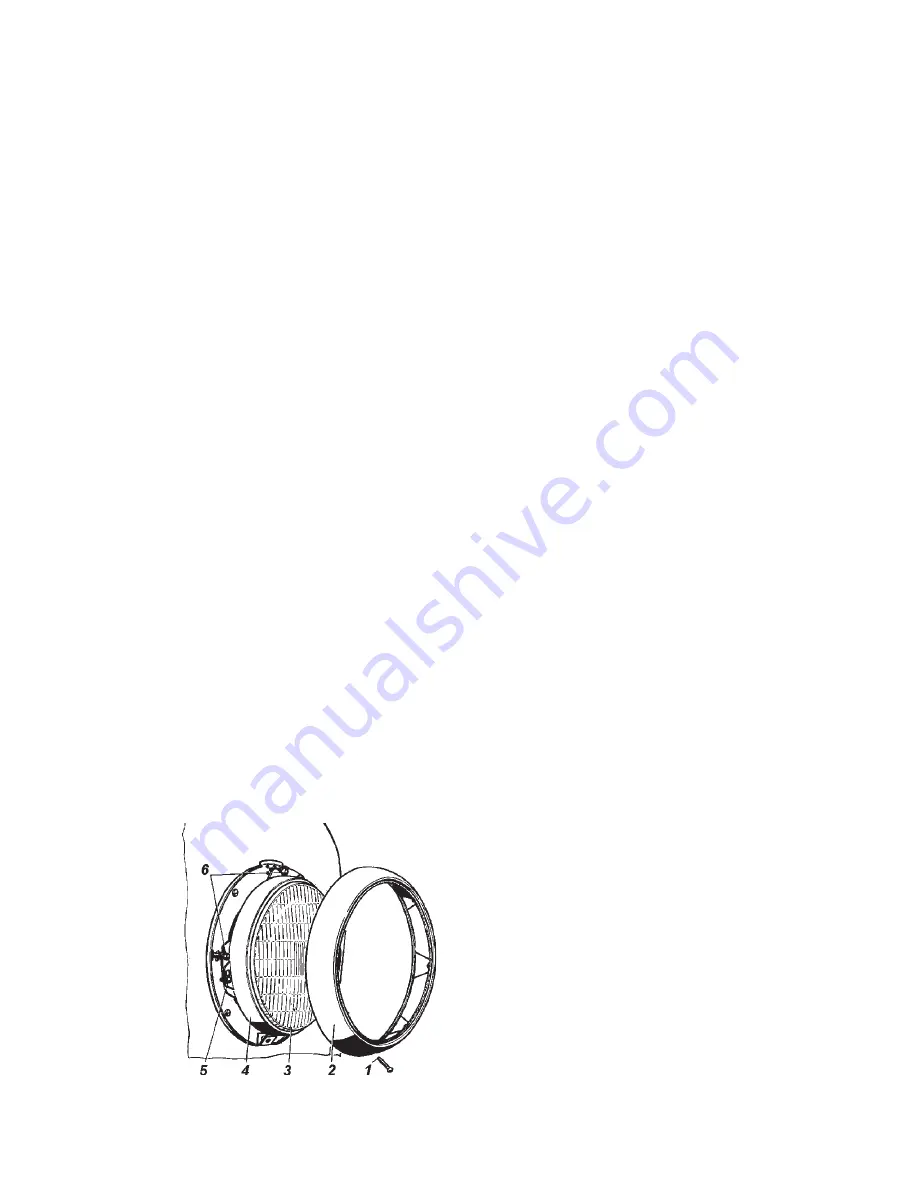
To replace a bulb in the lamp, untwist screw 1
(Fig. 9.38) and remove decorative ring 2. loosen three screws 5 and
remove inner ring 4 with beam element 3.
Adjust lamps as follows:
1. Park the vehicle, which shall have its curb weight and 75 kg
loaded driver's seat, on an even level ground, so that the vehicle
longitudinal axis is perpendicular to the screen, which is 10 meters
far from the headlamps center, and remove rings from the headlamps.
2. Turn on the lamps and make sure that the low beam is switched
to the high beam (and vice versa) simultaneously on both headlamps,
using the turn indicators and beam switch lever.
3. Turn on the low beam and, closing one headlamp, adjust the other
one with screws 6 (see Fig. 9.38), so that the light spot on the wall or
on the screen is located as shown in Fig. 9.39. Adjusting screws of
the headlamps are located symmetrically to the headlamps center in a
horizontal plane.
4. Adjust the second headlamp as the previous one, making sure that
the upper borders of light spots are on the same height.
5. Install the headlamps rings.
+front fog lights
shall be adjusted so that the light spots on the
wall or on the screen are located as shown in Fig. 9.40. For replacing
the fog light bulb remove the cover of the bulb holder by turning it
counterclockwise and take it out.
Fig. 9.38. headlamp:
1, 5 — screws; 2 — decorative ring;
3 — beam unit; 4 — inner ring;
6 — adjusting screws


