Operation
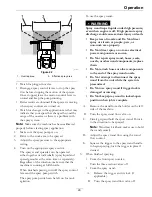
g319658
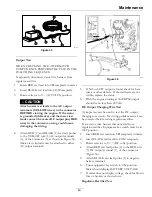
Figure 28
1.
Spreader moving
towards pans
4.
Right collection pans (no
gap between each)
2.
Center collection pan
5.
L1 and R1 collection
pan gap (spread apart to
allow machine to pass
through)
3.
Left collection pans (no
gap between each)
6.
Graduated measuring
cylinder
4.
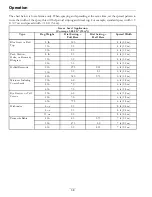
Reference the
Spreading Charts
section to
determine the appropriate rate dial setting (see
Figure 10).
5.
Fill the hopper approximately half-full with the
desired material.
6.
Set the impeller speed to the appropriate
broadcasting rate.
7.
Pull the Spread On/Off handle to the open
position and drive the spreader, at the appropriate
speed, over the center pan. Repeat this several
times, moving in the same direction each time,
until enough material is dispensed to fill the center
graduated measuring cylinder half full.
8.
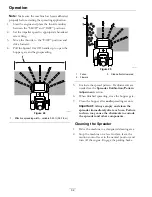
Label each graduated measuring cylinder to
correspond with the distribution pans (i.e. ...L2,
L1, Center, R1, R2....) (reference Figure 27 and
Figure 28).
9.
One at a time, take a collection pan and dump
the contents into the corresponding graduated
measuring cylinder. Record the amount of
material collected and return the pan to its
location. Repeat this until all pan contents have
been emptied.
10.
With the graduated measuring cylinder in the
same straight line as the pans, evaluate the volume
of material in each cylinder to determine the
quality of the distribution from the spreader.
11.
To adjust the spreader pattern, refer to the
Spreader Pattern Adjustment
section.
12.
Repeat steps through until an uniform pattern is
achieved.
Determining the Effective Spreading
Width
The effective width is used to determine the uniform
distribution of the material.
Note:
The spreading width range is 3 ft (0.9 m) up
to 25 ft (7.6 m).
1.
After the spreader pattern is correctly adjusted,
evaluate the amount of material in the center
graduated measuring cylinder.
2.
Locate the two tubes, one each side of center, that
contain 1/2 the measured amount of the material
that you observed in the center graduated cylinder.
3.
Go to the two corresponding pans. Starting from
the outer edge, measure and record the distance
between left pan, through the center pan, to the
outer edge of the right pan.
Note:
This measurement is the effective
spreading width.
Calculating the Application Rate
1.
Determine the amount of product to be applied.
2.
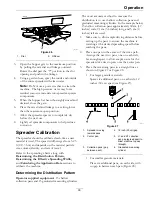
Determine the calibration course
A.
Determine the amount of product to be spread
per 1,000 ft
2
(93 m
2
). Use the recommended
rate from the
Spreading Charts
section or
the product manufacturer’s label as a guide.
B.
Determine a course length by dividing 1,000
ft
2
(93 m
2
) by the effective spread width.
For example, if the effective width is 6 feet
(1.8 meters), then the calibration course length
equals 167 ft (51 m).
Course Length
1,000 ft
2
(93 m
2
)
6 ft (1.8 m)
=
167 ft (51 m)
C.
The calibration course is 6 ft (1.8 m) by 167
ft (51 m).
34
Summary of Contents for Z-SPRAY JUNIOR Series
Page 1: ...Z SPRAY JUNIOR SERIES For Serial Nos 411 294 212 Higher Part No 4505 818 Rev A...
Page 60: ...Notes 60...
Page 61: ...Notes 61...
Page 62: ...Service Record Date Description of Work Done Service Done By 62...
Page 63: ...63...


