background image

Notes:

61


Summary of Contents for Z-SPRAY JUNIOR Series

Page 1: ...Z SPRAY JUNIOR SERIES For Serial Nos 411 294 212 Higher Part No 4505 818 Rev A...

Page 2: ...rester as defined in Section 4442 maintained in effective working order or the engine is constructed equipped and maintained for the prevention of fire To acquire a spark arrester for your machine see...

Page 3: ...ator s manuals If additional information is needed or should you require trained mechanic service contact your authorized Z Turf Equipment dealer or distributor All Z Turf Equipment dealers and distri...

Page 4: ...heck for Loose Hardware 45 Service Air Cleaner 45 Change Engine Oil 45 Check Hydraulic Oil and Tank Level 45 Change Hydraulic System Filter and Fluid 46 Check Tire Pressures 47 Check Spreader System 4...

Page 5: ...personal injury or death Read understand and follow all instructions and warnings in the Operator s Manual and on the machine engine and attachments All operators and mechanics should be trained If t...

Page 6: ...pose the adhesive surface Apply only to a clean dry surface Smooth to remove any air bubbles Familiarize yourself with the following safety signs and instruction labels They are critical to the safe o...

Page 7: ...ight position 2 Release the foot pedal to unlock the caster wheels to allow turning decal135 6725 135 6725 1 Cutting dismemberment hazard stay away from moving parts decal135 6728 135 6728 1 Press and...

Page 8: ...l handle up 5 Spread Lock Rotate counterclockwise to unlock rotate clockwise to lock 2 Spread Off Push handle down 6 Deflector Pull knob up to open 3 Spread pattern control Pull handle up if heavy on...

Page 9: ...wheel pressure 4 locations 2 Time interval 6 Grease idler pivot refer to the Operator s manual for further instructions 3 Check engine oil level 7 Grease caster pivots refer to the Operator s manual f...

Page 10: ...stop engine before leaving the operator s position 20 Throttle Fast 8 Crushing dismemberment hazard of bystanders Do Not carry passengers look forward and down when operating the machine look behind a...

Page 11: ...5 2 5 4 6 25 6 7 25 2 Begin to spread the product As you are spreading you should be able to see the spread pattern in front of you Generally all spreaders will tend to throw fertilizer heavy to the...

Page 12: ...ilter In fuel tank Electrical System Electric Start Charging System Flywheel Alternator Charging Capacity 20 amps Battery Type BCI Group U1 Battery Voltage 12 Volt Polarity Negative Ground Fuses 10 am...

Page 13: ...nly One Boom 2 ft 0 6 m Spray Pump Remco 5500 Series Diaphragm Pump 12VDC Spray Nozzles Hypro Air Injected Tips Ceramic Tip Color MPH Pressure Gallons 1 000 sq ft Yellow 5 40 psi 27 1 4 gallon Lavende...

Page 14: ...g the machine will shorten the life of the transmission and void the warranty Torque Requirements Bolt Location Torque Wheel Hub 235 ft lb 319 N m Crankshaft Bolt 35 ft lb 47 N m Engine Mounting Bolts...

Page 15: ...on each side of the top console control the forward and reverse motion of the machine Moving the levers forward or backward turns the wheel on the same side forward or reverse respectively Wheel spee...

Page 16: ...and stop the engine The switch has three positions OFF ON and START Insert key into switch and rotate clockwise to the ON position Rotate clockwise to the next position to engage the starter key must...

Page 17: ...the left side of the foot pan Push the bottom of the switch to turn the sprayer OFF Once the pump is turned on the spray pressure control knob is turned clockwise to increase pressure and or counter...

Page 18: ...e lock trigger forward to keep it in the open flow position Pull the lock back to release the trigger Spray Wand Flow Valve Rotate the knob counterclockwise to increase the spray system flow or clockw...

Page 19: ...arily deflect the granules Pull the knob up to raise the deflector g312556 Figure 9 1 Fence 3 Side deflector lowered 2 Flowers Rate Dial and Linkage Located at the front of the machine below the sprea...

Page 20: ...fety switches guards and shields Do Not operate the machine unless they are in proper working condition Replace worn or deteriorated parts with genuine Z Turf Equipment parts when necessary DANGER It...

Page 21: ...pplication of the chemical and Do Not exceed recommended system application pressure Handle chemicals in a well ventilated area Have clean water available especially when filling the spray tank Do Not...

Page 22: ...ease or oil and other debris which can accumulate in these areas Clean up oil and fuel spills and remove fuel soaked debris Allow the machine to cool before storing the machine in any enclosure Do Not...

Page 23: ...unning machine unattended Stop engine wait for all moving parts to stop Before refueling Tragic accidents can occur if the operator is not alert to the presence of children Children are often attracte...

Page 24: ...oisture can quickly affect the operation of the machine on a slope Operate across slopes never up and down Avoid operation on excessively steep or wet slopes Identify hazards at the base of the slope...

Page 25: ...atures under 30 F 1 C 5 If the choke is in the ON position gradually return choke to the OFF position as the engine warms up Driving the Machine CAUTION Machine can spin very rapidly by positioning on...

Page 26: ...position 2 Loosen the knobs on both sides of the control tower g316808 Figure 16 1 Motion control levers 2 Adjustment knob 3 Move the bar forward to obtain the fastest speed Move the bar backward to...

Page 27: ...machine on a level surface move motion control lever to the neutral position stop the engine and set the parking brake 2 Determine the amount of water needed to mix the amount of chemical needed as pr...

Page 28: ...Rotate the valve handles as shown in Figure 20 g315315 Figure 20 1 Left tank return valve close position 3 Right tank suction valve open position 2 Left tank suction valve close position 4 Right tank...

Page 29: ...r tank agitation To use the spray wand WARNING Spray wand traps liquids under high pressure even when engine is off High pressure spray discharge could cause serious injury or death Keep clear of nozz...

Page 30: ...ine throttle to FAST 6 Set the three spray valves to ON 7 Allow the water in the tank to spray out through the nozzles 8 Check the nozzles to ensure that they are all spraying correctly 9 Remove the w...

Page 31: ...these steps to avoid damaging the spreader Note Clean your spreader thoroughly after all applications Before Operating the Spreader Make sure the spreader has been calibrated for the material to be s...

Page 32: ...0 9 7 6 m g312556 Figure 25 1 Fence 3 Side deflector lowered 2 Flowers 5 Evaluate the spread pattern If adjustments are needed see the Spreader Calibration Pattern Adjustment section 6 When finished...

Page 33: ...on Rate sections to calibrate the machine Determining the Distribution Pattern Operator supplied equipment 15 shallow collection pans and 15 graduated measuring cylinders The most accurate method to m...

Page 34: ...er to determine the quality of the distribution from the spreader 11 To adjust the spreader pattern refer to the Spreader Pattern Adjustment section 12 Repeat steps through until an uniform pattern is...

Page 35: ...e result is the amount applied to the course Amount Applied 25 lb 11 3 kg 20 lb 9 kg 5 lb 2 3 kg For this example 5 lb 2 3 kg was applied to 1 000 ft2 93 m2 9 If necessary adjust the rate dial to achi...

Page 36: ...control 4 Start notch if pattern is heavy to right side 2 Rotate counterclockwise to unlock 5 Rotate clockwise to lock 3 Start notch if pattern is heavy to left side 2 Lock the spreader pattern contro...

Page 37: ...results Approximate Dial Settings Type 1 000 ft2 93 m2 Dial Setting One Pass Dial Setting Two Passes 1 lb 45 kg 3 6 3 1 2 lb 91 kg 4 0 3 5 Fine Pellets 3 lb 1 36 kg 4 2 3 7 2 lb 91 kg 3 7 3 2 4 lb 1 8...

Page 38: ...1 2 m 1 lb 2 0 4 ft 1 2 m Blue Grass or Red Top 2 lb 2 5 4 ft 1 2 m 5 lb 2 5 4 ft 1 2 m 1 lb 3 0 4 ft 1 2 m Park Merion Delta or Kentucky Bluegrass 2 lb 3 5 4 ft 1 2 m 2 lb 2 75 2 25 6 ft 1 8 m 3 lb 3...

Page 39: ...se the tie down locations shown in Figure 31 If possible both front and rear straps should be directed down and outward from the machine Using non designated locations may cause damage to the machine...

Page 40: ...backward WARNING Loading a machine on a trailer or truck increases the possibility of backward tip over Backward tip over could cause serious injury or death Use extreme caution when operating a mach...

Page 41: ...accessories may alter the warranty controllability and safety of the machine Unauthorized modifications to the original equipment or failure to use original Z Turf Equipment parts could lead to seriou...

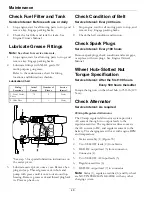
Page 42: ...and exhaust system area Clean the debris build up from the machine Every 40 hours Check the hydraulic system fittings Check the condition of belt Every 50 hours Check the tire pressures Check spreader...

Page 43: ...eries in storage when the open circuit voltage drops to 12 4 volts Note To prevent damage due to freezing battery should be fully charged before putting away for winter storage Charge batteries in an...

Page 44: ...shorted battery cell can cause an explosion resulting in serious personal injury Do Not jump start a weak battery if these conditions exist 2 Make sure the booster is a good and fully charged lead aci...

Page 45: ...urs Replace the dual element air cleaner element 1 Stop engine wait for all moving parts to stop and remove key Engage parking brake 2 See the Engine Owner s Manual for maintenance instructions Change...

Page 46: ...filter 1 2 turn and allow a small amount of oil to leak from the oil filter this allows air to be purged from the oil filter and supply hose from the hydraulic reservoir Turn filter clockwise until ru...

Page 47: ...Check the Hydraulic Oil Level section 8 Check hydro drive linkage adjustment as stated in Hydro Drive Linkage Adjustment section in Adjustments Check Tire Pressures Service Interval Every 50 hours 1...

Page 48: ...k Condition of Belt Service Interval Every 40 hours 1 Stop engine wait for all moving parts to stop and remove key Engage parking brake 2 Check the belt condition and tension Check Spark Plugs Service...

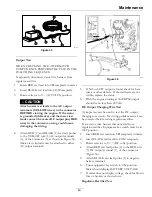
Page 49: ...nal g268086 Figure 36 5 If NO or LOW output is found check for bare wires or other defects If shorted leads are not visible replace the stator 6 With the engine running at 3600 RPM output should be no...

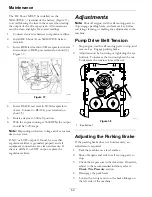
Page 50: ...operly and all equipment connections are clean and secure If there is still NO or LOW output replace the regulator rectifier Adjustments Note Shut off engine wait for all moving parts to stop engage p...

Page 51: ...pad 6 Loosen the two jam nuts at the upper and lower ends of the ball joints as shown in Figure 40 To increase the gap turn the control linkage counterclockwise To decrease the gap turn the control li...

Page 52: ...closure Do Not store the machine or fuel container or refuel where there is an open flame spark or pilot light such as on a water heater or other appliance Clean Engine and Exhaust System Area Service...

Page 53: ...n pollute the environment and cause health issues Follow the disposal directions on the chemical manufacturer s label Dispose of chemicals and containers in accordance to local state federal laws Moto...

Page 54: ...of the sprayer tanks C Run the pump to distribute the anti freeze mix throughout the system D Set the spray levers position to begin spraying Allow the antifreeze to circulate through sprayer and nozz...

Page 55: ...The throttle and choke are not in the correct position 3 Be sure the throttle control is midway between the SLOW and FAST positions and the choke is in the ON position for a cold engine or the OFF pos...

Page 56: ...ic failure 4 Check connections hoses and seals 5 Spreader controller turned off or down 5 Check controller knob positions 6 Shaft pin is missing 6 Replace shaft pin Impeller does not rotate 7 Impeller...

Page 57: ...pen position 3 Wand is clogged or damaged 3 Clean repair or replace wand 4 Nozzle is clogged 4 Unclog or replace nozzle 5 Trigger is not pressed 5 Press trigger 6 Hoses are clogged or damaged 6 Clean...

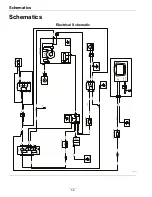
Page 58: ...AYER SP1406 J1415 SP1401 J1416 SW1402 PUMP Switch OFF ON P1404 1 3 4 6 8 P1404 2 5 7 K1402 86 87 30 87a PUMP RELAY 85 P1407 3 4 5 P1407 1 2 J1419 J1410 J1409 DIS1401 HOUR METER START REG DC GND S D RE...

Page 59: ...s schools and hospitals and on a wide variety of products Additionally some online and mail order retailers provide Prop 65 warnings on their websites or in catalogs How do the California warnings com...

Page 60: ...Notes 60...

Page 61: ...Notes 61...

Page 62: ...Service Record Date Description of Work Done Service Done By 62...

Page 63: ...63...

Page 64: ...Date Purchased Engine Model No and Spec No Model No Engine Serial No E No Serial No 2021 Z Turf Equipment is part of the Exmark family of products All Rights Reserved Printed in the USA 415 Industria...

Reviews: