EN
Infrared Camera – Operating Manual
B -
20
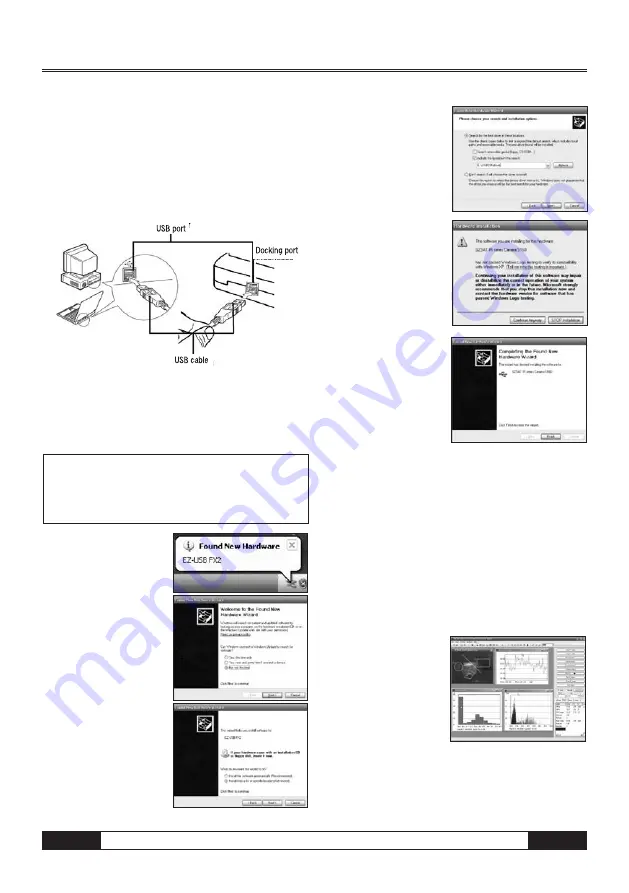
Connect the USB cable supplied included in the scope
of delivery to the USB port of your PC and the multi-
function docking port.
There is no need to turn off the computer or camera
when setting up this connection.
Please refer to your computer manual for information re-
garding the location of the USB port.
Installing the Driver
Connect the USB included in the scope of delivery to the
USB port of your PC and the USB port of your camera. Set
the SAT real-time disk (optional) to the CD-ROM driver.
Users of Windows XP Professional /
Windows 2000 must first log in as
as administrator (computer system
administrator) to install programs.
1. After a few moments,
the following dia-
logue will appear.
2. Select [No, not this time]
then click [Next >].
3. Select [Install from a list
or location (Advanced)]
then click [Next >].
4. Select [Include this lo-
cation in the search:]
then click [browse].
Locate the directory of
the driver, and click
[OK] to return to the
previous window.
Then click [Next >].
5. Click [Continue Anyway].
6. Click [Finish] to finish
the driver installation.
Transferring Videos via USB
You can use the real-time software to transfer your ther-
mal videos directly to your computer via USB.
1. Power on the computer.
2. Connect the camera and your computer via the USB
cable.
3.
The operating system will recognise your camera
as a removable medium if the drivers have been
installed correctly.
4. You can use the soft
ware to view and
anylyse thermal videos
in real-time and to
save them on to your
hard drive.
m


