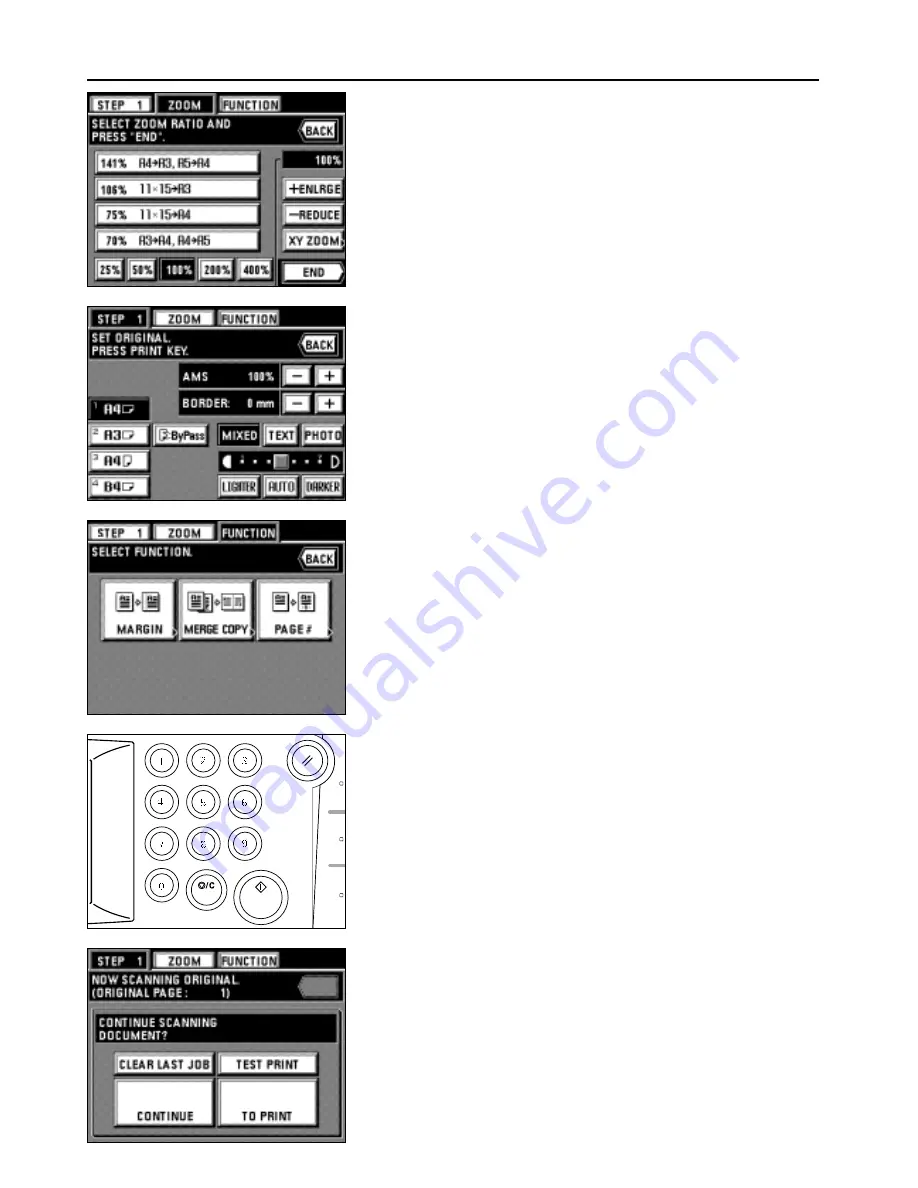
* When changing the zoom ratio, touch the "+" key or "-" key on the right side of the
zoom ratio display. When setting the zoom mode, such as standard zoom or XY zoom,
touch the "ZOOM" key and follow the instruction on page 19 and after.
* The setting of the zoom mode can be changed by each job.
59
APPLICABLE COPY MODES
* When setting the border erase mode, touch the "+" key or "-" key on the right side of
the display of the width of erasing border to set the width of erasing border. The width
can be selected from 6, 12 and 18 mm.
* The border erase mode in this setting is effective only for the sheet originals.
* The setting of the border erase mode can be changed by each job.
* If the "FUNCTION" key is touched, the following copy functions can be set.
• Margin mode: Touch the "MARGIN" key and follow step 4 and after on page 25.
• Merge copy: Touch the "MERGE COPY" key and follow step 3 and after on page 38.
• Page number printing: Touch the "PAGE #" key and follow step 4 and after on
page 26.
8. Set the original(s).
* Set the original selected in steps 3 or 5.
9. Press the Start key.
10. When continuing to read originals, touch the "CONTINUE" key.
* If "SHEET & BOOK ORIGINALS" is selected in step 3 to continue reading, repeat
from step 5.
If "SHEET ORIGINALS" is selected to continue reading, repeat from step 6.
If "BOOK ORIGINALS" is selected to continue reading, repeat from step 7.
* When all originals has been read completely, go to step 11.
* Touch the "CLEAR LAST JOB" key to clear the last page of read-in original.
* To print the test print, touch the "TEST PRINT" key. When the printing is completed,
the display will return to the screen in step 10.
11. Touch the "TO PRINT" key.
Summary of Contents for DC 2042
Page 1: ...INSTRUCTION HANDBOOK DC 2042 DC 2052...
Page 4: ......
Page 11: ...7 NAMES OF PARTS...
Page 16: ...12 PREPARATIONS...


