47
Recording
Introduction
Playback
Editing
Library
Function setup
Others
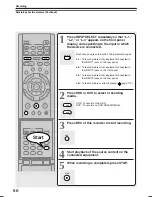
To stop recording
Press STOP.
To pause recording (to omit an unnecessary
portion)
During recording, press PAUSE.
To resume recording, press it again.
Note
• Pausing recording automatically creates a new chapter
division at that point.
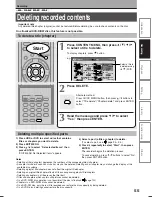
To change a TV channel to be recorded
1) During recording, press PAUSE.
Recording pauses.
2) Press CH/Page or the number buttons to
change the channel.
3) Press PAUSE to resume recording.
Notes
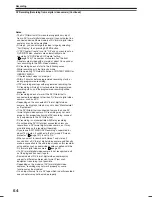
• During recording, you cannot change the recording parameters, such as modes, channels, etc.
• The number of titles cannot exceed 99 for a DVD-RAM/R/RW disc or 396 for the HDD.
• One continuous recording cannot exceed in any case 9 hours. Recording automatically stops at 9 hours.
• Even during normal recording, you can set the programmed recording.
• You cannot start recording immediately before a programmed recording starts.
• For recorded sound, see
page 73.
• During monaural sound recording, the same sound is recorded on both the left and right channels.
• When “Audio” is set to “L-PCM”, multi-channel sound is recorded as stereo sound. When playing this recorded sound, you
will hear MAIN and SAP sounds simultaneously. Press AUDIO button to select a desired sound.
• When “DVD compatible mode” is set to “Main” or “SAP”, the unit records the same sounds on both the left and right channels
when receiving monaural sound. When receiving the multi-channel sound, the selected sound, Main or SAP, is recorded on
both the left and right channels.
• Depending on the disc contents, pressing REC button may take a longer time to start recording.
• When a starting time of a programmed recording comes, a recording in execution is stopped and the programmed recording
starts. If you do not want to stop the recording, cancel the timer program before it starts.
• Even if you set “Aspect ratio(Video mode)” (
page 154) to “16:9”, images are recorded in 4:3 aspect ratio when using a
DVD-R/RW disc with “Rate” set to “1.0” (Mbps) or “1.4” (Mbps).
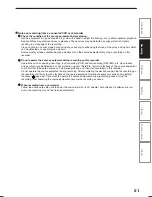
To view a TV program while recording another
1) Start recording on this recorder.
2) On a connected TV, select the TV mode.
3) Using the channel selector of the TV, select a
desired channel on the TV.
To reduce noise on recordings (Rec DNR)
Before recording, set “Rec DNR” (
page 154).
To record and play at the same time
To start recording while playing a disc
Stop playback, then select the other disc by
pressing HDD or DVD button, and start recording
on that disc.
To play a disc while recording on another disc
Select the disc that is not being recorded by
pressing HDD or DVD button, and start playback on
the disc.
Note
• During a dubbing job, the unoccupied drive is available for
recording or playback, however, cannot perform a function
which records and plays simultaneously.
RD-XS35SU/SC_Ope_E_p031-048
06.1.17, 7:23 PM
47
Summary of Contents for RD-XS35SC
Page 58: ......
Page 82: ......
Page 130: ......
Page 140: ......
Page 169: ...169 Others Function setup Library Editing Playback Recording Introduction Memo ...
Page 197: ...RD XS35SU SC_Inst_E_p19 28 06 2 13 4 33 PM 28 ...
Page 223: ...54 RD XS35SU SC_Inst_E_p48 56 06 2 13 4 34 PM 54 ...
Page 224: ...55 Introduction Connections Basic setup Memo RD XS35SU SC_Inst_E_p48 56 06 2 13 4 34 PM 55 ...
Page 225: ...Printed in China Printed on 70 Recycled Paper RD XS35SU SC_Inst_E_p48 56 06 2 13 4 34 PM 56 ...


