The Remote Control
Page 8-3
Programming the Remote Control
There are two ways to program your remote control to match your equipment: code scan and
code entry. Code scan can take some time, but it avoids having to refer to this manual to program
your remote control. Code entry saves some time but you will need to look up the codes assigned
to the devices.
Programming Mode
Keep your remote control aimed at the device you want to control during this process. The
remote control will send out the “power” command for the device being programmed.
While holding down the device key you are programming (“TV” in this instance), press the
MUTE key for one full second. Then release the keys. The device key should light and stay lit. If
it doesn’t, repeat the process. If it does, the remote control is now in programming mode.
Then choose either the code scan or code entry method, as described below.
Code Scan
Once you are in programming mode, repeatedly press the
key to step through the codes,
sending out the power command. This could take some time since there could be many codes for
each type of device. When your device shuts off, you have found the code. If you inadvertently go
past a code that responded, or realized that you may not have been aiming the remote at the
device, you can use the
key to step backward through the codes. Press the
key to
verify that you haven’t missed the code. In order to lock in the code, press the device key again.
The remote will remember the code until you reprogram it.
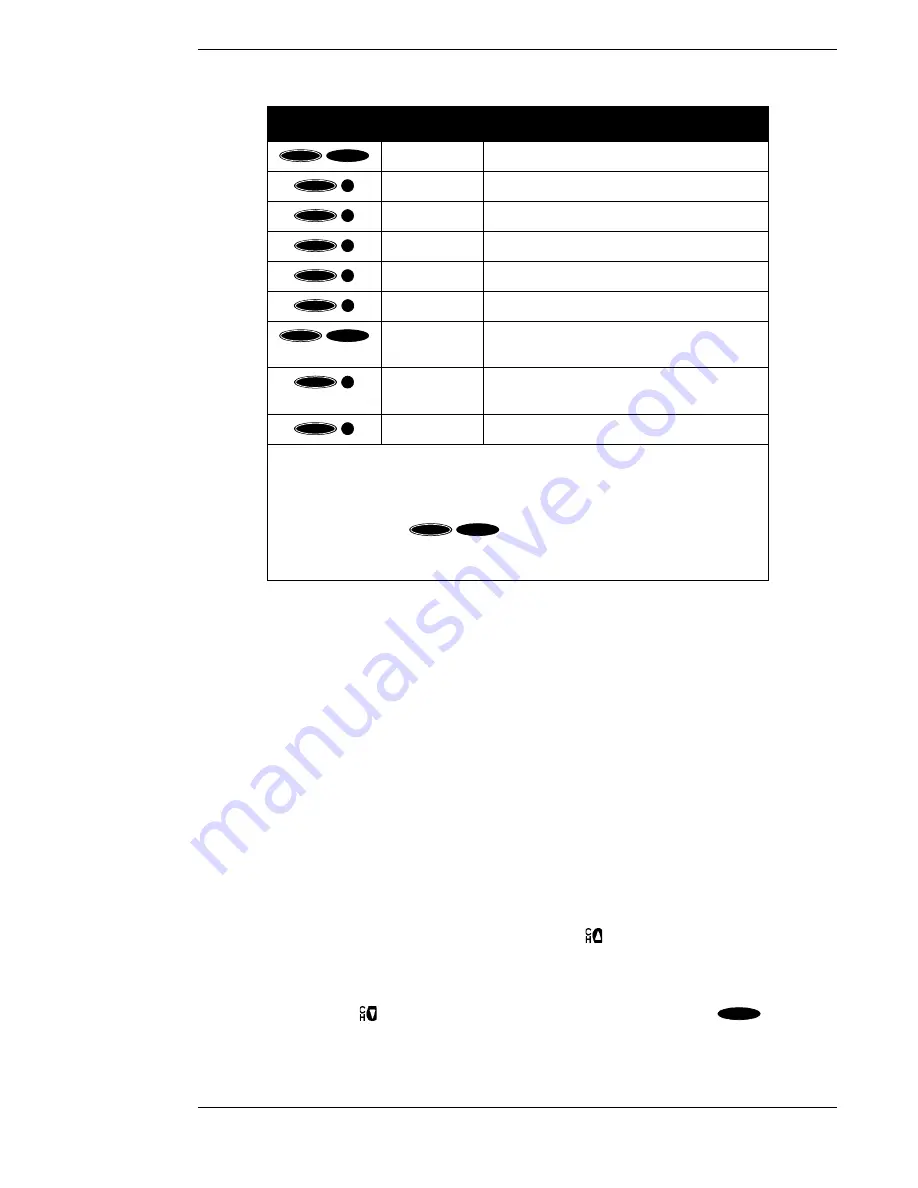
Keys
Label
Feature
LIST
Displays the CHANNEL LISTS screen
SERVICES
Displays the Alternate Services menu
MOVIES
Filters the on-screen guide to movies only*
SPORTS
Filters the on-screen guide to sports only*
NEWS
Filters the on-screen guide to news only*
ALPHA
Select channel by call sign
HD/SD
Switches the output of the HD receiver
between HD and SD**
CROP/
LTRBX
Modifies video display viewing format
ALL
Removes all on-screen guide filters.
* Pressing this sequence a second time will undo the respective filter.
** HD formatted video output (1080i) uses the
Y
,
P
r
, and
P
b
jacks. SD formatted
video output (480i) uses the Audio/Video (A/V) and
Out to TV
jack.
Note:
The
first time you turn your system on, the HD formatted video output is active. You
may have to press the
key sequence twice to get any picture. A
complete explanation of switching from HD to SD can be found in the section
“Now You Can Turn It On” on page 14.
ACTION
FAV
ACTION
CH
PREV
ACTION
1
ACTION
2
ACTION
3
ACTION
–
ACTION
INPUT
ACTION
8
ACTION
0
ACTION
INPUT
POWER
Summary of Contents for DST-3000
Page 1: ......
Page 10: ......
Page 25: ...Setting Up Your Satellite Receiver Page 2 7 ...
Page 29: ...Setting Up Your Satellite Receiver Page 2 11 ...
Page 34: ......
Page 62: ......
Page 82: ......
Page 92: ......
Page 98: ...Toshiba DST 3000 High Definition Digital Receiver Appendix A 6 ...


