4
Warning: Remove placement wire and Luer-Lock sidearm assembly as a unit.
Failure to do so may result in wire breakage.
29. If there is any difficulty removing placement wire or guidewire, catheter and wire
should be removed as a unit.
Warning: Do not apply undue force on guidewire to reduce the risk of possible
breakage.
Complete Catheter Insertion:
30. Check lumen patency by attaching a syringe to each extension line and aspirate until
free flow of venous blood is observed.
31. Flush lumen(s) to completely clear blood from catheter.
32. Connect all extension line(s) to appropriate Luer-Lock connector(s) as required.
Unused port(s) may be “locked” through Luer-Lock connector(s) using standard
institutional policies and procedures.
•
Slide clamp(s) are provided on extension line(s) to occlude flow through each lumen
during line and Luer-Lock connector changes.
Warning: Open slide clamp prior to infusion through lumen to reduce risk of
damage to extension line from excessive pressure.
Secure Catheter:
33. Use catheter stabilization device and/or catheter clamp and fastener to secure
catheter (where provided).
•
Use triangular juncture hub with side wings as primary securement site.
•
Use catheter clamp and fastener as a secondary securement site as necessary.
Caution: Minimize catheter manipulation throughout procedure to maintain
proper catheter tip position.
Catheter Stabilization Device (where provided):
A catheter stabilization device should be used in accordance with manufacturer’s
instructions for use.
Catheter Clamp and Fastener (where provided):
A catheter clamp and fastener are used to secure catheter when an additional securement
site other than the catheter hub is required for catheter stabilization.
Warning: Do not attach catheter clamp and fastener until either guidewire or
placement wire is removed.
•
After guidewire has been removed and necessary lines have been connected or locked,
spread wings of rubber clamp and position on catheter making sure catheter is not
moist, as required, to maintain proper tip location.
•
Snap rigid fastener onto catheter clamp.
•
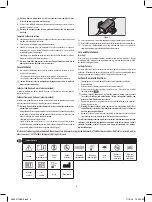
Secure catheter clamp and fastener as a unit to patient by using either catheter
stabilization device, stapling or suturing. Both catheter clamp and fastener need to
be secured to reduce risk of catheter migration (refer to Figure 7).
Figure 7
34. Ensure insertion site is dry before applying dressing per manufacturer’s instructions.
35. Assess catheter tip placement in compliance with institutional policies and procedures.
36. If catheter tip is malpositioned, assess the situation and replace the catheter or
reposition according to institutional policies and procedures.
Care and Maintenance:
Dressing:
Dress according to institutional policies, procedures and practice guidelines. Change
immediately if the integrity becomes compromised (e.g. dressing becomes damp, soiled,
loosened or no longer occlusive).
Catheter Patency:
Maintain catheter patency according to institutional policies, procedures and practice
guidelines. All personnel who care for patients with PICCs must be knowledgeable about
effective management to prolong catheter’s dwell time and prevent injury.
Catheter Removal Instructions:
1. Position patient as clinically indicated to reduce risk of potential air embolus.
2. Remove dressing.
3. Release catheter and remove from catheter securement device(s).
4. Remove catheter by slowly pulling it parallel to skin. If resistance is met while
removing catheter
STOP
Caution: Catheter should not be forcibly removed, doing so may result
in catheter breakage and embolization. Follow institutional policies and
procedures for difficult to remove catheter.
5. Apply direct pressure to site until hemostasis is achieved followed by an ointment-
based occlusive dressing.
Warning: Residual catheter track remains an air entry point until site is
epithelialized. Occlusive dressing should remain in place for at least 24 hours or
until site appears epithelialized.
6. Document catheter removal procedure including confirmation that entire catheter
length and tip has been removed per institutional policies and procedures.
For reference literature concerning patient assessment, clinician education, insertion
technique, and potential complications associated with this procedure, consult
standard textbooks, medical literature, and Arrow International, Inc. website:
www.teleflex.com
Symbol Glossary
Caution
Consult
instructions for use
Do not
reuse
Do not
resterilize
Sterilized by
ethylene oxide
Keep away
from sunlight
Keep
dry
Do not use
if package
is damaged
Not made
with natural
rubber latex
Catalogue
number
Lot
number
Use by
Manufacturer
Teleflex, the Teleflex logo, SharpsAway and SharpsAway II are trademarks or registered trademarks of Teleflex Incorporated or its affiliates, in the U.S. and/or
other countries. © 2015 Teleflex Incorporated. All rights reserved.
A06041108B0.indb 4
7/18/16 10:33 AM


