


10
www.teejet.com
Aeros 9040 Field Computer
#4 START NEW JOB OR CONTINUE JOB
Once the power up sequence has completed, the Home screen will appear with the option to start a new job or continue an existing job. The
console must have GNSS before starting or continuing a job.
Setup for the specific machine and its components must be
completed before starting a job.
Once a job is active, some setup options can no longer be changed. To change between simple and
advanced mode, go to Data-> Options-> Job Mode in the System Setup.
Simple Mode
In simple mode, only one job will be available at a time.
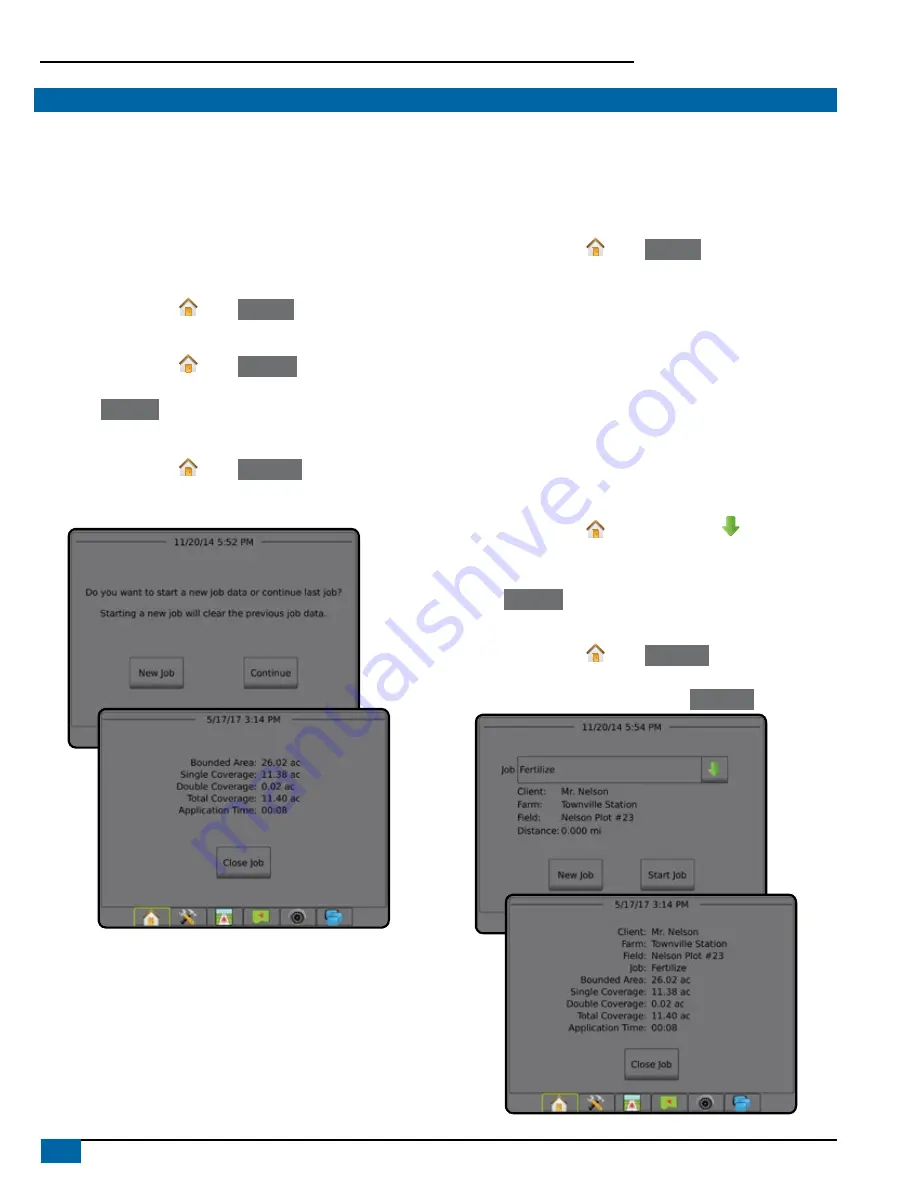
New Job
1. On the Home screen , press
New Job
.
Continue Job
1. On the Home screen , press
Continue
.
If the current job is in a UTM zone other than the current or adjacent
UTM zone
Continue
will be disabled.
Close Job
1. On the Home screen , press
Close Job
.
To create a report of the job when closing a job, Insert a USB drive into
the USB port of the console before pressing “Close Job”.
Advanced Mode
In advanced mode, more than one job will be available at any time.
Client information, farm information, field information, and prescription
maps can only be inputted using Fieldware Link. A job name can only
be edited using Fieldware Link.
A user can duplicate jobs for reuse of guidelines, boundaries, applied
data, prescription map and/or polygons using Fieldware Link or
Data -> Job Data -> Manage in the console.
New Job
1. On the Home screen , press
New Job
.
2. Press:
►Yes – to automatically generate a name
►No – to enter a name using the on screen keyboard
Client, farm, and field information are inputted using Fieldware Link.
Start Job
The Aeros 9040 is programmed with a field finder tool to assist the user
in finding the job closest to the vehicle’s location. With GNSS acquired,
the job pick list will be updated every ten seconds. During this update,
the list of jobs is sorted by distance and the closest two jobs are
displayed on the top of the list. The remaining jobs are listed beneath
these.
1. On the Home screen , press DOWN arrow to access the list
of jobs saved in the console.
2. Select the job name to be started/continued.
3. Press
Start Job
.
Close Job
1. On the Home screen , press
Close Job
.
To create a report of the job when closing a job, Insert a USB drive into
the USB port of the console before pressing
Close Job
.


