maintenance/
troubleshooting
4
18
Synrad
Firestar i401
operator’s manual
Troubleshooting
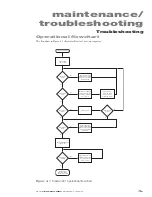
Remote interlock faults are not latched on OEM lasers. This means that if an interlock open fault occurs,
the
INT
indicator will turn red, the
Interlock Open
output will Close, the internal shutter automatically
closes to block the beam path, the
RDY
LED turns Off, the
SHT
LED turns Off (regardless of the state of
the
Shutter Open Request
input), and all DC power is removed from the RF boards.
However, if the interlock circuit closes again, the
INT
indicator changes from red to green, the
Interlock
Open
output Opens, the
RDY
light illuminates, the
SHT
LED turns On, the internal shutter opens, and
five seconds later lasing is enabled.
Web interface
Symptom:
■
DC power is applied, but the Firestar i401 web interface cannot be accessed.
Possible Causes:
■
The peer-to-peer connection was made using a straight-thru Ethernet cable.
Use an Ethernet crossover cable for a peer-to-peer connection between the Firestar i401 laser and the
computer. A straight-thru cable is required if the i401 is connected to your network using a network router,
switch, or hub.
■
The factory-default IP address was changed.
Firestar i401 lasers are pre-configured at the factory with a fixed IP address of 192.168.50.50. If this address
was changed in the field, then you must locate the new IP address, it
cannot be remotely reset.
Symptom:
■
The Firestar i401 is connected to a network; however, the i401 web interface does not open or locks
up while receiving data from the laser.
Possible Causes:
■
Multiple i401’s are connected to the same network with identical IP addresses.
Make sure only one i401 laser is connected to the network at a time or, if multiple i401’s are connected, be
sure they have distinct IP addresses to prevent IP addressing conflicts.
■
The i401 laser was connected to the network using a crossover cable.
A straight-thru cable is required if the i401 is connected to a network through a network router, switch, or
hub.
■
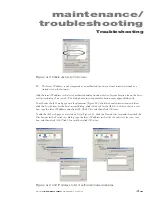
Java script is not enabled in the web browser.
Locate your browser’s
Internet Options
menu and configure it to enable Java script. As shown in Figure 4-3,
the Java feature is located on the
Internet Options
dialog’s
Advanced
tab (under
Tools/Internet Options
). The
dialog boxes in your particular browser may appear differently.


