54
Click for contents
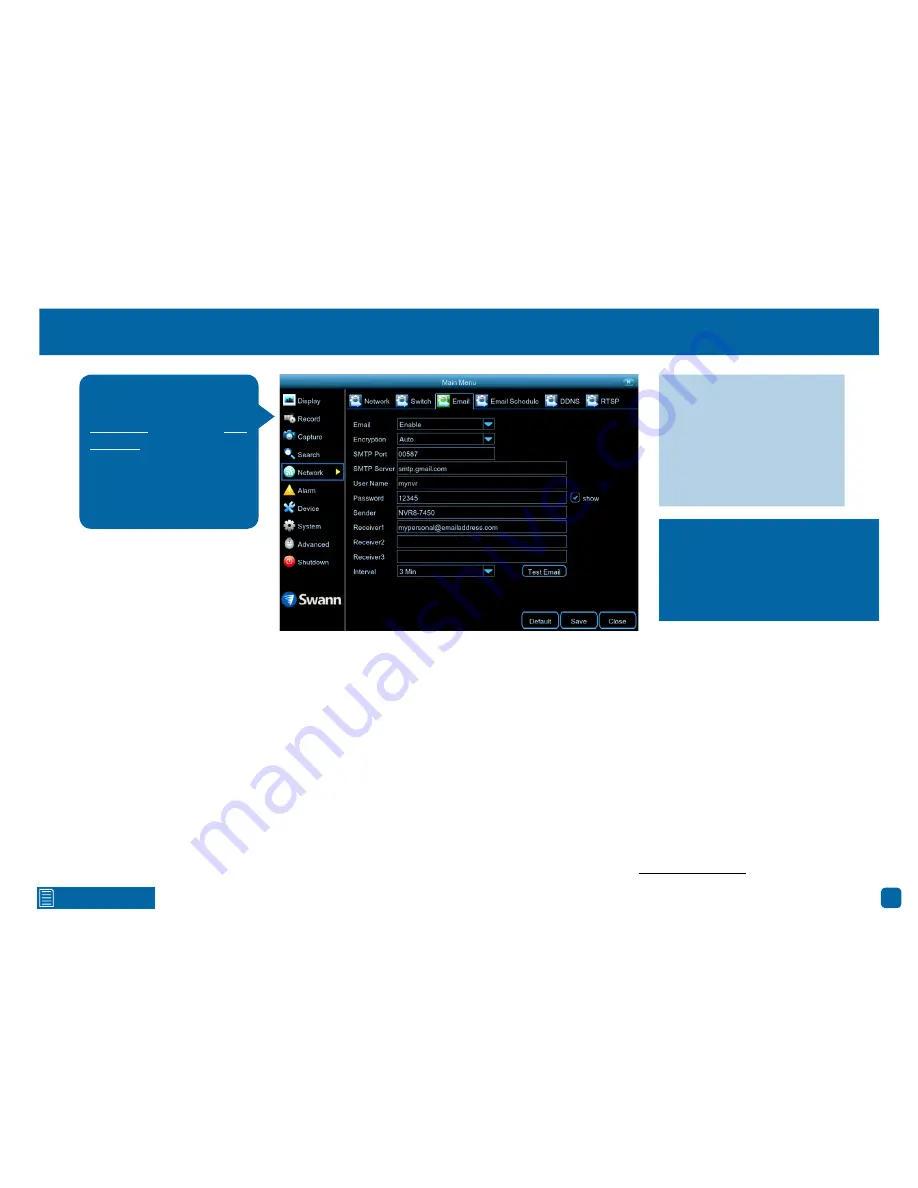
Network: Email
Email:
Click “Enable” to input your email details.
Encryption:
Leave this on “Auto”. This ensures your NVR will always use the
correct encryption for your email provider.
SMTP Port:
Gmail input 00587. Outlook input 00587.
SMTP Server:
Gmail input “smtp.gmail.com”. Outlook input “smtp.live.com”.
User Name:
Input the email user name for the account you created.
Password:
Input the email password for the account you created. Click the
“show” checkbox if you would like to hide your password.
Sender:
Input a name for your email account, for example NVR8-7450.
Receiver1:
Input the email address that you want to send email alerts to.
Interval:
This is the length of time that must elapse after your NVR sends an
email alert before it will send another. Adjust accordingly.
Test Email:
Click to verify the information is correct then click “OK”. A mes-
sage will appear if the test has been successful. Click “OK” to continue.
If the test email is not in your inbox, check your junk or spam folder.
Email not working? Please try the following:
1.
Check that your email user name and password are correct.
2.
Located at the back of your NVR, you should see one or two flashing LEDs
(above the Ethernet port). If you don’t see this, disconnect then reconnect the
Ethernet cable or try a different port on your router.
3.
Search “less secure apps” at support.swann.com.
Why do I need to create an email for
my NVR?
So your NVR can send you
email alerts and to send you a pass-
word reset request if you have for-
gotten your password.
The following email provid-
ers are supported - Gmail
gmail.com and Outlook out-
look.com. On your computer
or mobile device, go to the
relevant website to create an
account. When finished, in-
put those details here.
·
Don’t forget to click “Save”
to apply settings.
·
Click the “Default” button to
revert back to default settings.
·
Click the “Close” button to
exit the Main Menu.


