15
3-4-2 Fuel check
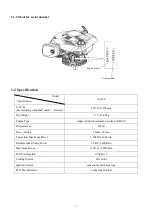
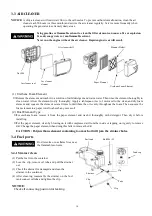
1) Remove the fuel tank cap and check fuel level.
2) If the level is too low, refuel the tank. Remember
adding fuel, but, not over the fuel upper level.
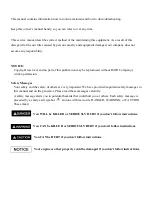
WARNING
:
1) Gasoline is extremely flammable and is explosive under certain conditions.
2) Refueling in a well-ventilation area with the engine stopped. Do not smoke and allow flames or sparks
in the area where gasoline is stored or where the fuel tank is refueled.
3) Do not overfill the fuel tank (The fuel will not exceed 3/4 of the fuel tank). After refueling, make sure
the fuel tank cap is set back securely.
4) Be careful not to spill fuel when refueling. Spilled fuel or fuel vapor may ignite. If any fuel is spilled,
make sure the area is dry before starting the engine.
5) Avoid repeated or prolonged contact with skin or breathing of fuel vapor.
6) Keep out of reach of children.
EA 190 fuel tank capacity
:
1.0L
Only use unleaded gasoline and recommend gasoline grade
#
90 over.
Unleaded gasoline can reduce gasoline engine carbon deposit and prolong the exhaust system service
life.
Never use contaminated gasoline or mixed gasoline with oil. Don
’
t allow the dust, foreign matter or
water entering into fuel tank.
CAUTION:
Fuel may damage the oil paint and plastic. Be careful not to spill fuel when refueling. Any damage due
to
fuel
spilling is not within valid warranty.
"Light knocking" or "spark exploding" sound can be hear when the engine overloading. It is normal. Do
not be worry about that.
If " knocking" or "spark exploding" sound occur at a steady speed under normal load, change grade of
gasoline; if such phenomena still happen, consult your dealer for help, otherwise the engine may be
damaged.
CAUTION:
When the engine is running, continuously "Knocking" or "spark exploding" sound occurring will
damage engine.
"Knocking" or "spark exploding" sound from misusing will not be within the valid warranty.
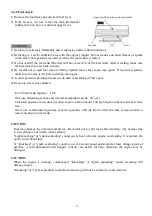
Fuel tank
Fuel
U
(
)
pper limit 3/4position of the fuel tank
Summary of Contents for EA190V
Page 1: ...EA190V SERVICE MANUAL...
Page 2: ......
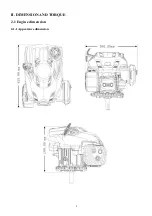
Page 8: ...8 II DIMENSION AND TORQUE 2 1 Engine dimension 2 1 1 Appearance dimension...
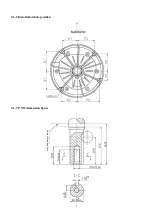
Page 9: ...9 2 1 2 Installation hole position 2 1 3 P T O dimension figure Engine Mounting Face...
Page 49: ...49 4 4 Electric diagram Engine switch Engine switch Spark plug Ignition coil Black OFF ON...
Page 50: ......
Page 51: ......


