63
16
���� ������
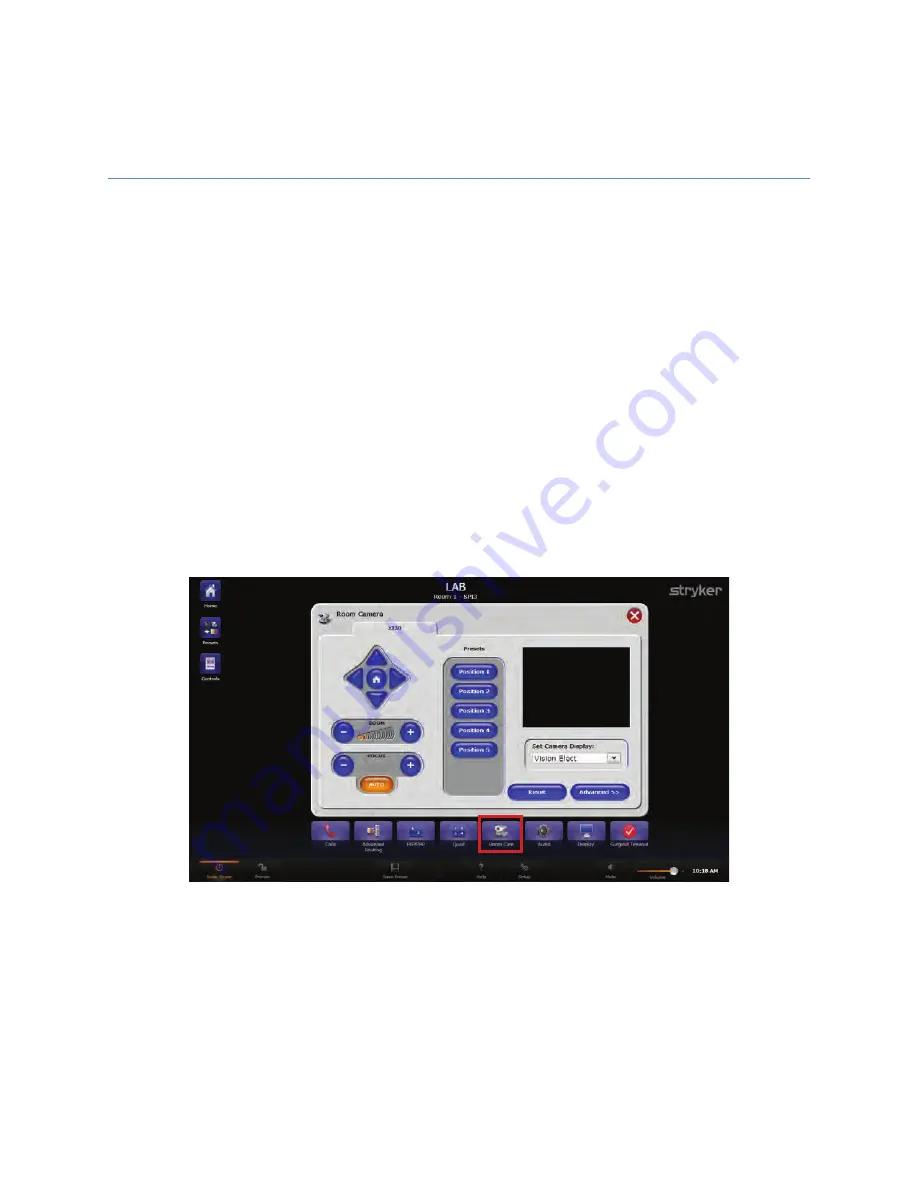
The Room Camera screen directs the operation of the wall-mounted pan/tilt/zoom
cameras in the OR. This screen allows the user to adjust the pan/tilt/zoom functions as
well as focus the camera to frame the action. Each camera can be panned left or right,
tilted up and down, and zoomed in and out. The Focus can be controlled automatically by
selecting the A
Au
utto
o F
Fo
occu
uss button, but can be adjusted manually for unusual lighting
conditions or camera angles.
To go to the Room Camera screen, press the R
Ro
oo
om
m C
Ca
am
m button in the Quick Button
Bar.
To access the pan/tilt/zoom camera controls:
1.
Select one of the available room cameras from the sub tabs at the top of the screen.
2.
Direct the camera by pressing and holding the button that corresponds to the desired
direction you want the camera to pan or tilt. For example, press and hold the left
arrow button to move the camera head from right to left. The Zoom and Focus
controls operate in the same manner.
F
Fiig
gu
urre
e 4
42
2..
R
Ro
oo
om
m C
Ca
am
me
erra
a S
Sccrre
ee
en
n
Once the camera angles and zoom preferences have been established, it can be saved
as a preset by pressing and holding down one of the five preset buttons until the
message, “Position has been saved” appears just below the preset buttons.
To recall a saved camera position, press the numbered button (i.e., Position 1) that
corresponds to the camera preset. The camera will return to that position.
Summary of Contents for SwitchPoint Infinity 3
Page 2: ......
Page 8: ......
Page 63: ...61 F Fiig gu ur re e 4 40 0 O Ou ut tp pu ut t L Le ev ve ells s S Sc cr re ee en n...
Page 72: ...70 F Fiig gu ur re e 4 48 8 F Fiin na all C Ca alliib br ra at tiio on n S Sc cr re ee en n...
Page 79: ...77 F Fiig gu ur re e 5 52 2 E Ex xa am mp plle e R Ro ou ut te es s...
Page 105: ...103 29 R Re ec cy yc clliin ng g G Gu uiid de e...
Page 123: ......


