


2-4
PCS-1500/1500P
2-5. Replacing the Main Parts
n
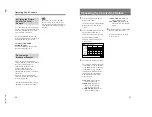
To protect the inside of the unit from damage, be sure to
turn off the main power, remove the AC adapter jack, and
perform the following procedure.
2-5-1. Speaker
Replacement Part
Part name :
speaker
Part number : 1-505-156-11
Replacement Procedure
1.
Remove the upper cabinet. (Refer to Section “2-4.
Removing the Cabinets”.)
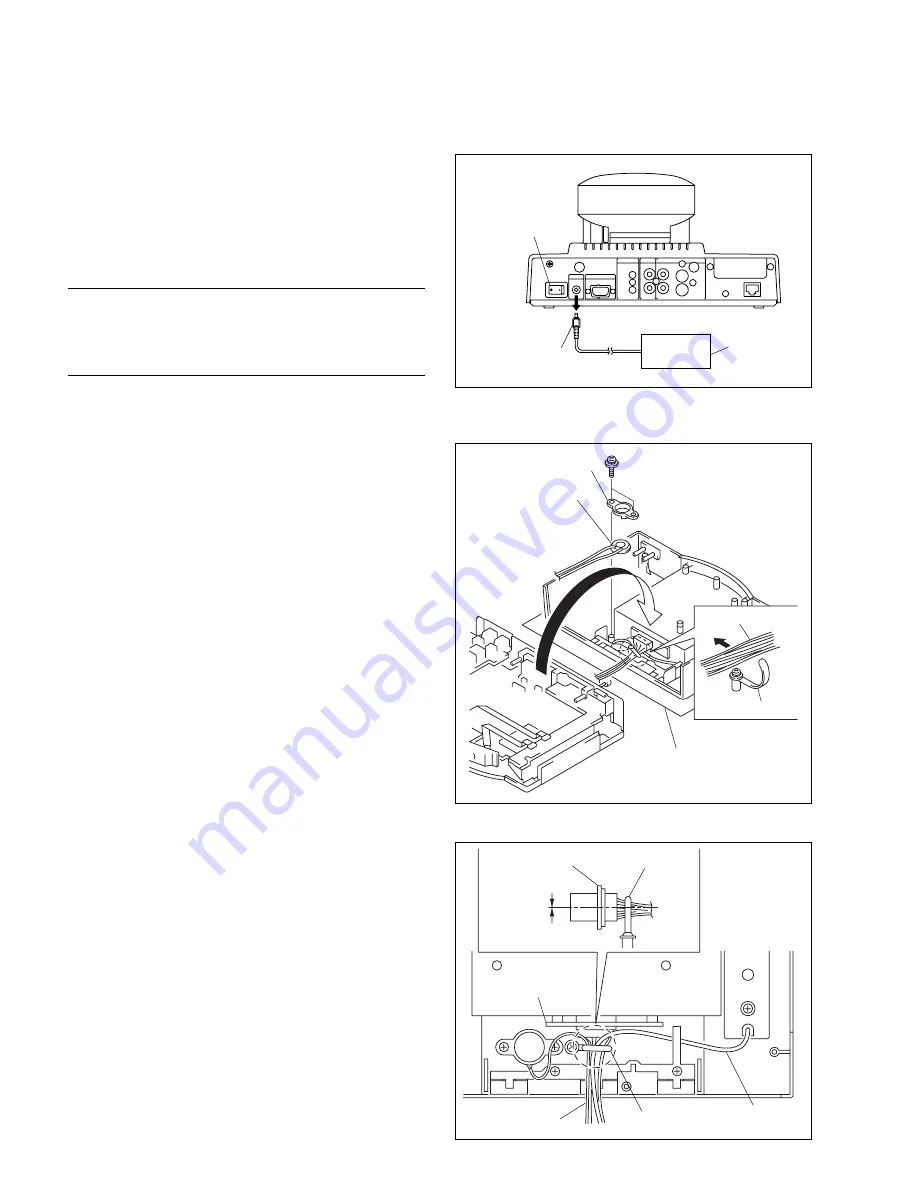
2.
Open the upper cabinet in the direction of the arrow
and remove the harness from the harness retainer.
n
Place a sheet under the cabinet to protect it.
3.
Remove the two screws, and remove the speaker
holder and the speaker.
4.
Attach the new speaker by reversing the disassembling
procedure of steps 1 to 3.
n
Standard tightening torque : 80
x
10
_
2
N
.
m {8 kgf
.
cm}
2-5. Replacing the Main Parts
Precaution for installation of the speaker
Be careful of the followings when fixing the harness using
the harness retainer as shown.
1.
Be cause the built-in microphone is a high sensitivity
microphone, the microphone can pick up vibrations of
the PCS-1500/1500P via microphone harness.
Be sure to give a small amount of play to the micro-
phone harness when fixing the harness with the
harness retainer.
2.
The camera connection connector as shown is fixed
with some play in order that the connector can be
easily connected to the camera block.
Adjust the harness retainer after the harness is fixed
with the harness retainer, so that the camera connect-
ing connector becomes level.
Main power switch
Jack
AC adapter
PSW3
x
6
Speaker holder
Speaker
Harness
Harness retainer
Sheet
Camera connection
connector
Camera connection
connector
Harness retainer
Harness retainer
Level
Harness
Microphone
harness
Summary of Contents for PCS-1500
Page 8: ......
Page 75: ...1 67 PCS 1500 1500P Sony Corporation Printed in Japan ...
Page 76: ......
Page 130: ......
Page 198: ......