Chapter 4
Menu Settings
4-29
Chapter 4 Menu Settings
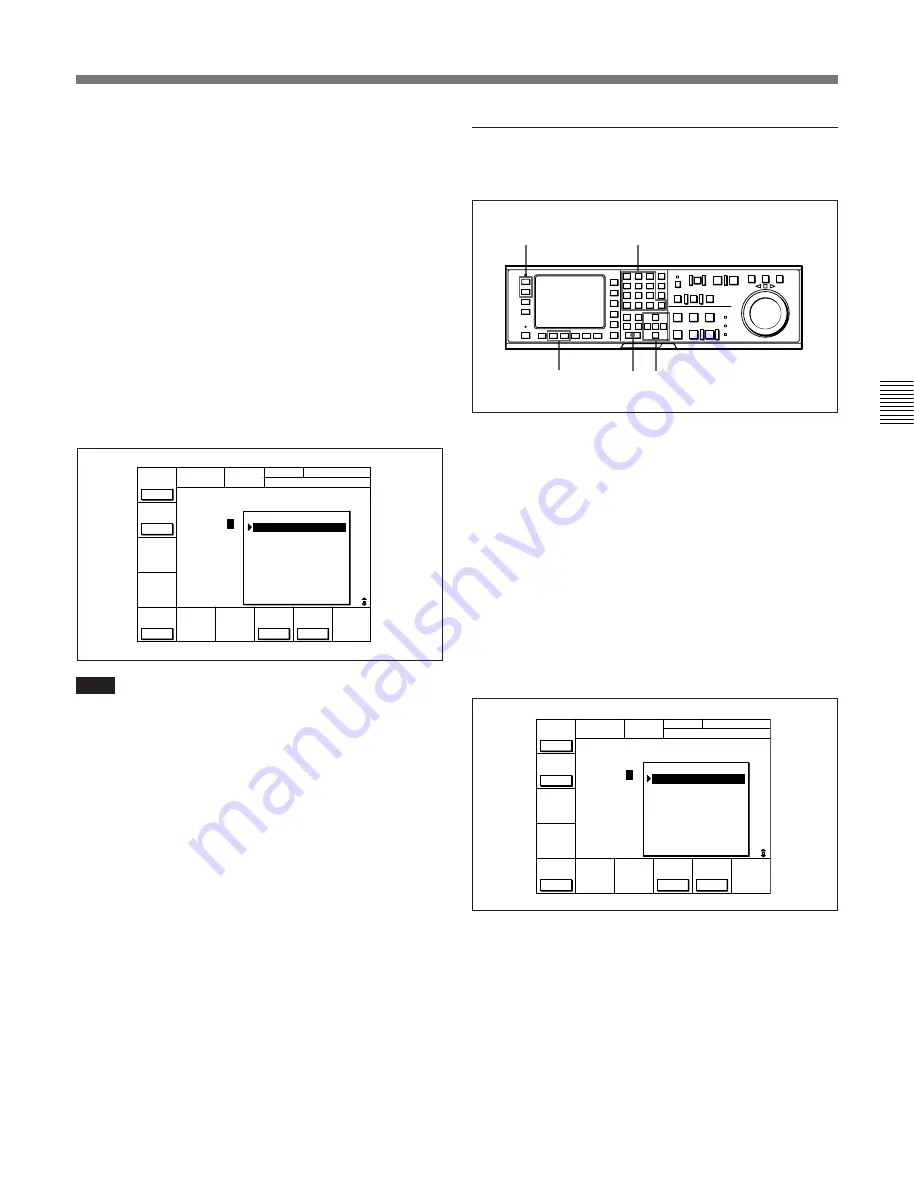
Registering cue points by the numeric
buttons
Registering cue points by the numeric buttons
1
Press the ALT button, then the
[F8]
(PAGE
MODE) button or the
[F9]
(EXTEND MODE)
button.
2
If you selected PAGE mode, press the ALT button,
then the
[F1]
(PREV PAGE) button or
[F2]
(NEXT
PAGE) button (or use the numeric buttons to enter
the page number in the data entry window, then
press the
[F8]
(PAGE SET) button).
3
Press the
G
or
g
button to move the cursor (
z
) to
the cue number to be registered.
To select the cue number directly by the
numeric buttons
Enter the cue number in the data entry window
with the numeric buttons, then press the
[F9]
(CUENUM SET) button.
To select the cue number directly by
numeric buttons
Enter the cue number in the data entry window
with the numeric buttons, then press the
[F9]
(CUENUM SET) button.
4
Press the JOG or VAR button, then rotate the
search dial to find the position where you want to
register the cue point.
5
Press the ENTRY button at the selected position.
The current tape address of the position where the
button is pressed is registered as a cue point.
Press the ENTRY button repeatedly to register the
cue point repeatedly. The cue number will
automatically increment by one each time.
Note
In PAGE mode, each time you press the ENTRY
button to register a cue point more than once, the cue
number automatically increments on the page. For
example, after registering cue point No. 19 on page 1,
the next cue point is registered to cue point No.10. In
EXTEND mode, if you press the ENTRY button after
registering, for example, cue point No.99, the next cue
point is registered to cue point No.99 again.
1
3
2
4
5
C U E
T C R 0 1 : 0 0 : 3 0 : 0 0
[ I Å M C U E T I T L E ]
P Å G E : 0
1
1 0 0 0 : 0 0 : 0 0 : 0 0
1 1 0 0 : 0 0 : 0 0 : 0 0
1 2 0 0 : 0 0 : 0 0 : 0 0
1 3 0 0 : 0 0 : 0 0 : 0 0
1 4 0 0 : 0 0 : 0 0 : 0 0
1 5 0 0 : 0 0 : 0 0 : 0 0
1 6 0 0 : 0 0 : 0 0 : 0 0
1 7 0 0 : 0 0 : 0 0 : 0 0
1 8 0 0 : 0 0 : 0 0 : 0 0
1 9 0 0 : 0 0 : 0 0 : 0 0
2
3
4
5
6
7
8
9
N E X T
P Å G E
P R E V
P Å G E
C U E
P - R O L L
P Å G E
S E T
C U E N U M
S E T
C U E
T C R 0 0 : 0 0 : 0 0 : 0 0
[ I Å M C U E T I T L E ]
P Å G E : 0
1
1 0 0 0 : 0 0 : 0 0 : 0 0
1 1 0 0 : 0 0 : 0 0 : 0 0
1 2 0 0 : 0 0 : 0 0 : 0 0
1 3 0 0 : 0 0 : 0 0 : 0 0
1 4 0 0 : 0 0 : 0 0 : 0 0
1 5 0 0 : 0 0 : 0 0 : 0 0
1 6 0 0 : 0 0 : 0 0 : 0 0
1 7 0 0 : 0 0 : 0 0 : 0 0
1 8 0 0 : 0 0 : 0 0 : 0 0
1 9 0 0 : 0 0 : 0 0 : 0 0
2
3
4
5
6
7
8
9
N E X T
P Å G E
P R E V
P Å G E
C U E
P - R O L L
P Å G E
S E T
C U E N U M
S E T
Summary of Contents for DVW-500/1
Page 18: ...1 1 Features Chapter 1 Overview 1 6 Chapter 1 Overview ...
Page 86: ...4 7 SET UP Menu 4 44 Chapter 4 Menu Settings Chapter 4 Menu Settings ...
Page 100: ...5 14 Chapter 5 Recording Playback 5 4 Playback Chapter 5 Recording Playback ...
Page 120: ...6 2 Advanced Automatic Editing 6 20 Chapter 6 Editing Chapter 6 Editing ...


