Chapter 4
Menu Settings
4-3
Chapter 4
Menu Settings
4-1-3 Registering Items to the
PF1/2 Menus
You can register up to 40 items to the PF (Personal
Function) 1/2 menus, including items that are
displayed when the ALT button is pressed. The
registration of items from different menus to the PF1/2
menus eliminates the need for changing menus in
order to change a given VTR operating condition.
For details on the factory-set PF1/2 menus, refer to “4-5
PF1 Menu (Factory Settings)” on page 4-33 and “4-6 PF2
Menu (Factory Settings)”on page 4-36.
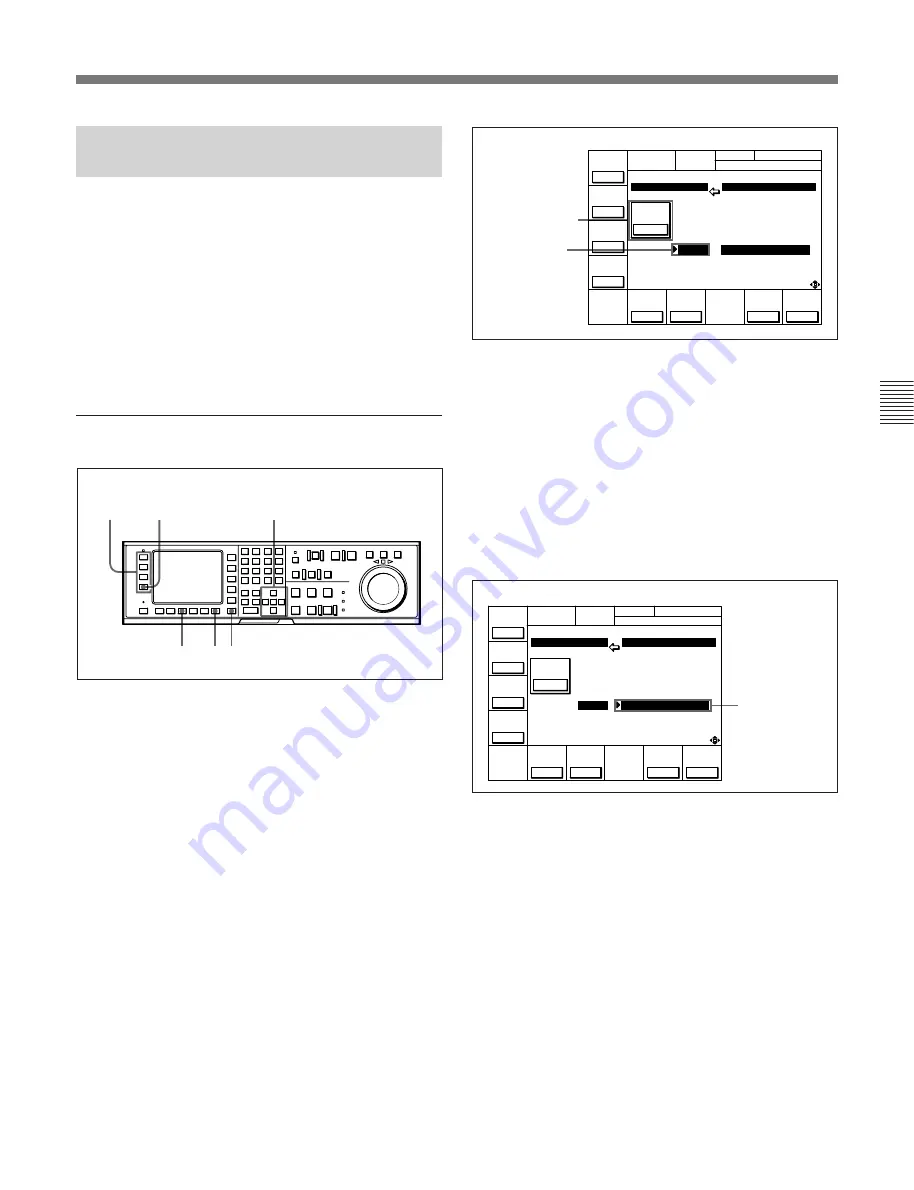
Registering items to the PF1/2 menus
Registering items to the PF1/2 menus
1
Press the SET UP button.
The SET UP menu appears in the display.
2
Press the
[F4]
(PF1&2 ASSIGN) button.
The PF1&2 ASSIGN menu appears in the display.
3
Press the
[F1]
(PF1),
[F2]
(ALT+PF1),
[F3]
(PF2)
or
[F4]
(ALT+PF2) button to select the PF menu
where you wish to register an item.
The selected PF menu appears and the items
currently registered to the menu appear at the left
of the display.
4
Press the
G
or
g
button to move the cursor (
z
) to
the function button where the item is to be
registered.
The selected function button is highlighted and the
currently registered item appears.
To cancel a currently registered item
Press the
[F6]
(SET BLANK) button.
5
Press the
F
button to move the cursor (
z
) to the
PF1&2 ASSIGN menu, then press the
G
or
g
button to move the cursor to the menu item to be
registered to the function button.
To scroll the menu faster
Press the
G
or
g
button while holding down the
SFT button.
6
Press the
[F7]
(PASTE) button to register the item.
The new item is registered to the function button.
7
Repeat Steps
3
to
6
to register more items.
To cancel the registration of all new items
Press the
[F9]
(CANCEL) button.
8
Press the
[F10]
(SAVE/EXIT) button to save the
newly registered items.
The registration is completed and the SET UP
menu appears in the display again.
Item currently
registered to the
button
6 81
2
3
4,5
Å L T + P F 1
S E T U P M E N U
F 6 K E Y
S E T U P I T E M - 6 1 0
1 : 7 1 0
6 0 5 : T C G R E G E N
2 : 1 1 0
6 0 6 : T C O U T S I G .
3 : 2 0 1
6 0 7 : B I N Å R Y G P
4 : 2 0 3
6 0 8 : P H Å S E C O R R .
5 :
6 0 9 : T C G C F F L Å G
6 : 6 1 0
6 1 0 : R E G E N M O D E
7 :
6 1 1 : T C R G N S R C
8 : 7 0 3
7 0 1 : E E D E L Å Y
9 : 7 0 4
7 0 3 : B L Å N K L I N E
1 0 :
7 0 4 : D E C M O D E
Å L T +
P F 1
Å L T +
P F 2
P F 1
P F 2
P Å S T E
C A N C E L
R E G E N
M O D E
a s & i n
S E T
B L Å N K
S Å V E /
E X I T
Selected function
button
Å L T + P F 1
S E T U P M E N U
F 6 K E Y
S E T U P I T E M - 6 1 0
1 : 7 1 0
6 0 5 : T C G R E G E N
2 : 1 1 0
6 0 6 : T C O U T S I G .
3 : 2 0 1
6 0 7 : B I N Å R Y G P
4 : 2 0 3
6 0 8 : P H Å S E C O R R .
5 :
6 0 9 : T C G C F F L Å G
6 : 6 1 0
6 1 0 : R E G E N M O D E
7 :
6 1 1 : T C R G N S R C
8 : 7 0 3
7 0 1 : E E D E L Å Y
9 : 7 0 4
7 0 3 : B L Å N K L I N E
1 0 :
7 0 4 : D E C M O D E
Å L T +
P F 1
P F 1
Å L T +
P F 2
P F 2
P Å S T E
C A N C E L
R E G E N
M O D E
a s & i n
S E T
B L Å N K
S Å V E /
E X I T
Item to be
registered to the
function button
Summary of Contents for DVW-500/1
Page 18: ...1 1 Features Chapter 1 Overview 1 6 Chapter 1 Overview ...
Page 86: ...4 7 SET UP Menu 4 44 Chapter 4 Menu Settings Chapter 4 Menu Settings ...
Page 100: ...5 14 Chapter 5 Recording Playback 5 4 Playback Chapter 5 Recording Playback ...
Page 120: ...6 2 Advanced Automatic Editing 6 20 Chapter 6 Editing Chapter 6 Editing ...


