SECTION 3 - INSTALLATION
Page S3-52
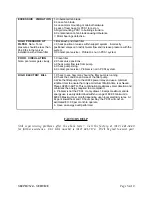
CONTROLLER NOTES
1. Compool has a Limited Warranty on the LX220 and the product must be
returned directly to them for service or repair during this warranty period. See
warranty on back of CompoolÕs instructions.
2. The power reset button protects the solar valve and control circuitry from
electrical overload situations. It is an internal circuit breaker. Check for short circuit
conditions if breaker consistently trips. Push to reset.
3. Always keep the cover to the LX220 closed to protect the electronic circuitry
from moisture and weather exposure.
4. To install the
water sensor
, drill a 5/16Ó hole in the selected location and
insert the sensor into the hole with ÒOÓ ring attached and facing pipe. Feed the
sensor wires through hole in the clamp and gently tighten clamp around pipe.
Caution
: Over tightening of clamp can cause deformation of ÒOÓ ring seal. Run 22
gauge 2 conductor cable from the sensor to the low voltage compartment of the
LX220. Strip back insulation 1/4Ó and connect to
WTR
screw terminals on printed
circuit board. Use the UY crimp connectors supplied by Compool to provide
waterproof connections between the sensor and the two conductor cable.
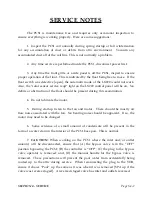
5. If the Òwater or solar sensor service reqdÓ lights are onÑthis could mean a
defective sensor or loose wire(s) is/are present. An electrical ohmmeter should read
resistance across the sensorÕs two leads. Typically 10K ohms at 68-70
°
F. As
temperature increases, the resistance decreases. A very hot attic may cause the
sensor to only read 6K ohms [6000 ohms across the sensorÕs two leads].
6. If the Òsolar sensor service reqdÓ light is onÑthis could also mean that the
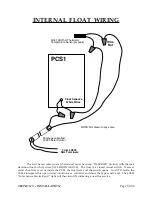
float inside the PCS1 has detected a condition of excess water in the base pan.
Summary of Contents for PCS1
Page 7: ...SECTION 1 SYSTEM ARRIVAL Page S1 1 SECTION ONE SYSTEM ARRIVAL...
Page 22: ...SECTION 2 HEATING DATA Page S2 1 SECTION TWO HEATING DATA...
Page 28: ...BTUS Vs GPM BTUS Vs T SECTION 2 HEATING DATA Page S2 7...
Page 34: ...SECTION 3 INSTALLATION Page S3 1 SECTION THREE INSTALLATION...
Page 65: ...Attic Installation Photos SECTION 3 INSTALLATION Page S3 31...
Page 66: ...Attic Installation Photos SECTION 3 INSTALLATION Page S3 32...
Page 88: ...SECTION 4 SERVICE Page S4 1 SECTION FOUR SERVICE...
Page 99: ...Common Questions Page 1 of 10 COMMON QUESTIONS...
Page 109: ...Dictionary of Terms Page 1 of 4 DICTIONARY OF TERMS...

