Instruction for work
16
–
Turn the rotors (3) outwards – make sure that the
pin (4) locks. See the pictures.
–
Raise the tedder’s rotors by turning on the
hydraulic circuit, so that the rotors’ fixing pins are
released (2)
–
Pull the rope, so the fixing pins (2) are ejected.
–
Release the tedder’s rotors by turning on the
hydraulic circuit until the raising cylinders (5) are
completely extended.
–
Pull out the pin (1) of the movable attachment and
put it into position “B”.
–
Use the three-point rail system to gently lower the
tedder onto the ground.
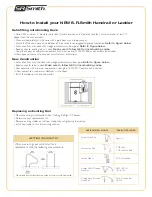
2.8 Disconneting the rotary tedder from the tractor
–
Pay attention to put the swather on a
flat and solid ground.
–
Nobody is allowed to stay between the
tractor and the machine when lifting or
lowering the machine with 3 point
hydraulic hitch.
–
Pay attention to the following safety
instructions.
–
Choose a flat, dry and suitably firm lowering
surface.
–
Lower the jack stand (1) and secure it with a pin (2).
–
Lower the tedder to the ground and make sure that
it is placed in a stable position.
–
Disconnect the PTO shaft (3) and put it on the arm
(4). The safety chain on the PTO shaft is not
intended for hanging it.
–
Disconnect the hydraulic hose(5) and secure the
quick clamp.
–
Pull the rope (6) from the tractor and secure it on
the connection.
–
Disconnect the tedder from the tractor.
3. Preparing the rotary tedder for turning over and
tossing
–
Perform the repair work, maintenance,
cleaning and stopping works only with
the switched off drive and stand still
engine! Remove the ignition key.
–
Maximum P.T.O. shaft rotation is 540
rpm.
–
Optimal P.T.O. shaft rotation is between
480 and 500 rpm.
–
It is forbidden to stay in the working
area of the machine. Danger of rotating
tines.
–
Danger warning of substance eject
behind the machine.
–
It is forbidden to climb on the machine.
–
Protections must be in protective
position while working.
–
When resetting the rotor from working
into the transport position and vice
versa, there is the danger of the rotor
hitting somebody or stabbing them
with the spring tines.
3.1 Basic stting in work position
–
Special care is advised when raising
the tedder on steep inclines. Because
of its weight, the tedder does not fold
into the middle position “B”, but can
suddenly swing into the lower position
“C”. If this happens, there is a great
9
5
6
4
3
2
1
Summary of Contents for SPIDER 400/4 ALP
Page 24: ...Navodila za uporabo 20 17...
Page 36: ...Uputstvo za rukovanje 6 1 1 Polo aj piktograma sa opasnostima i odgovaraju im merama na ma ini...
Page 50: ...Uputstvo za rukovanje 20 17...
Page 54: ...SPIDER 400 4 ALP Kreiselheuer Ab masch Nr SPIDER 400 4 ALP 221 159883708 D Betriebsanleitung...
Page 63: ...SPIDER 7 1 1 Lage der Hinweisschilder mit sicherheitstechnischen Inhalt an der Maschine...
Page 77: ...SPIDER 21 17...
Page 90: ...SPIDER 7 1 1 Position of safety decals with warning text on the machine...
Page 104: ...SPIDER 21 17...
Page 117: ...SPIDER 7 1 1 Posizione sulla macchina degli adesivi sicurezza con dei messaggi di avvertimento...
Page 131: ...SPIDER 21 17...
Page 135: ...SPIDER 400 4 ALP Faneuse rotative N de machine SPIDER 400 4 ALP 221 159883708 F Mode d emploi...
Page 144: ...SPIDER 7 1 1 Position des autocollants de s curit avec texte d avertissement sur la machine...
Page 158: ...SPIDER 21 17...