11
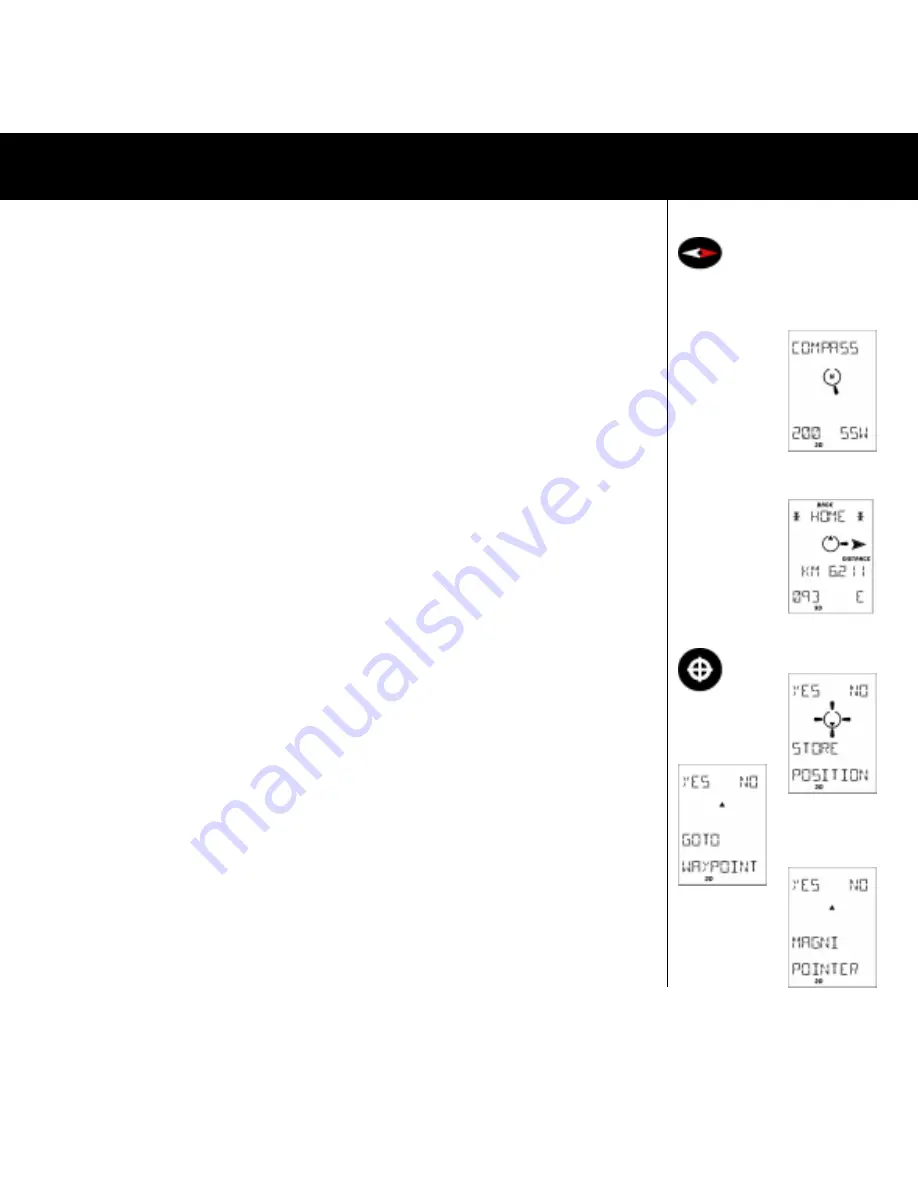
Fig.008
Fig.025
Fig.026
Fig.004
Fig.026
Fig.027
Fig.028
4.4.6 Intellicompass
TM
COMPASS FUNCTION
The electronic compass function is found by pressing the dedicated COMPASS button. (FIG. 008) The electronic
compass is detecting the Earth’s magnetic field and shows you the correct compass course when standing or
moving slowly. This makes the Intellicompass
TM
the perfect navigation function when using the Multi-Navigator
TM
on foot. (An ”ordinary” GPS does not have this function and is in this sense, useless for pointing out the desired
direction of travel.)
There are three ways that the Intellicompass
TM
function can look, depending on whether you have selected a
waypoint or * HOME * to go to:
1. When no waypoint is selected the compass function works as a normal magnetic compass i.e. the graphic north
indicator points to north (as a compass needles north end does) and on the bottom line you will see the direction
the Multi-Navigator
TM
is pointing in and the cardinal/intercardinal points such as SSW (SouthSouthWest) (FIG.025)
2. When a **HOME** waypoint is stored/selected you will see the distance and the steering indicators guide you
in the correct direction towards your * HOME * waypoint. You will still be able to use it as a normal compass,since
the direction and cardinal/intercardinal points are shown on the bottom line. (FIG. 026)
3. When a waypoint is selected to go to you will see the distance and the steering indicators guide you direction
towards the waypoint you have selected. You will still be able to use it as a normal compass since the direction
and cardinal/intercardinal points are shown on the bottom line. Where you have stored a **HOME** waypoint
and have selected a waypoint to go to you will be able to toggle between the two waypoints by pressing
RIGHT/
LEFT
repeatedly to see navigational data ”out” to your GOTO waypoint and ”BACK” data to your **HOME**
waypoint.
Note!
The magnetic compass has an accuracy of approx. +/- 3 degrees, provided it is autodeviated and held
horizontally. We recommend you autodeviate the compass frequently, at least every time you change batteries.
See chapter 4.5.7.3 4.4.7 WAYPOINT FUNCTION / ROUTES The WPT-button (FIG. 004) opens the waypoint function.
Everything that is related to waypoints such as storing your position as a waypoint, enter a new waypoint, view a
waypoint etc is found in this function. When you want to leave the waypoint function, press NO. The first thing you
find when pressing
WPT
is...
4.4.7.1 STORE POSITION (FIG. 026)
Here is where you store your present position as a waypoint and also give it a name for future reference.
4.4.7..2 GOTO WAYPOINT (FIG. 027)
Here is where you select a previously stored waypoint as your destination. Press
YES
and the Multi-Navigator
TM
will
suggest the first waypoint (alphabetically) as your destination. Press
UP
or
DOWN
to ”scroll” through the stored
waypoints. As you do this you will see the name, bearing and distance to the waypoint. Thanks to the compass you
will also instantly be able to point out the direction to the waypoint shown in the display. Turn the Multi-Navigator
TM
in the direction the steering arrows in the display and you will be facing in the direction of the waypoint! A Valuable
function for quick orientation when in the field! When the correct one is found press
YES
and the navigation will
start.
4.4.7.3 MAGNIPOINTER (FIG. 028)
The Magnipointer
TM
enables you to create waypoints by pointing your Multi-Navigator
TM
in the required direction of
travel and entering the distance to the target. This is especially valuable when you would like to enter waypoints
found on maps without reference systems (tourist maps, yellow pages etc).
Proceed like this:
1. Press
YES
when in the Magnipointer
TM
function and the current compass direction is shown.
2. Point and turn the Multi-Navigator
TM
so that the required bearing appears in the display and at that time press
SET.
3. The bearing on which you will create the waypoint is now locked and you are prompted to enter the distance.
THE COMPASS FUNCTIONS


