


9
❑
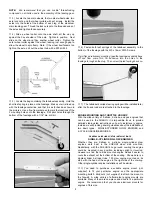
6) Fasten both leaf springs of the tailwheel assembly to the
bottom of the fuselage with the M3 x 14mm PWA Screws.
Tip: After a preliminary mounting, take the tailwheel assembly back
off and flow some thin CA adhesive into the holes in the
fuselage to toughen them up. Then screw the leaf springs back on.
❑
7) The tailwheel’s coiled steering springs will be installed later,
after the fin and rudder are attached to the fuselage.
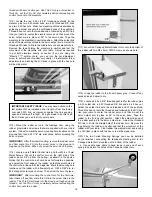
ENGINE MOUNTING AND THROTTLE HOOKUP
With the wide variety of 2-stroke, 4-stroke, and gas engines that
can be used in the SUKHOI, it is impossible for us to provide
detailed step-by-step instructions on how to install every engine.
Instead, we will provide general guidelines about the installation of
two basic types:
SINGLE-CYLINDER GLOW ENGINES and
2-CYCLE GASOLINE ENGINES.
GENERAL GUIDELINES ON THE INSTALLATION OF
SINGLE-CYLINDER GLOW ENGINES
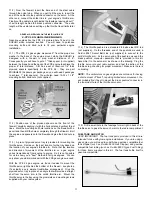
Whether they are 2-stroke or 4-stroke, single-cylinder glow
engines work best in the SUKHOI when side mounted.
Realistically, with the SUKHOI's huge round cowling the engine
could be mounted in any position, including upright or inverted.
However we find that a side mounted engine makes it easier to
route the exhaust out the bottom of the cowling. Shown here is a
single-cylinder 2-stroke Irvine 1.50 glow engine mounted on its
side, with the head of the engine in the right side of the cowling.
Other single-cylinder engine installations will be similar.
❑
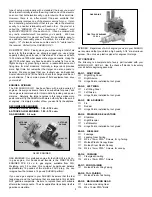
1) You need to purchase a suitable engine mount (not
supplied) to fit your particular engine and the appropriate
mounting bolts & blind nuts (not supplied) to attach the mount to
the firewall. A wide variety of after-market engine mounts are
available. Many of them are one-piece and sized to fit a particular
engine. We recommend that you choose aluminum mounts for
engines of this size.
NOTE:
We recommend that you use Loctite
®
threadlocking
compound on all bolts used in the assembly of the landing gear.
❑
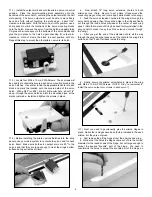
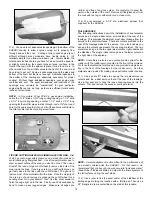
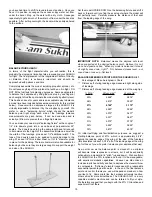
3) Locate the two main wheels, the two steel wheel axles, two
axle lock nuts, and four wheel collars with set screws. Install the
axles into the holes at the bottom of each leg of the aluminum
main landing gear. Thread the lock nuts onto the threaded ends of
the axles and tighten these securely.
❑
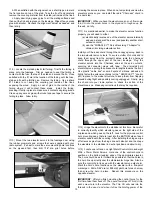
4) Slide a wheel collar onto the axle shaft, all the way up
against the hex shoulder of the axle. Tighten in position. Next
slide on the wheel and then another wheel collar. Tighten the
outer wheel collar against the wheel, leaving just enough gap to
allow the wheel to spin freely. Note: If the wheel itself seems too
tight on the axle, drill out the wheel hub with a #20 drill bit.
❑
5) Locate the bag containing the tailwheel assembly. Hold the
short leaf spring in place on the fuselage. Make sure it is lined up
with the fuselage centerline, and that it is as far back as shown in
the pictures. Use a fine-tip marker pen to mark the locations of the
3 mounting holes onto the fuselage. Drill pilot holes through the
bottom of the fuselage with a 1/16" dia. drill bit.
Summary of Contents for SUKHOI SU-31 ARF
Page 23: ...23 ...