


5
❑
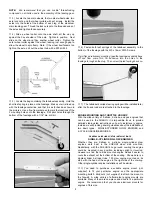
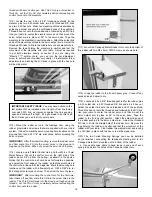
4) Install the output arm back onto the aileron servo, in neutral
position.
Place the servo/mounting block assembly onto the
backside of the servo hatch, centering the output arm with the half
slot opening. The servo output arm must be able to move freely
back and forth without touching the slot's edge - about 1/32"
clearance is adequate. With the servo now in this position, use a
sharp pencil to mark the locations of the servo mounting blocks
onto the hatch. Remove the servo from the hatch and apply thick
CA glue or 5-minute epoxy to the bottoms of the servo blocks and
glue them in place to the hatch, again checking for output arm
clearance. Hold or clamp the block in exact position until dry.
Repeat this step to mount the other aileron servo to its hatch.
❑
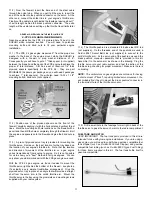
5) Locate four M2.6 x 10mm PWA Screws. These screws will
be used to mechanically secure each servo mounting block to the
servo hatches. Use a ruler to find the approximate center of each
block and mark the location onto the covered side of the servo
hatch. With a 3/64" (or #56) dia. bit, drill a pilot hole - about 1/4"
deep - through the servo hatch and into the mounting block, at the
marks just made. Install and tighten the screws in place.
❑
6) Before installing the aileron servos/hatches into the wing
panels, use your radio system to center both servos and to check
servo travel. Make sure both servo output arms are 90
O
to the
servos and that they are long enough to clear the wing's bottom
surface during extremes of travel.
a.
Now attach 12" long servo extension chords to both
aileron servos. (Note: Be sure to put a piece of tape around the
connecting plugs so they can’t come apart while hidden in the wing.)
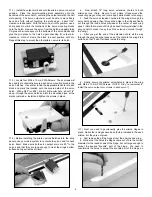
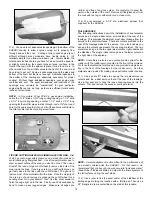
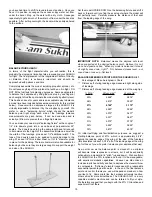
b. Feed the servo extension chords into the wings through the
servo hatch opening, then through the holes in the ribs and finally
out through the round holes provided at the center of each wing
panel. (Note that a piece of string has been factory-installed in the
wing panels to make it easy to pull the extension chords through
the wing.)
c. After you get the end of the extension chord all the way
through the wing, tape the loose end of the chord to the wing's top
surface, so that it won't fall back inside the wing.
d. Finally, secure the aileron servo/hatch in place in the wing
with M2.6 x 10mm PWA Screws. (NOTE: Did you remember to
install the servo output arm screws in each servo?)
❑
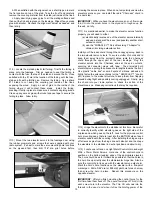
7) Next you need to permanently glue the aileron hinges in
place. Notice that 4 hinges have been factory-installed in the each
aileron, but they are not glued.
a. First remove the all the hinges from the ailerons and wing.
b. Notice that the holes the hinges came out of are the correct
diameter for the round shank of the hinge, but not large enough to
accept the square "knuckle" part of the hinge.
You need to
countersink the holes to accept the knuckle part of the hinge, so
Summary of Contents for SUKHOI SU-31 ARF
Page 23: ...23 ...