2-8
COPIER
Contents
ORIGINALS
STANDARD ORIGINAL PLACEMENT ORIENTATIONS
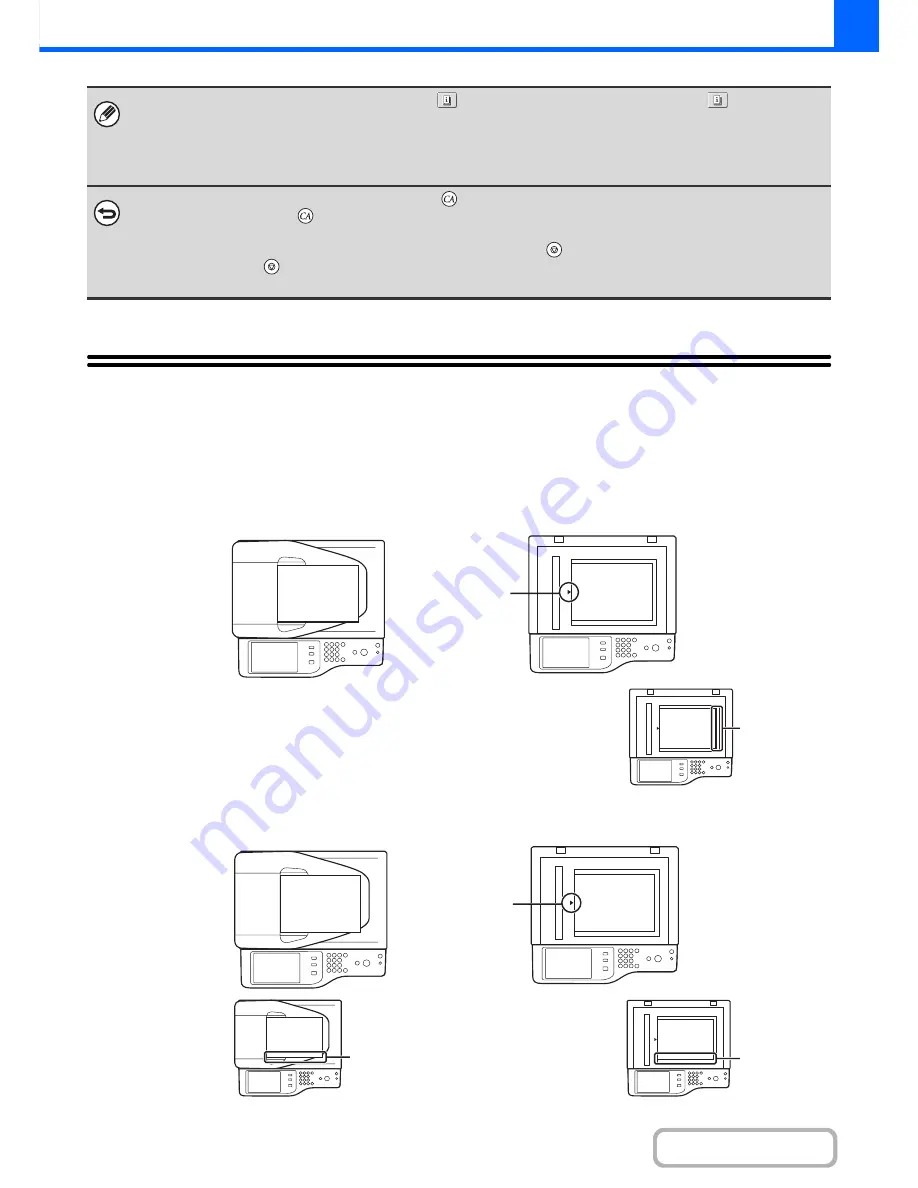
Place the original so that the top and bottom edges are oriented as shown below. For more information on placing the
original, see "
ORIGINALS
"
(page
1-34
)
in "1. BEFORE USING THE MACHINE".
• When one or more special modes are selected, the
key appears in the base screen. Touch the
key to display a
list of the selected special modes. This lets you check what special modes are selected and the settings of each mode.
☞
Checking what special modes are selected
(page 2-5)
• To store a copy job using the document filing function, select copy settings and then touch the [File] key or the [Quick File]
key.
To cancel all settings, press the [CLEAR ALL] key (
).
When the [CLEAR ALL] key (
) is pressed, all settings selected to that point are cleared and you will return to the base
screen.
To stop scanning of the original and copying, press the [STOP] key (
).
When the [STOP] key (
) is pressed, a message will appear asking you if you want to cancel the job. Touch the [Yes] key
in the message screen.
A
A
Document glass
Document feeder tray
Place the original
face down in the
left center position
of the document
glass
Portrait original
A
When using the below functions in copy
mode, place the original so that the top
of the image is to the right.
• Staple sort
• Pamphlet copy
• 2in1
• Stamp
Top of image to
the right
A
A
Document glass
Document feeder tray
Place the original
face down in the
left center position
of the document
glass
Landscape original
A
When using the staple sort function,
place the original so that the top of the
image is toward you.
Top of image
toward you
A
Top of image
toward you
Summary of Contents for MX-B401
Page 4: ...Reduce copy mistakes Print one set of copies for proofing ...
Page 6: ...Make a copy on this type of paper Envelopes and other special media Transparency film ...
Page 11: ...Conserve Print on both sides of the paper Print multiple pages on one side of the paper ...
Page 35: ...Organize my files Delete a file Delete all files Periodically delete files Change the folder ...
Page 203: ...3 18 PRINTER Contents 4 Click the Print button Printing begins ...
Page 835: ......
Page 836: ......


