57
MAC OS X
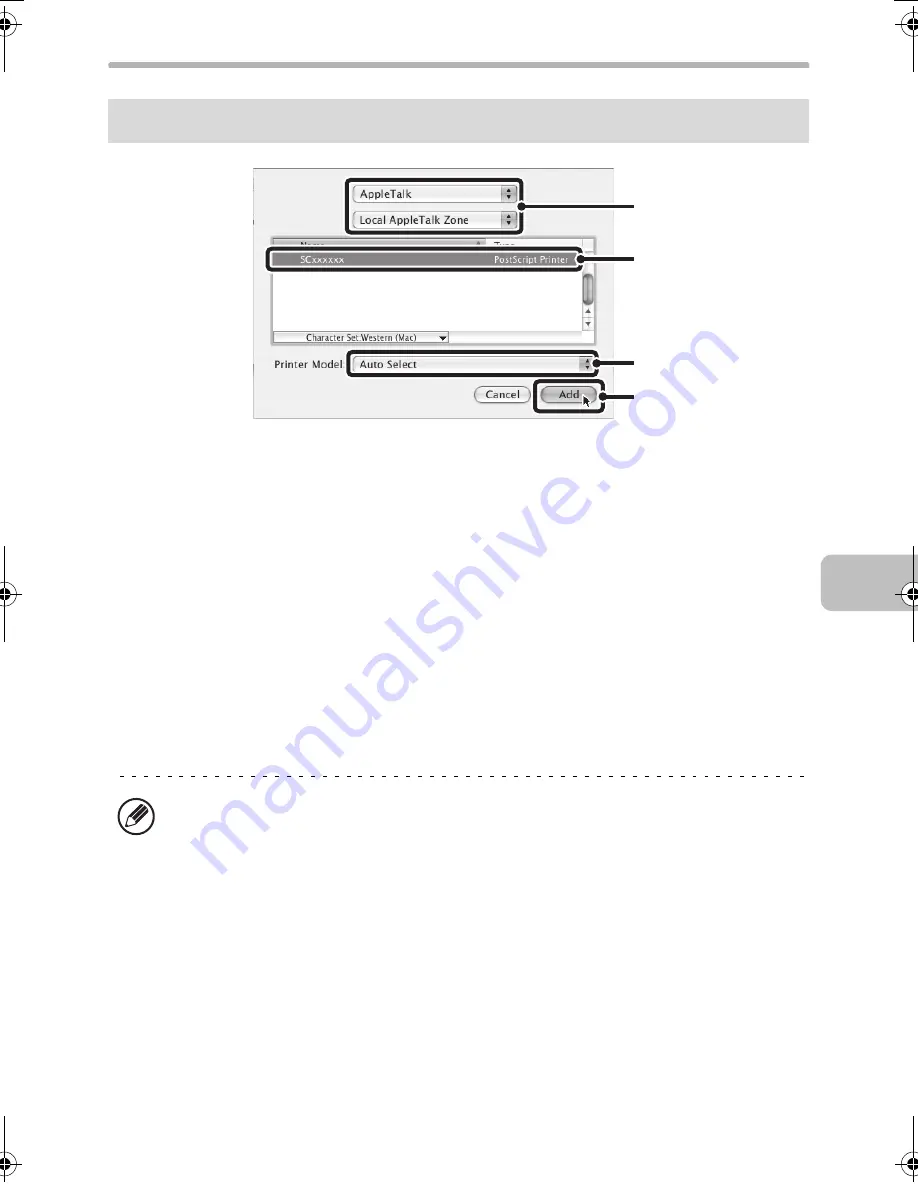
(1) Select [AppleTalk].
If multiple AppleTalk zones are displayed, select the zone that includes the
printer from the menu.
(2) Click the machine's model name.
The machine's model name usually appears as [SCxxxxxx]. ("xxxxxx" is a
sequence of characters that varies depending on your model.)
(3) Select the PPD file of the machine.
• If you are using Mac OS X v10.3.9, select [Auto Select].
• If you are using Mac OS X v10.2.8, select [Sharp] and click the PPD file of
your model.
(4) Click the [Add] button.
If you are using Mac OS X v10.3.9, the PPD file of the machine is automatically
selected and the peripheral devices installed on the machine are detected and
automatically configured.
v10.2.8, v10.3.9
The PPD file is installed in the following folders on the startup disk.
[Library] - [Printers] - [PPDs] - [Contents] - [Resources] - [en.lproj]
(1)
(2)
(4)
(3)
!mxb401_us_ins.book 57 ページ 2009年1月7日 水曜日 午後3時42分
Summary of Contents for MX-B401
Page 4: ...Reduce copy mistakes Print one set of copies for proofing ...
Page 6: ...Make a copy on this type of paper Envelopes and other special media Transparency film ...
Page 11: ...Conserve Print on both sides of the paper Print multiple pages on one side of the paper ...
Page 35: ...Organize my files Delete a file Delete all files Periodically delete files Change the folder ...
Page 203: ...3 18 PRINTER Contents 4 Click the Print button Printing begins ...
Page 835: ......
Page 836: ......


