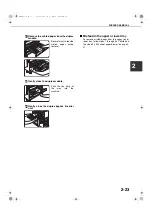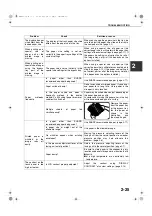
MISFEED REMOVAL
2-20
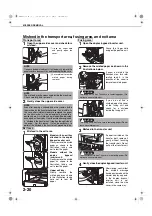
Misfeed in the transport area, fusing area, and exit area
Transport area
1
Open the upper side cover and check for a
misfeed.
Grasp the finger hold
and gently open the
cover.
Be careful not to tear the
misfed paper during
removal.
2
Gently close the upper side cover.
Exit area
1
Misfeed in the exit area
Models with an exit tray
attached to the duplex
bypass/inverter unit:
Gently remove the misfed
paper as shown in the
illustration, taking care
not to tear the paper.
Models without the
duplex bypass/
inverter unit:
Gently remove the misfed
paper as shown in the
illustration, taking care
not to tear the paper.
Upper exit tray:
Gently remove the
misfed paper as shown
in the illustration, taking
care not to tear the
paper.
Fusing area
1
Open the duplex bypass/inverter unit.
Grasp the finger hold
and gently open the unit.
2
Remove the misfed paper as shown in the
illustrations below.
If paper is misfed in the
transport area, turn roller
rotating knob A in the
direction of the arrow to
remove the misfed paper.
If you do not find a
misfeed, open the cover
of the fusing unit and
check for a misfeed
inside the fusing unit.
3
Misfeed in the transfer unit
If paper is misfed on the
transfer belt, remove it
gently without touching
the transfer belt. Do not
pull out the transfer unit.
4
Gently close the duplex bypass/inverter unit.
After closing, confirm that
the misfeed message
has been cleared and the
normal display appears.
If the duplex bypass/
inverter unit is not
installed, close the side
cover in the same way.
NOTE
If paper is loaded in the bypass tray, temporarily remove the
paper and close the bypass tray before opening the side cover.
NOTE
The misfeed may have occurred inside the machine.
Check carefully and remove it.
NOTE
Even after clearing a misfeed, paper may remain inside
the machine on the transfer belt where it is not visible. In
this case, after visible misfeeds are removed, the paper
on the transfer belt will be automatically moved to a
position where it is visible and a misfeed will be indicated
once again on the display. Clear the misfeed as explained
in "Misfeed in the transfer unit" (step 3 on the right side of
this page). For this reason, it may be necessary to
perform the "Misfeed in the transfer unit" procedure twice.
The fusing unit is hot. Take care in removing paper. (Do
not touch any metal parts.)
The fusing unit is hot. Take care in removing paper. (Do not
touch any metal parts.)
The transfer unit is hot. Take care in removing paper. (Do
not touch any metal parts.)
CAUTION
CAUTION
CAUTION
00-08.book 20
ページ
2002年11月8日 金曜日 午前9時39分
Summary of Contents for AR-C260
Page 3: ...Part 1 General Information 00 08 book 1 ページ 2002年11月8日 金曜日 午前9時39分 ...
Page 4: ...00 08 book 2 ページ 2002年11月8日 金曜日 午前9時39分 ...
Page 48: ...00 08 book 26 ページ 2002年11月8日 金曜日 午前9時39分 ...
Page 66: ...00 08 book 18 ページ 2002年11月8日 金曜日 午前9時39分 ...
Page 67: ...Part 2 Copier Operation 00 08 book 1 ページ 2002年11月8日 金曜日 午前9時39分 ...
Page 68: ...00 08 book 2 ページ 2002年11月8日 金曜日 午前9時39分 ...
Page 76: ...00 08 book 8 ページ 2002年11月8日 金曜日 午前9時39分 ...
Page 94: ...00 08 book 18 ページ 2002年11月8日 金曜日 午前9時39分 ...
Page 128: ...00 08 book 6 ページ 2002年11月8日 金曜日 午前9時39分 ...
Page 136: ...00 08 book 8 ページ 2002年11月8日 金曜日 午前9時39分 ...
Page 137: ...00 08 book 8 ページ 2002年11月8日 金曜日 午前9時39分 ...


