49
PRINTER FUNCTIONS
4
If the tray runs out of paper during printing
Add paper to the tray or press the [PAPER SELECT] key (
) to select a different tray, and then press the [ON
LINE] key (
) to resume printing.
Note that if the "Auto tray switching" setting in the system settings is enabled on a model that has two or more paper
trays and there is the same size of paper in another tray, the machine will automatically switch to the other tray and
continue printing.
Pausing a print job
To pause a print job during printing, press the [ON LINE] key (
) on the operation panel to switch the machine
off-line. Printing will be paused and the ON LINE indicator will blink.
• To cancel a print job, press the [CLEAR] key (
) or the [CLEAR ALL] key (
).
• To resume printing, press the [ON LINE] key (
) to switch the machine online.
When "Paper Source" is set to "Auto Select"
If "Paper Source" is set to "Auto Select" in the "Paper" tab of the printer driver setup screen and the correct size of
paper for a print job is not loaded in the machine, the printing procedure will vary depending on the "Use close paper
size" setting in the system settings
When "Use close paper size" is disabled
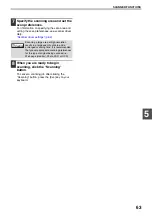
The PAPER SIZE indicator on the operation panel will blink. You can press the [PAPER
SELECT] key (
) to select a tray manually, or load paper in the bypass tray and press
the [ON LINE] key (
) to begin printing.
* The paper sizes that appear in the operation panel will vary by country and region.
When "Use close paper size" is enabled
Printing will take place using a size of paper that is close to the size of the print image.
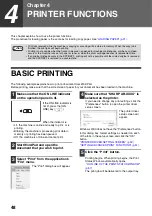
OPENING THE PRINTER DRIVER FROM THE "Start" BUTTON
You can open the printer driver and change the printer driver settings from the Windows "Start" button. Settings
adjusted in this way will be the initial settings when you print from an application. (If you change the settings from the
printer driver setup screen at the time of printing, the settings will revert to the initial settings when you quit the
application.)
1
Click the "Start" button and select
"Control Panel" and then select
"Printer".
• In Windows 7, click the "Start" button, and then
click "Devices and Printers".
• In Windows XP, click the "start" button, and
then click "Printers and Faxes".
• In Windows 2000, click the "Start" button and
point to "Settings", and then select "Printers".
•
2
Click the "SHARP AR-XXXX" printer
driver icon.
3
Select "Properties" from the
"Organize" menu.
• In Windows 7, right-click the "SHARP
AR-XXXX" printer driver icon, and then click
"Printer properties".
• In Windows XP/2000, select "Properties" from
the "File" menu.
4
Click the "Printing Preferences"
button in the "General" tab.
In Windows 7, click the "Preferences" button in
the "General" tab.
The printer driver setup screen will appear.
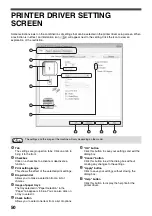
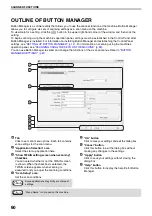
"PRINTER DRIVER SETTING SCREEN" (p.50)
• For limitations on copying in print mode, scanner mode limitations, and print mode limitations in copy and
scanner mode, see
"OPERATION IN COPY, PRINTER, AND SCANNER MODES" (p.26)
.
• The print image is automatically rotated to fit the paper in the event that the paper is loaded in an orientation
different from the print image.
Note
In Windows XP, if "Printers and Faxes" does
not appear in the "start" menu, select "Control
Panel", select "Printers and Other Hardware",
and then select "Printers and Faxes".
Note
Summary of Contents for AR-5618
Page 2: ......
Page 108: ...OPERATION GUIDE AR5623D EX1 ...

