10
S&C Instruction Sheet 766-510
Installation
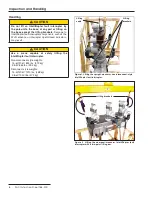
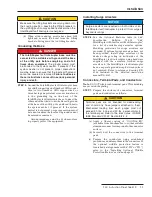
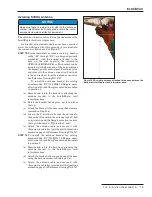
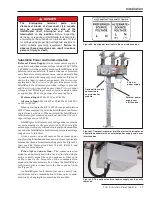
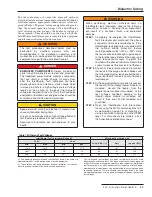
Figure 9. Tightening the through-bolts. Make sure flat washer
is between bolt head and the mounting bracket.
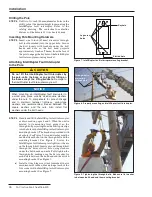
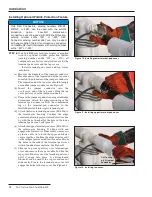
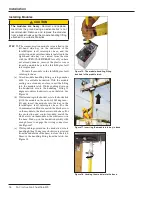
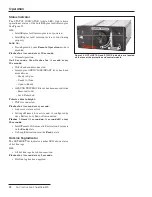
Figure 8. Properly mounting an IntelliRupter fault interrupter.
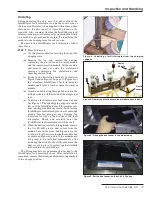
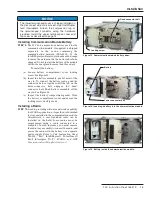
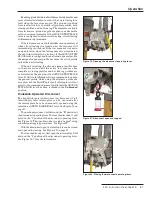
Figure 7. IntelliRupter fault interrupter mounting bracket.
Lag screw
holes
Through-bolts
projecting
through pole
Drilling the Pole
STEP 2.
Drill two
13/16
-inch (21-mm) diameter holes in the
utility pole at the desired height for mounting the
IntelliRupter fault interrupter. Refer to the
catalog drawing. The centerline-to-centerline
distance of the holes is 22
⅜
inches (568 mm).
Inserting Pole Mounting Hardware
STEP 3.
Insert one ¾-inch (19-mm) diameter through-
bolt (not furnished) into the upper hole. Secure
the bolt loosely with washers under the bolt
heads and nuts so the bolt head projects
approximately 3 inches (76 mm) from the face of
the pole to engage the keyhole of the IntelliRupter
fault interrupter mounting bracket.
Attaching IntelliRupter Fault Interrupter
to the Pole
CAUTION
Do not lift the IntelliRupter fault interrupter by
the pole-units, the base, or any part or fitting on
the base except the lifting brackets. Damage to
the IntelliRupter fault interrupter may result.
NOTICE
When mounting an IntelliRupter fault interrupter to
a wood pole, place suitably sized square washers
under the nuts. To compensate for pole shrinkage
and to maintain fastener tightness, spring-type
washers are recommended, placed between the
square washers and the nuts. Also install flat
washers under the bolt heads.
STEP 4.
Handle and lift the IntelliRupter fault interrupter
as discussed on pages 8 and 9. When the unit is
hoisted to its mounting level, guide it so the
through-bolt projecting from the utility pole slips
into the hole in the IntelliRupter fault interrupter
mounting bracket. (The bracket is provided with
a keyhole.) See Figure 7. A round washer must be
used between the nut on the through-bolt and the
mounting bracket. See Figure 8. Lower the
IntelliRupter fault interrupter slightly so it bears
on the through-bolt. Insert a second through-bolt
through the lower slotted hole, using washers
under the bolt heads and nuts. Fully tighten the
through-bolts, making sure the flat washer for
each bolt is between the bolt head and the switch
mounting bracket. See Figure 9.
(a) Install a ½-inch lag screw (not furnished) that is
a minimum of 2 inches (51 mm) long at each of the
four corners of the IntelliRupter fault interrupter
mounting bracket. See Figure 7.
Keyhole
Slotted hole

