


User Guide
49
on or off
Restricted Area
: Turns the displaying of
Restricted area on or off
Fishing Area:
Turns the displaying of
Fishing Area on or off
Sea Cable
: Turns the displaying of Sea
Cable on or off
Name:
Turns the displaying of area name on
or off
Mark Attribute:
Turns the displaying of
Mark Attribute on or off
Sea Sector No
: Turns the displaying of Sea
Sector No on or off
4-2-5 Map datum
This unit has a compatibility with most of
major chart system and this option allows
you to select a map datum. The default
datum is WGS84.
Map datum Selection
1 Press and hold
and select chart icon
2 Select general and Map datum
3 Select a desired map datum
4-2-6
NMEA datum offset
When you select other Map datum different
from WGS84, latitude and longitude will be
different from WGS84’S coordinate
s and this
might confuse other device such as VHF radio
if connected to the unit. If this option is
applied, latitude and longitude send on the
unit NMEA output will be the same as
coordinates in WGS84.
4-2-7
Map shift
Sometimes current position of own ship does
not match with the current location on the
chart. To correct this position error, you can
apply a map shift.
Applying a map shift
1 In the Chart setup menu, press and hold
and select
Chart
icon.
2 Select Map shift to
ON
.
3 Move cursor to the actual position on the
chart.
4 Press
and select
Set
.
Canceling a map shift
If you want to clear the map shift:
1 In the Chart setup menu, select
Map shift
.
2 Press
and select
Clear
.
4-2-8 Restore default
Returns every chat settings to default.
User Guide
50
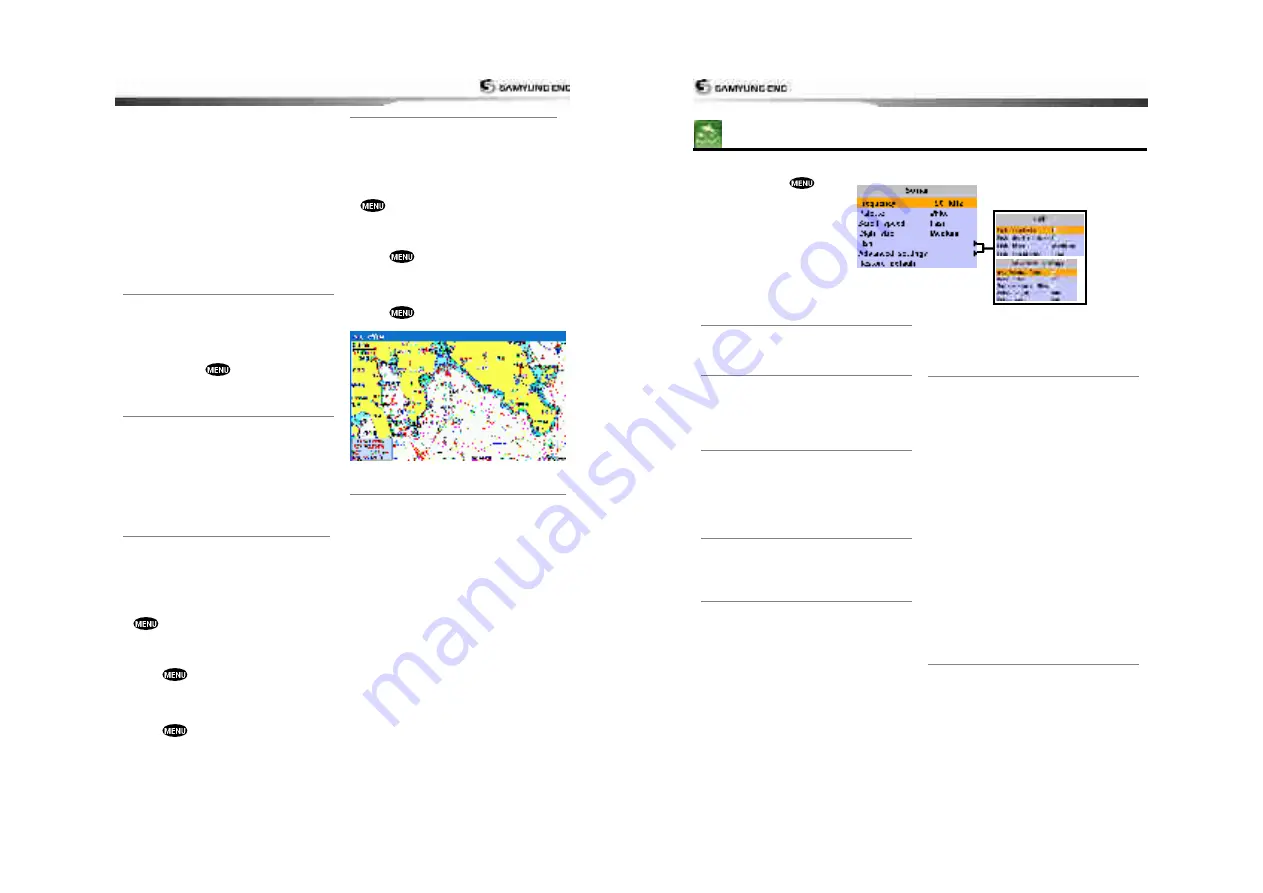
4-3
Sonar settings
Sonar feature requires a connection to depth transducer.
To go to the Sonar settings:
1 Press and hold
.
2 Select the sonar icon.
4-3-1 Frequency
You can select a sonar frequency among 200
kHz, 50 kHz or Mixed.
4-3-2 Palette
Palettes are used to enhance the visibility of
the display depending on the surrounding
light environments. Three types of displays
are provided black, blue and white.
4-3-3 Scroll speed
You can set the scroll speed which
determines how quickly the vertical scan lines
run across the screen. Five speed options are
provided; Very Fast, Fast, Medium, Slow and
Pause.
4-3-4 Digit size
You can change the size of the depth window
on the Sonar window. Three options are
available Small, Medium or Large.
4-3-5 Fish
Fish symbols:
Turn the fish symbol on or
off.
Fish depth labels:
Turn the fish depth
value on or off.
Fish filter:
Select a minimum fish size that
will be displayed as a fish symbol.
Fish sensitivity
Select the minimum strength fish echo that
will be displayed as a fish symbol.
4-3-6 Advance Settings
Interference filter:
Interference from other
equipment operating nearby or on your boat
may show itself on the display. Use this
option to remove interference.
Noise filter:
If there is noise, the echo
signal from transducer is not stable. This
function remove noise and averages the echo
signal. However, this option may also remove
fish echoes.
Surface clutter filter:
This filter removes
surface noise. However, the function does not
remove fish echoes.
Pulse length:
You can select specific pulse
length of transducer. A short pulse shows
more detailed information but
can’t show
deeply into the water because of less power.
The Auto setting is recommended.
Pulse power:
You can select specific pulse
power of transducer. Low power shows a
clear display but can’t show deeply into
the
water. The Auto setting is recommended.
4-3-7 Restore default
Returns every sonar settings to default.
Summary of Contents for NF800
Page 1: ...User Guide 1 User Guide 2...
Page 32: ...User Guide 63 User Guide 64...
Page 33: ...User Guide 65...