96
P Mode Programming
SPS-2000 Program Manual v1.30
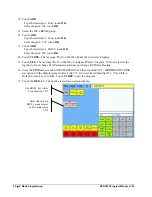
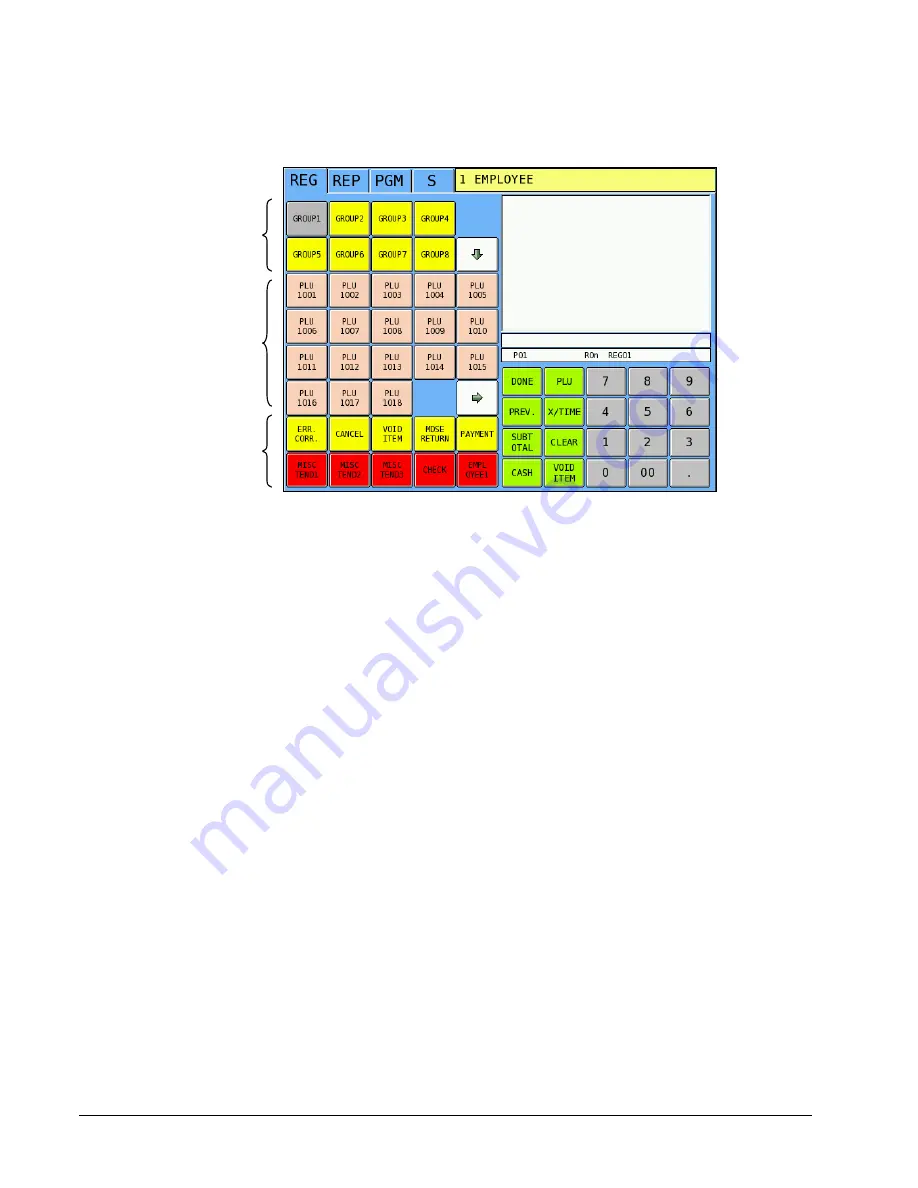
Format of Automatically Created Screens
Key
Links
Screens created by the Quick Registration System are located beginning at Key Link #73.
Group #1 will use Key Links 73-76; Group #2 will use Key Links 77-80, etc. (Use PGM Mode
System Option/ Level/Modifier Option #9 to set the default screen to Key Link #73, also reset
Level/Modifier #11, “Use Clerk’s Default Screen Level” to NO. You must make these settings
to view the menu screens created by the Quick Registration system in REG mode.)
Groups
Groups are used to organize sets of items. For example, Grill Items, Drinks, and Ice Cream
items might be separated into different groups. Groups are Key Link keys located on the top
two rows of the screen. The group currently selected displays in a gray color and the PLUs
associated with that group are displayed below. Touch another group Key Link to display it’s
PLUs. Up to eight groups can be displayed simultaneously. When more that eight groups are
used, arrow keys display. Touch the arrow down (
↓
) to display the next set of groups. Touch
the arrow up (
↑
) key to display the previous set of groups. A total of 32 groups can be activated
using the PLU Quick Registration System.
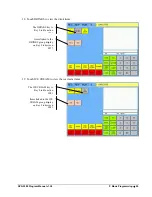
PLUs
Up to 18 PLU items for each group can be displayed simultaneously; a maximum of 72 PLUs
may be assigned to each group using the PLU Quick Registration system. When more that 18
PLUs are used in one group, arrow keys automatically display. Touch the arrow right
(
→
) to
display the next set of PLUs. Touch the arrow left (
←
) key to display the previous set of PLUs.
Note PLUs created using the standard PLU program method will not be used by the PLU Quick
Registration system.
Function
Keys
The 10 keys located on the bottom two rows of the main screen will be copied to each screen
created with the PLU Quick Registration feature. The
EMPLOYEE
key should be located in
this area.
Key Links
(Groups)
PLUs
Function
Keys

