27
Explanation of the panels
Explanation of the panels
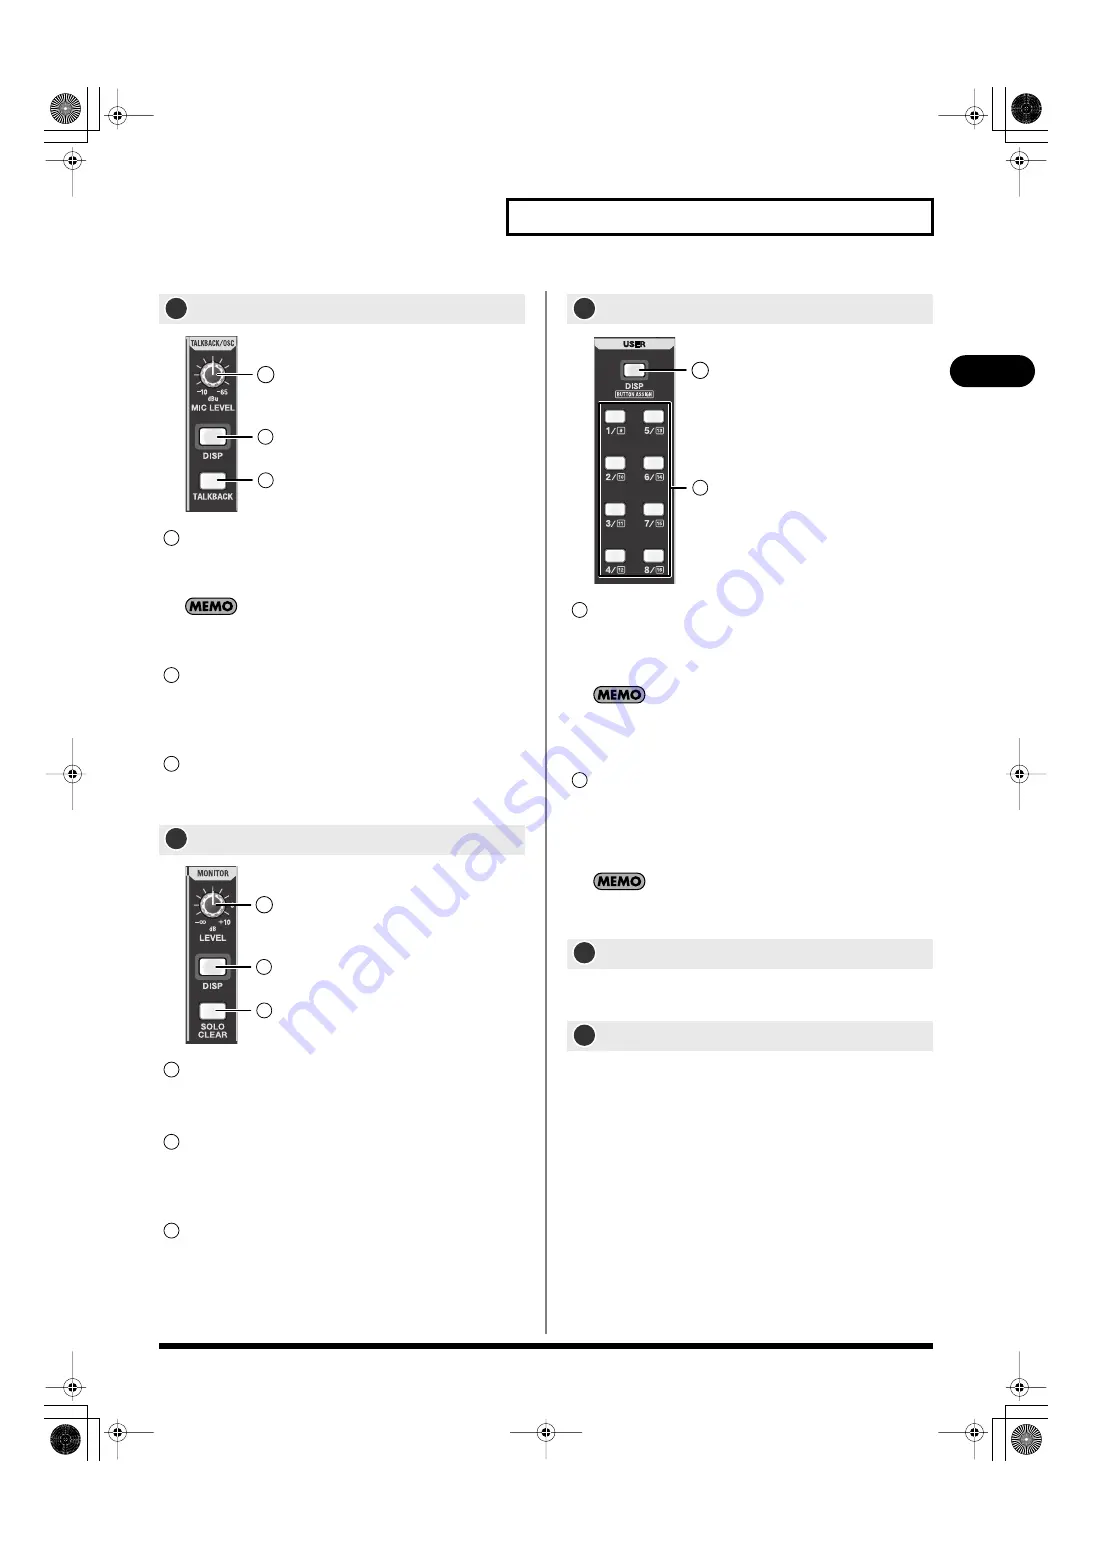
fig.TalkbackOscSectGuide.eps
MIC LEVEL knob
This adjusts the preamp gain of the talkback mic input over a
range of -10dBu–65dBu.
In the TALKBACK/OSCILLATOR screen, you can select a talkback
mic input from the CONSOLE INPUT 1–4.
DISP button
This button accesses the TALKBACK/OSCILLATOR screen,
where you can make talkback settings and oscillator
settings. It will light red while the screen is shown.
TALKBACK button
This button turns talkback on/off. It will blink while talkback
is on.
fig.MonitorSectGuide.eps
LEVEL knob
This adjusts the monitor output level in a range of -Inf dB –
+10.0 dB.
DISP button
This button accesses the MONITOR screen where you can
make monitor or solo settings. It will light red while the
screen is shown.
SOLO CLEAR button
This button clears (turns off) the solo settings of all channels
in a single operation.
fig.UserSectGuide.eps
DISP button
This button accesses the USER screen where you can change
or edit the user settings. It will light red while the screen is
shown.
If you hold down [SHIFT] and press this button, the USER
BUTTON tab of the USER PREFERENCE popup will appear. This is
a convenient way to check the user button settings.
USER 1-8 button
These access the function that is assigned to each button.
You can make function assignments in the USER
PREFERENCE popup. For details, refer to “Editing the user
button assignments” (p. 136).
By holding down [SHIFT] and pressing a USER1–8 button, you
can access the functions assigned to user buttons 9–16.
You can connect a set of headphones to this jack, and use it to
monitor the MONITOR L/R audio signal.
This adjusts the output level to the headphones connected to the
PHONES jack.
TALKBACK/OSC (talkback/oscillator) section
MONITOR section
14
1
2
3
1
2
3
15
1
2
3
1
2
3
USER section
PHONES jack
PHONES LEVEL knob
16
1
2
1
2
17
18
M-300_e.book 27 ページ 2010年4月22日 木曜日 午前8時17分


