


Establish the connection between the
software and the camera:
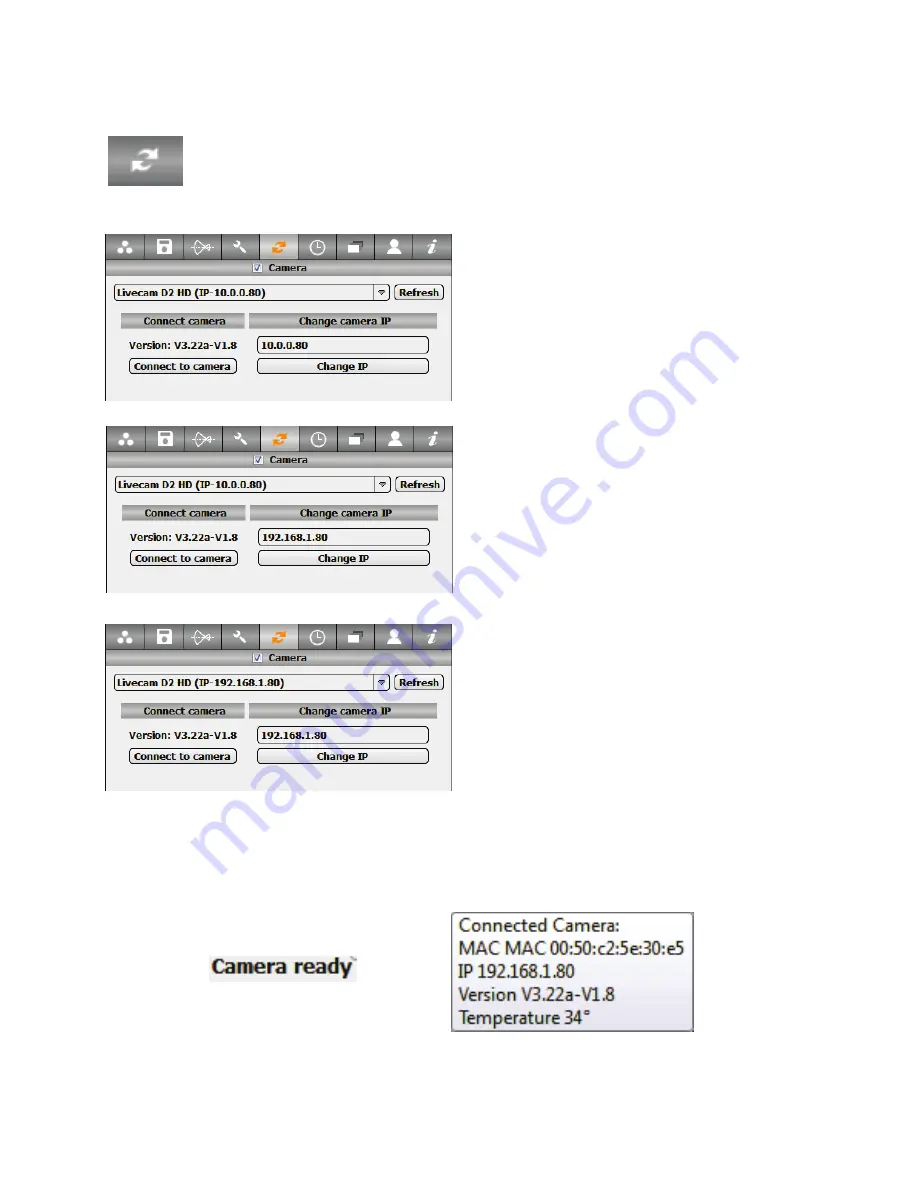
The drop-down list displays all cameras in
the network. Select “Livecam D2 HD”.
The software displays the IP of the camera as
10.0.0.80.
This is the default factory IP.
Change this IP now to bring it into the same
range as the IP of the computer (or the
network).
In this example change the IP of the camera
to: 192.168.1.80. Then click on “Change
IP” and then Refresh the camera drop-down
list
Click on “connect to camera”.
The software will now connect camera computer and camera. The connection is
confirmed with the “camera ready” message on the lower right and the “connected
camera” pop-up on the lower right hand corner of the computer screen:
2.5 Step 5: Configure the Roundshot Livecam D2 HD (continued)
Press the „External device“ button in the „Parameter“ menu to activate the
„External device“ tab:
If it is the first time the software is connected to the Livecam it is necessary to restart
the software. After restarting it the connection to the camera will be established
automatically.
Instruction Manual Roundshot Livecam D2 HD - version 4.04 – May 2012 - © by Seitz Phototechnik AG / Switzerland www.roundshot.ch
page 15