


51
Chapter 3 - A Wide Variety of Operations
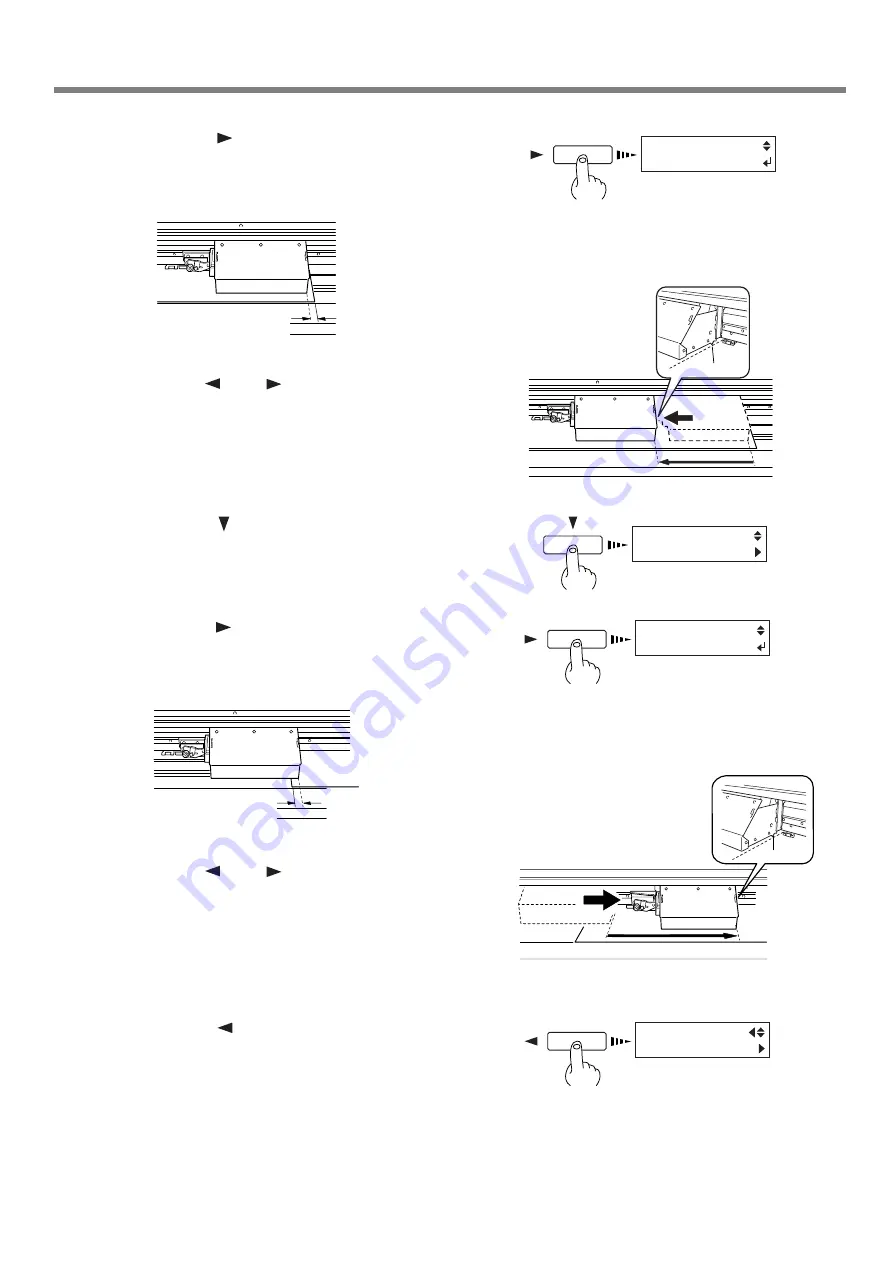
3-4 Setting the Margins
3
Press the [
] key to display the screen shown
in the figure.
When you do this, the printing carriage moves to the right
edge of the printing area.
4
Use the [
] and [
] keys to move the marker
at the right edge of the printing carriage to the
location that you want to make the right edge
of the printing area. Press the [ENTER] key to
lock in the setting the right-hand edge with an
audible beep.
5
Press the [ ] key to display the screen shown
in the figure.
6
Press the [
] key to make the following screen
appear on the display.
When you do this, the printing carriage moves to the left
edge of the printing area.
7
Use the [
] and [
] keys to move the marker
at the right edge of the printing carriage to the
location you want to make the left edge of the
printing area. Press the [ENTER] key to lock in
the setting the left-hand edge with an audible
beep.
8
Press the [
] key to display the screen shown
in the figure.
When you do this, the printing carriage returns to the
standby position.
Marker
Left-hand edge of
the printing area
Marker
Right-hand edge
of the media
RIGHT EDGE
SET
PRINT AREA
LEFT EDGE
LEFT EDGE
SET
MENU
PRINT AREA
Right-hand edge of
the printing area
Left-hand edge
of the media


