Maintenance message
Unlike the other fault messages,
the maintenance message can
be acknowledged or reset via
the wireless remote control.
This is due to the fact that it is
a purely informative message.
Proceed as follows to set up
the new maintenance interval.
1. Hold down the Right key for
5 seconds to open the fitter menu.
2. Use the Up and Down keys
to navigate to the maintenance
symbol.
3. Use the Right and Left keys to
change the 0 value to the required
maintenance interval.
4. Confirm the new maintenance
interval by pressing the Enter key.
Fault messages
The fault messages correspond
to the alarm messages which can
also be shown on the unit’s control
board display. To make the alarm
message recognizable, the fault
symbol is also displayed on
the wireless remote control.
Generally speaking, the fault
messages can only be reset
on the display panel of the
control board. The unit must be
thoroughly inspected and the fault
reset following rectification each
and every time.
No changes can be made to
the setpoints in the setup menus
while there is an active fault.
User setup menu
Hold down the Enter key for
3 seconds to open the user setup
menu.
In this menu it is possible to switch
between the wireless remote
control symbols using the Up and
Down keys provided the
corresponding option of “OF” has
been set to a value on the control
board itself. Please read pages
11 and 12 to set these values.
The Left and Right keys can be
used to set these parameter values.
The parameter is confirmed as
a new setpoint using the Enter
key. When this is confirmed,
the remote control switches back
to the symbol and exits the menu.
If you would like to exit the user
setup menu, do not press any
keys on the remote control for
10 seconds.
External heating
Dehumidification
User setup menu symbols
External heating
Dehumidification
External fan
Maintenance interval
Fitter setup menu symbols
Examples of fault messages
Sensor fault
Overly high
pressure level
detected
Maintenance message
NOTE
Do not simply reset the fault
messages without establishing
the cause first.
HP
High priority
LP
SEnS
Abt
AbrH Low priority
Fault priority
General
The wireless remote control
displays the values for humidity
and temperature at all times.
The values only disappear when
a malfunction arises.
Depending on which function
is currently active, one or more
of the symbols appear in the
centre of the display.
Fault priority
In the event that several faults
occur at the same time, only
the fault with the highest priority
is displayed.
Fitter setup menu
Hold down the Right key for
5 seconds to open the fitter setup
menu. At this point it is possible
to access all four menu items. It is
also necessary to set the respective
“OF” option on the control board
to a specific value to enable access.
18
REMKO SLN Series
Summary of Contents for SLN 45
Page 2: ......
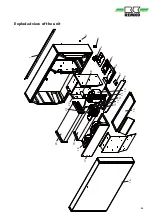
Page 25: ...1 10 2 3 4 5 6 7 8 9 11 12 13 14 15 16 17 18 19 21 20 22 Exploded view of the unit 25...
Page 34: ...Notes...
Page 35: ......


