Set-up
For optimum and safe use
of the units, the following notes
must be followed in full:
■
Two duct openings must
be created in the wall between
the room to be dehumidified
and the installation room
before the units are installed
in the adjacent room.
The inside dimensions
of these openings can be taken
from the sketch.
■
The openings must be created
in such a way that the air
in the room to be dehumidified
can be extracted through
the lower duct (with filter) in
an unrestricted manner and
blown out through the upper
duct.
■
The unit must be mounted
upright to ensure that
the condensate can drain freely.
■
Observe the illustrated
minimum gaps between
theunit and the ceiling and
floor in the installation room
to ensure safe operation.
■
The wall fittings must be adjusted
to the required length before
assembling the duct interfaces.
The max. wall strength is
limited to 290 mm. Ensure
that the embossed side is not
damaged when adjustments are
made.
■
Fit the duct piece together
with the filter into the lower
duct opening where the air in
the room being dehumidified
is to be extracted.
■
From the adjacent room side,
connect the unit connection
fittings together with the self-
sealing profile to the
Series
Dimension A Dimension B
Clear wall opening
SLN 45
464
998
110 x 610
SLN 65
614
1148
110 x 760
SLN 85
949
1483
110 x 1095
Mounting the units on the wall
20
65
110
110
min.
403
min.
730
700
444
A
B
90
294
68
304
395
341
341
341
437
437
450
450
450
Wall-mounted bracket for the units
SLN 45
SLN 65
SLN 85
■
Fit the air circulation inlet filter,
the grille installation fittings and
the ventilation grille together
with the wall supports.
■
Install both duct interfaces into
the duct openings.
Detailed information
on the wall-mounted
bracket
All measurements in mm
All measurements in mm
10
REMKO SLN Series
Summary of Contents for SLN 45
Page 2: ......
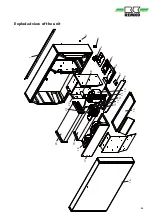
Page 25: ...1 10 2 3 4 5 6 7 8 9 11 12 13 14 15 16 17 18 19 21 20 22 Exploded view of the unit 25...
Page 34: ...Notes...
Page 35: ......


