26
27
15180-101 Rev. F
15180-101 Rev. F
Operation
(continued)
Measurement Mode
(continued)
Progressive Lens
(continued)
Measuring a Progressive Lens
(continued)
5. To switch to the opposite lens, press the
L/R
button to select the opposite lens.
6. Take a measurement of the opposite lens in the same way.
Note:
Measurements can be started from either right or left lens.
Note:
To clear the stored data in the current lens, press CLEAR.
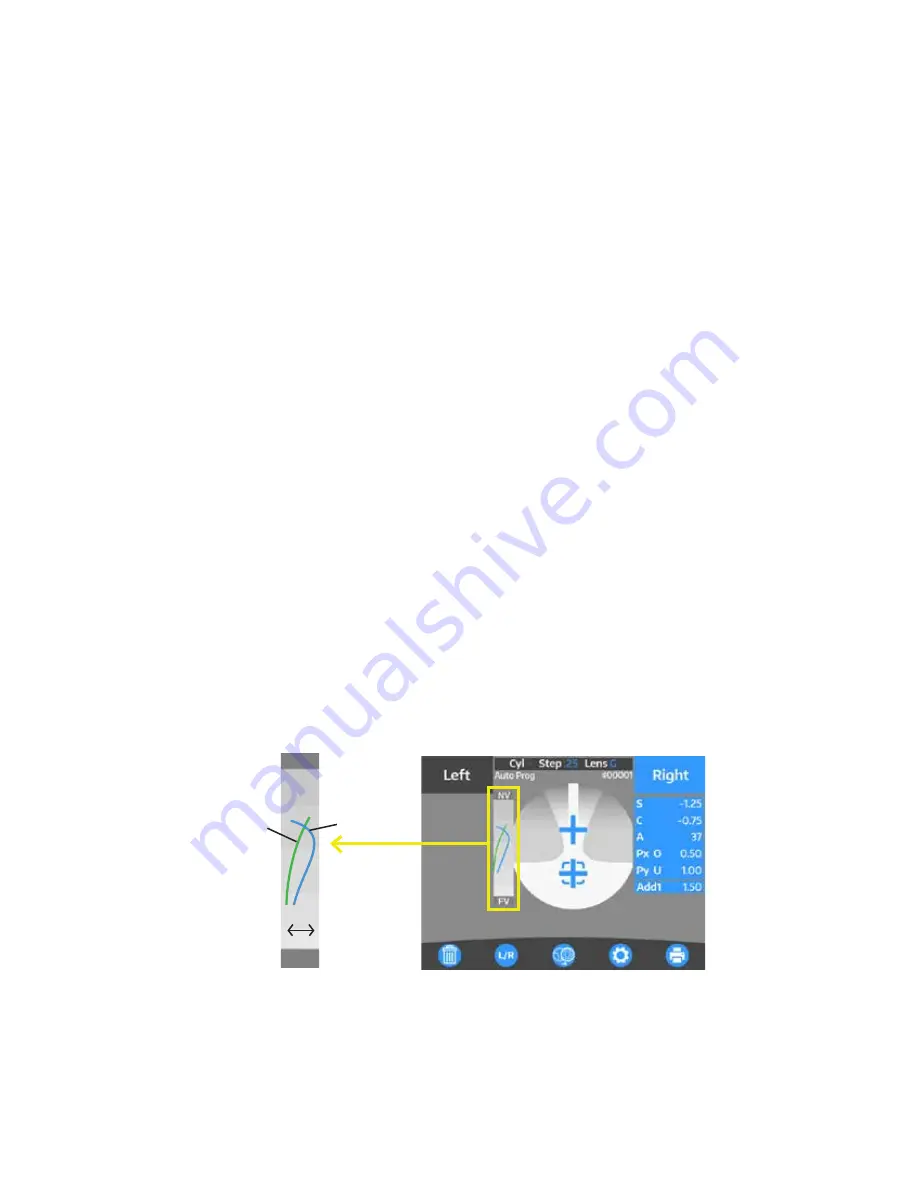
Assessment Graph and Manual Operation
Depending on the type of lens, it may be difficult to detect each point automatically even though normally
the near and far points are measured automatically and stored. When a lens is difficult to automatically
measure, manual measurements will need to be taken. Referencing the assessment graph can help with
determining the near and far points. To take a measurement of far point manually, perform the same steps
described in the
Measuring Progressive Lenses
section of this manual.
1. In the Setup Menu, set “Prog. Graph” to “On”, to display the progressive lens graph on the measurement
screen.
2. Take a measurement of far point by moving the lens so that the center of the alignment mark overlaps
with the cross cursor. Press the Measurement/Start button to take the measurement.
3. Measure the near point, by slowly moving the lens towards the nearpoint.
Note:
The Add Value and Assessment Lines will slowly grow as the lens is moved towards the near point.
Once you reach the near point, the Assessment Line will curve back towards the Add Value Line.
Once it crosses the Add Value Line, you have reached the near point. Press the Measurement/Start
button to save the near point value. Refer to Figure OP-21.
Figure OP-21 Progressive Graph
NV
FV
Add
Value
Line
Assessment
Line
Low
High


