14
15
15180-101 Rev. F
15180-101 Rev. F
Instrument Setup
(continued)
Instrument Settings
Setup Screens
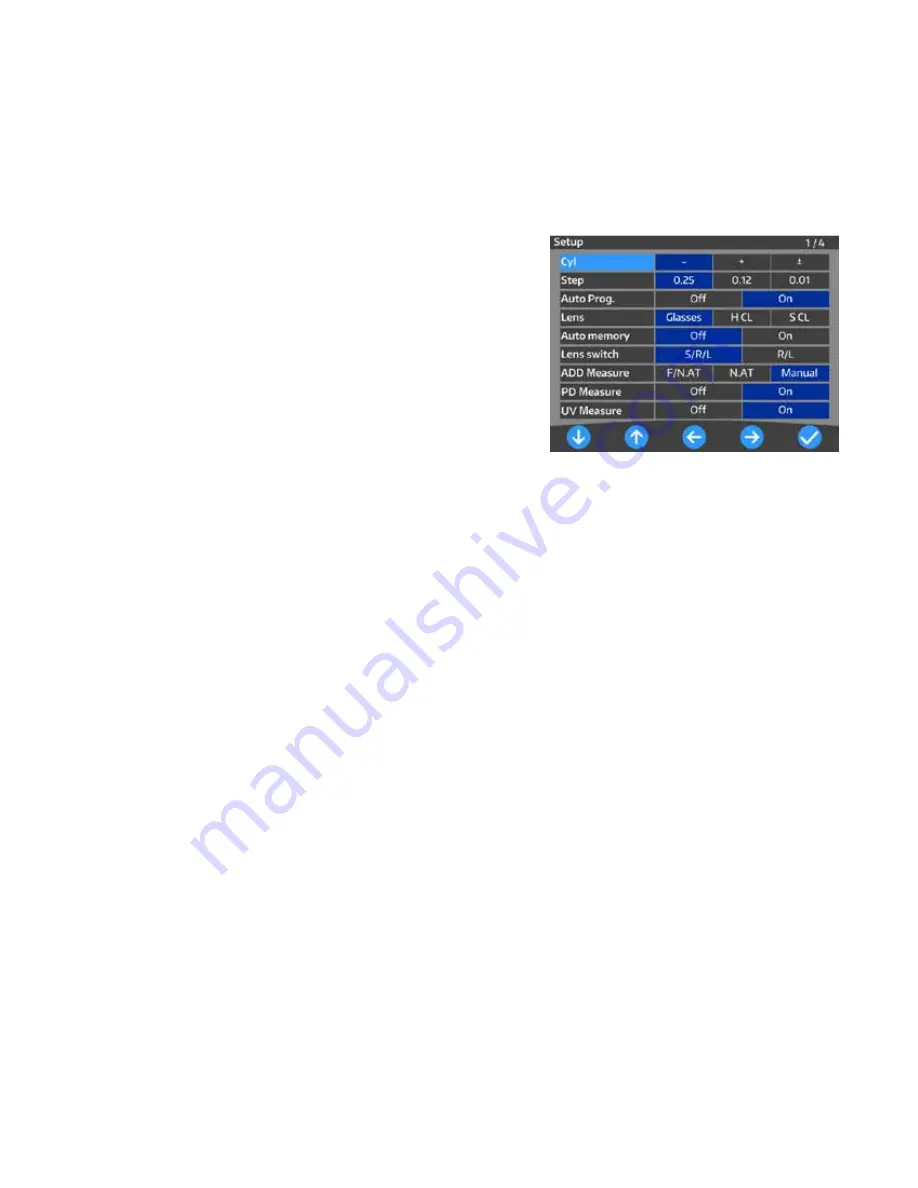
The Setup Screens of the LensChek Plus/Pro displays four pages
of default parameters that you can change to accommodate your
preferences. The current default values are highlighted in blue.
Refer to Figures SU-10, SU-11, SU-12, and SU-13.
Use the UP or DOWN icons to find a category, then use the
RIGHT or LEFT icons to change the parameter in that category.
You can then scroll to a different category and change that
parameter.
When you are finished, select the ENTER icon (check mark icon)
to save your changes and return to the previous screen.
The first page of the Setup Screen contains the following cat
-
egories:
Cyl
Selects sign for Cyl
(- /+/ ± )
(The sign set on the measurement screen is reflected here.)
Step
Selects step to display measurement value (
0.25 / 0.12 / 0.01)
Auto Prog.
Sets auto detection of progressive lens (
On / Off)
Lens
Selects lens to be measured.
(Glasses / H CL / S CL)
Glasses: Framed lens
H CL: Hard contact lens
S CL: Soft contact lens
Auto Memory
Automatically takes a reading when the lens is aligned. The measurements will be stored
on the screen and “Marking OK” will appear, showing that the lens was read.
(On / Off)
Lens Switch
Sets lens switching function.
(S/R/L / R/L)
S/R/L: Single lens/ right lens/ left lens
R/L: Right lens/ left lens
ADD Measure
Selects auto/ manual memory of far and near points.
(F/N.AT / N.AT / Manual)
F/N.AT: Stores both near and far points automatically
N.AT: Stores only near point automatically
Manual: Stores data manually
PD Measure*
Displays the PD measurement
(On / Off)
UV Measure*
Displays the UV measurement
(On / Off)
*
These settings available with the LensChek Pro only.
Figure SU-10 Page 1, Setup Screen


