background image

OWNER’S MANUAL 

OWNER’S MANUAL 

29 OBX

29 OBX

 REGAL# 281760

REGAL# 281760

3-2016

Summary of Contents for 29 OBX

Page 1: ...OWNER S MANUAL OWNER S MANUAL 29 OBX 29 OBX REGAL 281760 REGAL 281760 3 2016...

Page 2: ...THIS PAGE IS LEFT INTENTIONALLY BLANK...

Page 3: ...ter Conditions 55 2 RULES OF THE ROAD Navigation Rules Defined 58 Navigation Rules 59 Night Running 66 Bridge Clearance 67 3 ENGINES CONTROLS Outboard Engine Basics 69 Engine Lubrication 78 Propellers...

Page 4: ...her 157 Battery Charger 159 Battery Switch 161 Board Racks 164 Bow Filler Cushion 165 Bow Thruster 166 Bow Walk Thru Doors 167 Bilge Pump 168 Canvas 169 Chartplotter 174 Cockpit Carpet 175 Cockpit Sea...

Page 5: ...the United States Coast Guard and the American Boat and Yacht Council Your Regal boat was built with the same attention to detail and quality of construction that we would expect in a boat we would p...

Page 6: ...1 6 Mission Statement With God s help and a steadfast commitment to integrity we will develop a team of exceptional people and relationships to provide exceptional customer satisfaction...

Page 7: ...INT 7 Introduction THIS PAGE IS LEFT INTENTIONALLY BLANK...

Page 8: ...ce beyond the scope of this manual Also your Regal dealer carries a line of factory approved parts and accessories Your Regal dealer can provide information regarding national training organizations s...

Page 9: ...ots The Garmin also features a touch control to magnify drawings In keeping with its commitment to continued improvement Regal notes that all drawings specifications models standard and optional equip...

Page 10: ...in a hidden location This second HIN is useful to authorities if for example the boat is stolen and the original transom HIN is modified or eliminated Vessel Information Sheet It is recommended that y...

Page 11: ..._________State ___________ Phone _______________________________________________ Insurance Agent Name __________________________________ Policy _____________________________________________ USCG Phone...

Page 12: ...ss Home Telephone Food Cell Phone Water Make Of Boat Destination Registration Leave From Length Time Left Boat Name Going To Gel Color Fuel Level 1 4 1 2 3 4 F Trim Color Est Time Of Arrival Stern Dri...

Page 13: ...t is on board such as mooring lines first aid kit tool kit and extra parts Inspect fuel components hoses and hardware including all filters for fuel leaks and overall tightness Visually inspect engine...

Page 14: ...mmer Penetrating Oil Wire Crimpers Extra Light Bulbs Vise Grip Pliers Extra Batteries Floating Flashlight Duct Tape Nut Driver Set Electrical Tape Oil Filter Wrench Power Steering Fluid Fuel Filter Wr...

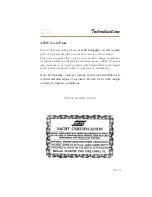
Page 15: ...uilt to design compliance standards in effect on the date the certification was verified The plate also states that your vessel complies with United States Coast Guard safety system standards in effec...

Page 16: ...ning all relevant boat and engine serial numbers will be sent after the factory receives the paperwork Dealer s Responsibility Your boat has undergone rigid quality assurance inspections before leavin...

Page 17: ...ply the following boating rules and regulations safety equipment environmental regulations accident reports and warranty regulations terms and conditions To read thoroughly all literature supplied wit...

Page 18: ...INT 18...

Page 19: ...Under the Five Year Transferable Limited Structural Hull Warranty Regal will repair or replace the fiberglass hull if it is found to be structurally defective in material or workmanship within the fi...

Page 20: ...days of the date of delivery and such information must be on file at Regal b The purchaser must first notify the dealer from whom the boat was purchased of any claim under this warranty within the app...

Page 21: ...upon or unloaded from trailers cradles or other devices used to place boats in water remove boats from water or store or transport boats on or over land m Water damage to dry rot to condensation to o...

Page 22: ...making repairs to or replacing the defective parts and no claim for breach of warranty shall be cause for cancellation or rescission of the contract or sale for any boat manufactured by REGAL MARINE...

Page 23: ...nformation Remember the skipper is responsible for the safety of his passengers and crew SAFETY LABELS Safety Precaution Definition Safety precautions are stated as caution warning and danger signal w...

Page 24: ...the safety labels are found close to the helm aft cockpit and or swim platform The location of the labels may vary by model and the label list does not cover everything Use common sense to analyze the...

Page 25: ...eck weather conditions periodically while you are boating and before your outing If you are forced to operate your boat in a storm condition take common sense precautions wear PFD s store gear reduce...

Page 26: ...PFDs and be sure they know their storage location on the boat Remember in an emergency a PFD that cannot be quickly located and worn is useless Never allow anyone to sit anywhere on the boat not spec...

Page 27: ...d current charts of the area you ll be cruising to stay on proper course Charts can be obtained at your closest marine outlet or store or by contacting one of three federal government agencies File a...

Page 28: ...s may change or be different from state to state Contact your local boating agencies for updated information We can not stress safety enough Remember there are no brakes on your boat and the water cur...

Page 29: ...rry one type I II III or V PFD wearable for each person aboard See the explanation following for each type For type V to be counted they must be used according to the label instructions In addition al...

Page 30: ...buoyant vest it is recommended for calm inland water where rescue time will be minimal It will turn some unconscious people face up in the water but not as numerous as Type I They are available in ad...

Page 31: ...ently before storing Keep PFD s out of grease and oil since they can deteriorate the jacket inner and outer materials Check any kapok bagged jackets by squeezing If jacket loses air the bag is defecti...

Page 32: ...flammable liquids such as grease oil and gasoline The number indicates the general size of the extinguisher and minimum extinguishing agent weight FIRE EXTINGUISHER CONTENTS CLASS FOAM C02 DRY CHEM H...

Page 33: ...All approved extinguishers need to have an indication gauge USCG Approved Fire Extinguisher Types Features The dry chemical agent is widely used because of its convenience and low cost The extinguishe...

Page 34: ...ters connected directly to them up to point where a body of water is less than two miles wide must have Coast Guard approved visual distress signals Pyrotechnic Devices Pyrotechnic visual distress sig...

Page 35: ...be certified by the manufacturer to comply with Coast Guard standards They include n Orange distress flag n Electric distress flag The distress flag is for day use only It must be 3 x 3 or larger wit...

Page 36: ...o p o q CHAPTER 1 POSITION INDICATING RADIO BEACON DYE MARKER ANY COLOR HAND HELD FLARE INTERNATIONAL DISTRESS SIGNALS...

Page 37: ...ship to shore and ship to ship communications today Learn the specialized messages such as Mayday Mayday Mayday is only used when life or vessel is in imminent danger NAVIGATION LIGHTS The U S Coast G...

Page 38: ...u v u w CHAPTER 1 NAVIGATION LIGHT RULES...

Page 39: ...st display a placard at least 5 x 8 made of durable material fixed in a conspicuous machinery space laocation stating the following You must immediately notify the U S Coast Guard if your vessel disch...

Page 40: ...dump plastic trash anywhere in the ocean or navigable waters of the United States Also it is illegal to discharge garbage in the navigable waters of the United States including the Great Lakes The di...

Page 41: ...Safety On Board...

Page 42: ...ckly and accurately alert rescue forces indicate an accurate distress position and guide units to the distress scene These devices operate from satellite signals sent to a ground station where the sig...

Page 43: ...e the carbon monoxide alarms that come with your Regal boat Test the unit in accordance with the alarm manufacturers instructions 3 Do not operate the engine for extended periods of time while in a co...

Page 44: ...ding slow speeds or when boat is at rest Blockage of exhaust outlets can cause carbon monoxide to accumulate in the cabin and cockpit area even when the hatches windows portholes and doors are open Ex...

Page 45: ...bon monoxide accumulation requires immediate attention Thoroughly ventilate cabin and cockpit areas Determine the probable source of the carbon monoxide and correct the condition immediately Regal has...

Page 46: ...ng accidents occur when someone falls into the water Balance is one of the first things you lose when drinking alcohol or under the influence of drugs The problem arises out of not knowing your balanc...

Page 47: ...N O C L O H O C L A D O O L B n I t h g i e W y d o B s d n u o P d o i r e P r u o H 2 A n I s k n i r D f o r e b m u N r o u q i l f o o r p 0 8 z o 1 e n i w z o 5 r e e b z o 2 1 0 0 1 1 2 3 4 5...

Page 48: ...the bow deck or swim platform while underway Choosing a boating outing day with inclement weather especially with high winds and thunderstorms in the forecast or staying out when bad weather is appro...

Page 49: ...1 Death 2 Injury requiring treatment other than first aid 3 The disappearance of someone from a boat under death or injury circumstances A formal report must be made within 10 days for accidents invol...

Page 50: ...and open waters stay 300 feet away The flag indicates a diver in the water If a diver is operating from your boat be certain to use this flag and post a lookout on board for a divers air bubbles Some...

Page 51: ...Follow the speed limits and all posted signs i e no wake etc Keep the boat away from swimmers or other people in the water Avoid running near the shoreline or in heavily congested areas with skier wa...

Page 52: ...er sport tow device This may be in the form of a stainless steel bar with an eyelet at the end for line placement or a roller type component attached to the Power Tower or hard top Periodically check...

Page 53: ...osion Check the laminated fiberglass under platform supports for fatigue and cracks Never run the boat with someone holding on to or standing sitting on the platform Use heed when operating the boat i...

Page 54: ...ing boat should be anchored a large wake could flip or swamp the boat upset fishing gear pull the anchor loose from the bottom or worse yet cause someone to fall overboard When fishing from your boat...

Page 55: ...ations Clouds indicate the type of current weather and upcoming changes in the weather Knowing the type of cloud formations can assist you in choosing the appropriate boating day or if already on the...

Page 56: ...f fog proceed to the nearest shoreline and wait until the fog lifts Boats equipped with navigation equipment local waterway experience and charts should proceed to a safe harbor Use extreme caution si...

Page 57: ...Safety On Board Marine Weather Symbols Although the National Weather Service has discontinued the use of the day flags and night lights many marinas and ports of call still display them...

Page 58: ...tside the established demarcation boundaries Most navigational charts show the demarcation lines by red dotted lines and are published in the navigation rules Remember to consult state and local agenc...

Page 59: ...tarboard has the right of way 6 When overtaking or passing the boat being passed has the right of way In general boats with less maneuverability have right of way over more agile craft The skipper mus...

Page 60: ...ose quarters with a larger tonnage vessel One way to accomplish this is to have a designated human lookout to eyeball the horizon for any developing collision course Use defensive driving skills on th...

Page 61: ...In a head on meeting both vessels must sound a single blast to give way toward starboard and pass to port These rules appear when there is a risk of collision In a crossing situation be aware of the o...

Page 62: ...boat first signals with a single blast if that boat desires to pass on the starboard side of the boat ahead or a double blast if passing to port The overtaken craft responds with the same signal if i...

Page 63: ...a chart to look for the weather resistant ones Buoys provide a road map to keep the skipper on course and to avoid hazards Buoys are identified by light shape color and in severe weather conditions by...

Page 64: ...arboard Side Even Numbers Port Side Odd Numbers Chart Symbol Chart Symbol Chart Symbol Chart Symbol Chart Symbol Chart Symbol Lighted Buoy Green Light Only Lighted Buoy Red Light Only Can Buoy Unlight...

Page 65: ...mbol Chart Symbol Diamond Shape Danger Warning Diamond Shape With Cross Boats Keep Out Circle Marks Area Controlled As Indicated For showing information such as locations distances and directions MID...

Page 66: ...y To see more easily at night avoid bright lights when possible Also it is helpful to have a passenger keep watch for other boats water hazards and navigational aids To determine the size speed and di...

Page 67: ...this measurement with the fuel and water tanks 1 2 full and only 1 person besides yourself on board This will give you a safe measurement As your boat is loaded down with people the bridge clearance...

Page 68: ...amage can result if proper winter storage is not followed in freezing climates Contact your Regal dealer for information regarding technical issues and parts Also refer to the maintenance section of t...

Page 69: ...these basic concepts of engine functionality include engine cooling lubrication and electrical systems The specific details of these systems can be found in the outboard manufacturer s owner s manual...

Page 70: ...n unobstrucrted at all times to avoid hazardous situations and to ensure a safe voyage Raw water is drawn up into the outboard vertical driveshaft housing through pick up feeds in the gearcase vicinit...

Page 71: ...ning properly The thermostat reads the temperature of coolant and determines whether to open or close a valve to allow warm sea water to pass into the exhaust manifold The thermostat may recirculate h...

Page 72: ...TEM Your engine utilizes a great deal of electronic equipment Some equipment sends signals between the engine and the Garmin while other systems set off alarms and still others are used by the engine...

Page 73: ...rk Plugs The spark plugs are the piece of equipment that help make ignition occur As electrical potential builds on one side of the gap based upon the energy distributed by the distributor the potenti...

Page 74: ...equipment was overworked Your outboard engine uses a helm mounted fuse box which is accessible by lifting the starboard bow backrest while others feature in line fuses while still others feature a mi...

Page 75: ...e a f c g a h i a j d a k d k _ Z k l a a Z _ a m e l a e n e o c d k o a k g o k d p a j d Z _ a a n d b c d h q a j e l a l e a g j q a m d r j q a k l a d k l Z _ a m e a g k g a k a d _ d k _ j k...

Page 76: ...flame producing agents before fueling The fill cap leads to the anti siphon valve and fuel tank When finished fueling ensure that the gas cap ratchets shut which ensures that vapors are contained with...

Page 77: ...m the tank to the engine by the pressure produced in fuel pumps Fuel filters are not able to remove large amounts of water If the fuel becomes contaminated with water the water separator filter s must...

Page 78: ...ve 5 Fuel Fill Line 3 Fuel Vent Line ENGINE LUBRICATION Whenever two components rub together friction causes wear on both components To minimize the wear on your engine a lubrication system has been p...

Page 79: ...between components An oil filter keeps metal particles and water out of the engine s interior Yahama engines performing on regular oil should have the oil drained and replaced after the first 20 hour...

Page 80: ...ion and improving ride performance This power trim fluid is used in hydraulic rams that maneuver the outboard unit and shouldn t need to be replaced very often if at all Power trim fluid should be che...

Page 81: ...choose We have allowed for the additional weight in equipment that might be added to the boat It is a good idea to carry a spare set of propellers and hand tools onboard in order to handle emergency...

Page 82: ...Bent propeller blades Objects wrapped around the prop such as fish line Decomposing propeller blades electrolysis symptom If equipped check the propeller rubber hub for slippage Contact a propeller s...

Page 83: ...power to the dashboard and the ignition switch will not function properly All electrical features are protected by a main battery management panel A fuse for the stereo memory and the automatic bilge...

Page 84: ...ttom of the hull accessible through a removable plate in the ski locker Fuel Gauge The fuel gauge indicates the level of fuel inside the fuel tank as sent by the fuel sender It is a good idea to keep...

Page 85: ...nd Fusion circuitry use individual sources to power up the system The key switch does not power up these 2 systems Also thedepthandfuelgaugedisplaysareindependent of the Garmin engine displays 1 To po...

Page 86: ...ent optional equipment that is not installed on your vessel Main Switch Panel Typical Panel Horn This momentary switch controls the electric bow horn located at the starboard bow area Make sure the ho...

Page 87: ...ircuitry is delivering current to the light fixture Wiper This switch controls the optional starboard windshield wiper Do not run the wiper blade over dry glass as it can leave permanent scoring on th...

Page 88: ...ighted icon as it indicates a leak Hatch This switch controls the electric actuator located inside the aft hatch compartment Should the batteries go dead plug in a 3 prong grounded 14 gauge extension...

Page 89: ...k to any faucets or showers mounted aboard Fresh WTR Other Vessel Switches Windlass If installed this optional switch activates the up and down movement of the anchor windlass This switch is located a...

Page 90: ...reverse outboard shifting operations Also the control features power trim up and down functions See the following page for component description and features Practice docking operations using the remo...

Page 91: ...ontrol lever forward from the neutral 12 o clock position to the 11 o clock position will engage forward gear with minimal throttle From the 11 o clock position to the 9 o clock position the vessel is...

Page 92: ...e neutral position Your control lever also features a trim control switch This switch allows the captain to set the trim for the drive from the helm either up or down to achieve a desired plane positi...

Page 93: ...ard used on selected control levers sometimes called an interrupter switch is attached to the operator and the remote control panel Should the operator lose control of the vessel and become dislodged...

Page 94: ...Engine Controls 3 27 Typical Switch Shown Above...

Page 95: ...aneuverability Furthermore it can be programmed for toe in and toe out settings which provide optimum vessel performance Also this system eliminates the need for a tie bar which normally is used in tw...

Page 96: ...Engine Controls 3 29...

Page 97: ...for maximum control taking into account individual driver needs and body types The steering wheel motion can be adjusted to various lock to lock turning postitions along with the ability to adjust wh...

Page 98: ...is an on demand system using minimal power The system uses two 60 amp breakers one per starting bat tery located near the battery source The breakers are between each battery twins and the PCM mountin...

Page 99: ...EPS power steering fluidl Do not use any substitutions It is a good idea to have extra fluid funnel and cloth on board for emer gency filling of the system Also note that there is a service valve lo...

Page 100: ...e steering smart cylinder It is footprinted with redundant senors to determine the steering re sponse to the wheel movement If one sensor should fail there are back up ones on each cylinder The stainl...

Page 101: ...n For information purposes components used in the smart cylinder are shown in the drawing This illustration may be useful too for ordering needed parts as well as a troubleshooting breakout Contact yo...

Page 102: ...battery and the automatic float switch is installed so that the bilge pump will automatically turn on as required The circuit to the bilge pump receives battery power regardless of the state of your...

Page 103: ...eller debris in the float switch bad motor or short circuit Typical Bilge Pump And Automatic Float Switch ELECTRICAL Your boat runs off direct current DC supplied by your battery It is called direct c...

Page 104: ...voltage If the volt meter shows below 12 volts there could be a charging system malfunction This condition needs to be addressed before the voyage and before the batteries become completely drained Y...

Page 105: ...G S 5 4 a b G S H P T B 7 K 4 G 7 8 J c D 5 S P S K 4 G 7 E 3 G H I 8 9 b 5 4 7 K 4 G 7 E V P S 8 9 V 7 O P V D 4 A G 4 I A B 4 D 8 9 b 5 B 4 F S 4 T 8 9 X G O d G D 5 4 N S H S 5 4 a c S 4 5 T C 5 S...

Page 106: ...shows activation See chapter 3 DC Circuit Protection As part of the direct current circuitry there are 2 fuse boxes located behind the dash for overcurrent protection of select electrical components...

Page 107: ...t y u z s u r t y u v r y u z x v q q w v x t z s z s y u w s z y q z s x v u r s z z z u v s t u u u u s y t y y w s z u v q s y z y z x t r t v y z w r s z t w v z q x y u r q z z s u v y z s z r v...

Page 108: ...lake or ocean These signals are measured and converted into a usable depth measurement displayed by the depth gauge at the helm This system does not register signal deflections due to fish Access to t...

Page 109: ...tator or other electrical system damage will occur Also for extended non use turn the battery switches to OFF The standard battery switch is located below the stbd aft side seat cushion With the stere...

Page 110: ...rolled by the house battery They include the house battery charger stereo memory CO monitor halon automatic fire extinguishing system and accessory breakers Note that all items except the stereo ampli...

Page 111: ...CHAPTER 4 House Battery Switch Engine Battery Switch Battery Charger Cord Receptacle Breaker Bank Breaker Bank Main Cabin Dash Bkrs System Warning ACR ACR BATTERY MANAGEMENT PANEL...

Page 112: ...blended with 10 ethanol and is known as E 10 at the pumps Marine engines used in your Regal boat may be operated with gasoline blended with no more than 10 ethanol and that meets the minimum octane sp...

Page 113: ...CHAPTER 4 TYPICAL EPA COMPLIANT FUEL TANK FILL HOSE VENT HOSE FEED HOSE ANTI SIPHON VALVE FUEL TANK LABEL...

Page 114: ...can not be serviced Also there is a carbon canister which functions much like the one in an automobile located between the fuel tank and hull side vent This canister under normal usage requires no ser...

Page 115: ...hich harm the environment There is a key that fits the fuel fill Use it to secure the fitting from leaking fuel Store the key in a safe place so it can be easily found for fueling Check the vent fill...

Page 116: ...on each outboard engine under the motor shroud cover which should be serviced per outboard motor manufacturer Also Regal installs for each outboard an in line 10 micron water separator filter which is...

Page 117: ...ump which supplies fresh water When the water supply line is full a pressure valve switch releases and the fresh water pump stops We recommend turning the water pressure switch off when the vessel is...

Page 118: ...nt bow The water tank itself is found amidships at the helm walk thru to the bow It is beneath the cockpit floor Periodically check hose clamps for tightness Note that if the fresh water pump continue...

Page 119: ...ing and refilling The lower tank contains a capacity gauge Before each outing check the waste level since it is illegal to dump waste within and extending out to the United States territorial limit Fo...

Page 120: ...ound there in more detail Pre Departure Questionnaire n Have all fluid levels been topped off n Is the fuel tank full n Is all safety equipment accounted for and easily accessible n Are navigation lig...

Page 121: ...ond person been briefed on operational procedures should the skipper become disabled n Are all gauges and electrical switches functioning properly n Has weather information been gathered and analyzed...

Page 122: ...ll systems been checked for leaks n Has the battery switch been turned to the off position n Are all seacocks closed if applicable n Has the fuel tank been filled enough to prevent condensation n Is t...

Page 123: ...near the fueling dock Close all portholes hatches and doors to keep vapors from blowing aboard and settling in the bilge Tie up your boat securely at the fuel dock Identify the fuel fill Unfortunately...

Page 124: ...ly spilled with a clean rag and dispose of it on shore After Fueling Close all fuel fill openings tightly Use a fuel key if needed Open all portholes hatches and doors if applicable Sniff in the bilge...

Page 125: ...ition Start engine only in a well ventilated location to avoid CO buildup Set the remote control handle in the neutral position Advance the neutral throttle position as instructed in the engine owner...

Page 126: ...S S Z T O d d Q d R O T Q R e d T O U S f g O U R e b Advance the remote control in the neutral throttle position as recommended in the engine manual but do not race the remote control in the neutral...

Page 127: ...ds The electronic helm footprint eliminates the need for hydraulic fluid at the dash Check the steering system for full steering port and starboard before disembarking Refer to the steering manufactur...

Page 128: ...his will permit the fender to be tied off to fit a variety of marina dock and tidal situations Be sure the fender is correct for the vessel size It is a good idea to carry extra fenders but half a doz...

Page 129: ...ern The stern line leads from a rear cleat to a piling or cleat on the dock astern of the vessel This line keeps the boat from moving ahead For small vessels these are the only lines needed for normal...

Page 130: ...s need to be kept in place against piles 1 Bow line 2 After bow spring 3 Forward quarter spring 4 Stern line 1 2 3 4 TYPICAL PIER MOORING FENDER TYPICAL PILING MOORING Boat Mooring Most boats can be s...

Page 131: ...y shouldn t be too heavy that they lose their shock absorbing capabilities Use the right size line for the vessel since a line to large for the boat will pull hard against the vessel since it won t be...

Page 132: ...are fairly easy to back up and maneuver with a little knowledge and docking practice One of the most important aspects of the process is to keep your calm in the wake of a busy marina Basically the r...

Page 133: ...centered C Center the wheel to align the boat parallel with the dock If the stern is too far from the dock shift to neutral then put the wheel hard over to port and then go forward a second or two Con...

Page 134: ...information on how outboard boats handle in normal conditions Gathering Headway When a outboard drive is not moving forward or reverse in the water and the propeller is not turning shift in neutral t...

Page 135: ...starboard as the bow turns to port As the vessel operator gains experience he will better gauge each maneuver and speed situation In this way he will understand the handling characteristics of his bo...

Page 136: ...erse the water flowing by the gearcase As the power is increased the propeller thrust becomes strong enough to stop the flow of water past the lower unit and as the throttle is advanced it reverses it...

Page 137: ...nd sends information to the chartplotter showing a reading The purpose of the power trim tilt is to enable the operator to change the angle of the outboard drive while at the helm Changing the angle o...

Page 138: ...tem when running in reverse Observe the trim tilt gauge which indicates the boat s bow position achieved by the trim angle of the vertical drive unit Bow Up corresponds to the upper portion of the tri...

Page 139: ...running against a choppy wave condition It is also used when pulling water skiers tubers kneeboarders etc In this position the boats bow will want to go deeper into the water If the boat is operated...

Page 140: ...ntion to your charts for descriptions of any shallow areas along with marked submerged objects Always post a lookout when operating in shallow water Trim your outdrive up as needed to provide adequate...

Page 141: ...CHAPTER 5 5 22 TRIMMED TO FAR IN POSITION TRIMMED TOO FAR OUT POSITION WELL TRIMMED LEVEL POSITION Typical Examples Stern drive shown...

Page 142: ...or select a well protected area preferably with a flat bottom Contrary to modern belief you do not throw the anchor over while the boat is making headway or moving forward In fact the bow of the boat...

Page 143: ...e or cleats to secure lines for towing Deck hardware is intended for mooring and anchoring and is not designed to withstand the strain and pull of towing Rather than tie the line to your cleats on dec...

Page 144: ...was founded primarily on English law fundamentals and basically says that a vessel distressed in danger of flounder if rendered assistance from a towing company or private agency can be forced to reli...

Page 145: ...the basic nautical knots and will use them when on the water Take the time to know the basic knots A useful knot to learn for general docking is the figure eight with one end reversed By turning the f...

Page 146: ...once Never use water on gasoline oil or electrical fires When you dump water on an electrical fire you can be shocked since water conducts electricity Follow these instructions if a fire breaks out Fi...

Page 147: ...le danger signs loss of breathing unconsciousness severe bleeding and heartbeat If you determine the individual is not breathing or unconscious place the victim on their back on a hard surface and do...

Page 148: ...or help on the radio and get the person out of the water Symptoms are 1 Shivering that if condition is advanced may stop 2 Confusion clumsiness or slurred speech 3 Rigid muscles 4 Semiconscious to unc...

Page 149: ...follows 1 Observe all regulatory agency policies regarding marine toilets 2 If equipped with a holding tank use marina pump out facilities 3 If used make sure bottom paints are legal and ecosystem fri...

Page 150: ...vessel Select equipment described may not be installed on your boat or the pictorials may not exactly resemble equipment on your craft Remember Regal is constantly improving its product line and ther...

Page 151: ...CHAPTER 6 WINDLASS GIPSY WINDLASS SWITCH ROPE LOCKER SNAP HOOK LANYARD CLEAT SAFETY CLUTCH FAIL SAFE LEVER CONTROL ARM ANCHOR SWIVEL SAFETY PIN ANCHOR SHANK ANCHOR WINDLASS...

Page 152: ...through the windlass A 50 amp breaker for windlass overcurrent protection is located at the battery management panel See illustration in this chapter There is a lanyard with a snap hook to add holding...

Page 153: ...chor rode There is a handle in the anchor locker that inserts into the gypsy drive cap located on top of the windlass framework With the handle inserted in the cap turn the handle clockwise which grip...

Page 154: ...or rode is paid out disengage the switch and tie off the rode to a cleat since it is not recommended to let the windlass mechanism be the only source holding the rode to the anchor on the sea bottom A...

Page 155: ...ignated by specifications 4 Always tie off the anchor rode to the designated cleat 5 Do not use the windlass to pull or tow another vessel 6 Always shut off windlass breaker or main battery switch bef...

Page 156: ...that during the retrieval process use the engine to gather headway Do not let the vessel sit directly on top or over the area where the anchor lies because the chain rode could damage the hull topside...

Page 157: ...INGUISHER IS ACTIVATED IMMEDIATELY SHUT DOWN ALL ENGINES POWERED VENTILATION BLOWER ELECTRICAL SYSTEMS AND EXTINGUISH ALL SMOKING MATERIALS DO NOT OPEN THE ENGINE COMPARTMENT UNTIL A SUITABLE AMOUNT O...

Page 158: ...For system information refer to the automatic fire extinguisher manufacturers manual 5 6 7 8 9 8 7 8 7 9 5 A B C 9 7 7 A D 5 A B E F 7 6 5 G 7 H 5 9 D 5 I A 8 J 8 B 8 J 5 J A K 6 5 G 7 5 B 5 L 5 9 7 5...

Page 159: ...an approved extension cord as indicated in the next page warning The available current will be able to support on board components such as cockpit refrigerator stereo system cockpit heater along with...

Page 160: ...metals used on boats such as stainless steel At the end of the day you want your underwater metals protected and you want your zincs to erode at a predictable rate for ease of maintenance With the gal...

Page 161: ...he the aft side of the battery switch bulkhead Its purpose is the distribute a charge to either battery as needed to keep them in a peak charge condition As part of this system is a 50 amp main breake...

Page 162: ...Equipment Operation X Y Z Typical Dual Battery Switch Circuitry Front View...

Page 163: ...CHAPTER 6 _ Dual Battery Switch Circuitry Rear View...

Page 164: ...Operation a b c Optional board racks attach to the Power Tower Pull up on the latch to move the board rack body It will reach a detent and lock Use the bungee cord to hold the boards in the slots BOA...

Page 165: ...ons One is longer than the other Make sure both bars are seated in the liner detents Typical bow seating shown Place cushion on bars Make sure the cushion is completely seated on the bars before attem...

Page 166: ...The thruster will assist in slow speed maneuvering especially around a dock or close mooring situations It operates similar to an gaming or marine engine joystick To activate the joystick push and hol...

Page 167: ...ecure latch To store fold against the walk thru and secure the folding latch Note there is a starboard side storage drawer along with a hide away trash receptacle Peri odically wipe the plexiglas door...

Page 168: ...h but the automatic mode utilizes a float switch Float switches have a float that sits at water level and when the float reaches a certain height it trips the switch and activates the bilge pump Perio...

Page 169: ...tach to an optional bow cover This strip can be used to align the covers with your boat Simply align the Velcrod edge with the windshield Ensure the center windshield is in the closed position Start s...

Page 170: ...AL COCKPIT TONNEAU BOW COVER BOW COVER COCKPIT COVER Note Before towing roll up the cockpit cover and bow cover Store them in a locker to prevent it from blowing out of the vessel Do not yank on the s...

Page 171: ...CHAPTER 6 CANVAS TRAVEL COVER...

Page 172: ...ng boat at highway speeds Tie cover securely to bow and stern eyes Do not exceed manufacturer s miles per hour speed limit Once on the road periodically pull over and check cover ratchet strap and per...

Page 173: ...bimini sunshade must be rolled up and stored in the boot The sunshade assembly must be collapsed back against the tower and clipped around the tower with the quick release clips This is also how the s...

Page 174: ...isplays are independent of the Garmin engine displays Chartplotter Quick Start 1 To power up the Garmin GPS press the on button located at the upper charplotter display 2 Load chart flash card into sl...

Page 175: ...ith a heavy duty backing As required snaps are installed Note Before towing roll up the cockpit carpet and store it in a locker to prevent it from blowing out of the vessel Do not yank on the carpet t...

Page 176: ...bacteria mold and mildew for the product s life When storing your seagrass mats always roll with the face of product out with the backing facing in Do not fold or crease as the backing may split Vacu...

Page 177: ...ss adding to its appeal It sands like wood resulting in a natural wood look and feel It provides superior grip making it great for boating in general and water sports It is stain resistant with most s...

Page 178: ...ver securely Pull the latch pin and hold until the table pedestal leg slides in the receiver sleeve Then release the latch pin When installed there are normally table receivers located in select cockp...

Page 179: ...ounder will automatically change to the fathoms f mode and continue to display depths to around 54 fathoms When the depth becomes larger than 200 feet the display will return to the feet mode Limits o...

Page 180: ...ain the shallow depth alarm setting is displayed This is the shallowest water that will energize the alarm Press and hold the up or down arrow keypads to adjust the reading to the desired depth DEPTH...

Page 181: ...ess the ON OFF MODE keypad until the depth reading appears KEEL OFFSET By pressing the ON OFF MODE keypad again the alarm will display the keel offset setting KL It can be set so the depth finder show...

Page 182: ...Equipment Operation Depth Gauge With Functions...

Page 183: ...ring To operate turn on the helm switch marked docking lights It is recommended not to use the docking lights while navigating in open water at night since the illumination could cause a glare on the...

Page 184: ...alone to tighten it After your outing while the boat is angled on the ramp remove the drain plug to eliminate any bilge water accumulation If the water stream is diminished check for foreign objects s...

Page 185: ...be dangerous 2 Do not operate the barbecue in rough seas or while under power 3 Do not use burning type charcoal briquettes or volcanic stones 4 Never light the barbecue with the lid closed 5 Never g...

Page 186: ...ith soapy water to check for leaks See the information on gas leaks 14 Never try to adjust the regulator It is factory set for best operation 15 Usecommonsensearoundthe grill A portable fire extinguis...

Page 187: ...Fit the grill mount assembly to the grill and into the deck fitting Make sure the grill is positioned securely Screw on the propane bottle With a long match or propane starter apply flame to the burn...

Page 188: ...dissipate Once lit adjust the flame to the desired temperature No preheating time is necessary Do not leave the grill operating unattended After cooking shut off the grill and allow the unit to cool...

Page 189: ...he Var a Brite light intensity detector The center window is the red warning indicator To check for fumes turn the ignition key to the on position The green power on LED will illuminate and the red wa...

Page 190: ...EXISTED CAREFULLY CHECK ALL FUEL LINES GAS LINES AND ANY OTHER POTENTIAL SOURCES OF GAS LEAKS IN THE EVENT OF AN ALARM Testing System The head unit can be tested for electrical continuity by pressing...

Page 191: ...ount of shade desired After use push the Sure Shade framework evenly in until it ratches in a locked position Note THE SURE SHADE IS TO BE USED ONLY WHEN THE VESSEL IS MOORED OF NOT MAKING HEADWAY DO...

Page 192: ...the helm controls the audible horn signal installed on your vessel Be sure to test the horn before each outing and learn the horn and bridge signals by reviewing the rules of the road chapter Hold the...

Page 193: ...compressor is useful for in flating a number of items including beach balls toys and tow components such as tubes To use plug the recep tacle into the 12 volt helm accessory outlet and use the proper...

Page 194: ...Power Tower shall be upright and all canvas stowed in their dedicated boots All attached canvas and bow hardware shall be checked for tightness before and after towing Cockpit carpet shall be rolled u...

Page 195: ...CHAPTER 6 9 9 Typical Power Tower Shown In Bridge Full Forward Position Bimini Top Sunshade Zipped In Boot Typical Power Tower Canvas Shown In Booted Cruise Position...

Page 196: ...Equipment Operation...

Page 197: ...ard visually monitor the port and starboard deck to ensure all passengers body parts are clear of the hinge mechanism This same procedure applies for lowering the mechanism to the original position Th...

Page 198: ...ts activities Be sure to fasten the mirror tightly so it stays in place when encountering waves wakes and maneuvering in busy waterways Note The mirror does not replace the need for an observer during...

Page 199: ...or backward simply press the switch control arrow position toward the bow or the switch control arrow toward the stern To utilize the bolster cushion simply grab the front of the cushion and pull it...

Page 200: ...d up to 12 withtheuseof astandard switch mounted at the walk thru area This feature permits additional cockpit space while entertaining at the dock or anchored To extend the cockpit seating aft simply...

Page 201: ...e the pull latch located at the front of each seat This illustration shows the seat backrest in the forward facing position If the seat is in the lounge or aft facing position simply pull the latch an...

Page 202: ...lounge seat configura tion Note All seats need to be posi tioned with the backrest toward the stern and in a locked position before the captain starts to gain forward headway speed Also people shall...

Page 203: ...your cruise Always try to balance the passenger load and supplies carried and stored on board Note that in the event of battery failure the aft hatch compartment can be opened by an emergency harness...

Page 204: ...o there is a special material called spaghetti mat that wicks water which may aid against mildew DO NOT open the floor locker while underway Ensure the floor locker is in the locked position after use...

Page 205: ...ways appoint a person to keep their eye out for the tow line when the vessel is running to prevent the line from being tangled in an object such as the outboard propellers Optional hard top models at...

Page 206: ...h the international IP waterproof standards Selected optional system components include an amplifier and additional speakers The unit features a UNI DOCK for safe charging and playback of the latest A...

Page 207: ...s not require any type of maintenance other than periodic checking of the wiring connectors for tightness Contact your closest Regal dealer for additional information Vessels with the optional Power T...

Page 208: ...ten warnings posted on the dash or swim platform regarding ladder load limits Swim Platform The swim platform is connected to the transom of your boat by hardware that should be periodically inspected...

Page 209: ...stain resistance Other features include noise reduction great traction even when wet body comfort when standing walking or leaning on the swim platform To clean small dirt particles first try soap hot...

Page 210: ...sed to rinse and help flush the toilet bowl When the flush valve is pulled forward the toilet bowl waste water empties into the holding tank Close the flush valve after each use The chemical toilet fe...

Page 211: ...p out procedure rinse the waste hose briefly to eliminate a build up of debris and odor before closing the pump out deck fitting Refurbish the holding tank chemical per the manufacturer s directions i...

Page 212: ...ivers the needed water to the toilet for flushing purposes when connected to a fresh water pump Holding Tank Unit features polyethylene composition A deodorant additive is required to keep the holding...

Page 213: ...m See the illustration on the next page 2 Next activate the switch located at the head wall to flush liquid or solid waste The system requires more water for solid over liquid waste Note the switch co...

Page 214: ...r s tank deodorant and cleaner until the discharge is clear Do not use chlorine based or caustic cleaners along with drain openers as damage to the seals and hoses may occur Rinsing the pump out hose...

Page 215: ...overboard pump uses an enhanced monitor panel with a built in key switch located in the head compartment To activate the macerator pump turn the switch on and completely to the right At this point the...

Page 216: ...e bow is lowered Lowering the port tab will cause the port stern to rise making the starboard bow lower Lowering the starboard tab will cause the starboard stern to rise making the port bow lower The...

Page 217: ...tude the boat speed accelerates and visibility increases If the boat is over trimmed it will plow the bow and the boat will lose maneuverability If this occurs simply short burst the bow up trim tab r...

Page 218: ...power trim to position the prop path parallel to the water flow At this point the trim tabs may need a fine adjustment One advantage of the trim tab system is that they allow trimming of the hull whil...

Page 219: ...ly necessary to make the vessel bow actually go down Optional trim tab indicators feature port and starboard icons As the tabs move up or down through the activation of the switches indicators illumin...

Page 220: ...tion light bars w LED bulbs make up the underwater lighting system The lights are located on the transom and in addition to the port and star board hull sides There is a dash switch for energizing the...

Page 221: ...nd locked when the boat is making headway Make sure both locking latches are firmly seated in a horizontal position against the windshield framework Magnets will secure the center windshield when open...

Page 222: ...onstant pressure on the wiper blade to ensure a more efficient removal of water on each sweep Note that windshield damage may result if the wiper blade is run over a dry windshield Periodically check...

Page 223: ...ce the vinyl life if they are not removed The frequency of cleaning depends on the amount of use and condi tions to which the vinyl is subjected Most common stains can be cleaned using warm soapy wate...

Page 224: ...r when not in use Use approved cleaners on carpet Always try on a test area first Many spots and spills can be removed using a cleaner combined with a clean white terry towel Try not to soak an area e...

Page 225: ...clean water and wipe dry Always test an area with a cleaner before applying it to a larger area Fiberglass Gelcoat Routine maintenance is the only practical way to keep the surface of your boat lookin...

Page 226: ...ving contaminants from gelcoat Never wax gelcoat in the direct sun When the washing and waxing as recommended does not restore the shine it may be necessary to use a fine rubbing compound Do not ap pl...

Page 227: ...sk your marine professional or Regal dealer for more information Fiberglass hulls are strong but they can be damaged A fiberglass hull has virtually no internal stresses Thus when a part is broken or...

Page 228: ...ply gelcoat to area leaving a slight lift above the surface 6 Cover the area with wax paper It will help the mixture to set up faster 7 Remove wax paper and shave off any extra gel coat with a razor b...

Page 229: ...eakage is through the sewn seams Because Sunbrella and the long term thread used is synthetic the holes created by sewing will not swell up and seal when exposed to water as cotton does Usually the mo...

Page 230: ...Uniseal We do not recommend any wax based treatments such as Thompson s Water Seal or any of the silicone products such as SC 15 or Aqua Tite Wax based products prevent the fabric from breathing and e...

Page 231: ...e edge of the material This can damage the canvas as well as the fasteners Use petroleum jelly on snaps to keep them from developing corrosion especially in harsh environments Hull Bottom Never use wi...

Page 232: ...d Tar D B Crayon D B Engine Oil B Spray Paint B Chewing Gum D A Shoe Polish D B Ballpoint Pen E B A Lipstick A B Eyeshadow E B Mildew C B A Wet Leaves C B A A Soft brush warm soapy water rinse dry B F...

Page 233: ...p hardware Refer to the outboard manufacturer s engine manual for appropriate propeller replacement Be sure to make a note of the propeller diameter and pitch while the vessel is in dry dock They are...

Page 234: ...r while removing the nut 3 Wedge a 2 x 4 between the skeg and the propeller Then use a deep socket and ratchet to remove the propeller nut 4 Next remove the washer and spacer Remove the propeller Remo...

Page 235: ...h the propshaft hole 6 Install a new cotter key and carefully bend the cotter pin ends over Note Using an old cotter key increases the chances of the propeller working itself off the shaft since the c...

Page 236: ...owner s pouch for additional information about maintenance procedures including adding fluid and bleeding the system See the photo above for bleed valve locations There is a fill valve at the helm Be...

Page 237: ...recently been charged The hydrogen gas generated by battery charging is highly explosive Set batteries on a block of wood rather than concrete since this pro cedure will help the batteries from losin...

Page 238: ...f l q h e g c c l g p c v i j z c d e f g h i j f e k h f l m k j n o t c v v i j f i h w e l v c f l h k r k j f w c w f g u e f h e l p x f w x c r h e w c l w c k h i t k j l h z c d e f g w e l v...

Page 239: ...as must be checked on a periodic basis At the engine end make sure all control cable hardware is tight and control cable brackets are secure An application of silicone spray on the cable ends periodic...

Page 240: ...r e o t t h e s e a t i n g includes periodic cleaning with products which are non corrosive and are recommended for vinyl Select seats use rams and hardware which needs to be periodically checked for...

Page 241: ...materials stuck in the strainer area or discharge hose Check all clamps and electrical connections for tightness A quick check of the bilge pump automatic float switch is afforded by lifting up on the...

Page 242: ...tions Examine each hose for signs of deterioration and leakage Check the fuel sender for loose bolts nuts and leaks at all areas of contact Also inspect the fuel tank for signs of leakage or abrasion...

Page 243: ...it as a designated fuse pack It is recommended that you carry on board all the different amperages When a fuse blows determine the cause before replacing the fuse Never replace with a higher amperage...

Page 244: ...cockpit do not discharge water directly at the stereo unit Possible damage may result As with any CD unit clean your CD s to keep them from skipping This process also aids in keeping dust out of the...

Page 245: ...ly active metals can occur whenever two or more dissimilar metals that are grounded connected by actually touching each other or through a wire or metal part are immersed in a conductive solution any...

Page 246: ...dd aftermarket products that are connected to the engine ground such as stainless steel steering aids and trim planes Zinc connected to aluminum will form a corrosion cell but the alumi num drive beco...

Page 247: ...and inspect anodes parts for signs of galvanic corrosion stray current corrosion or loose fasteners Contact your closest Regal dealer marine profes sional where signs of galvanic corrosion exist 2 Ne...

Page 248: ...d Provide good ground connec tions Nearby vessel with stray current Contact appropriate personnel Remove your vessel from water Paint on drive heavily worn exposing more metal Prime and repaint or ins...

Page 249: ...ter freshwater or brackish water See the photos below for anode location on your outboard Zinc anodes in brackish or salt water need to be checked more frequently If the anodes seem to be requiring fr...

Page 250: ...of maintenance items are covered in this chapter Since advanced ignition and fuel injection systems are used on outboard engines along with special factory training and tools it is best to contact yo...

Page 251: ...shroud engine cover on the port side of the outboard engine is an electrical cover Inside this cover is a variety of fuses protecting various engine components There are also extra fuses stored along...

Page 252: ...ith a clean pan empty the filter contents into the pan Water in fuel tends to hug the bottom and will show a different color than the fuel At least yearly or on an as needed basis replace the filter e...

Page 253: ...side of the outboard engine is a fuel filter Periodically check to ensure the fuel filter is clean and free of water When reinstalling the filter tighten to manufacturer s specifications Check for lea...

Page 254: ...owing 1 Ensure the outboard is setting in a flat vertical position or the dipstick may not display an accurate oil level 2 Remove the crankcase oil dipstick and wipe it clean 3 Reinstall the crankcase...

Page 255: ...e the m a n u f a c t u r e r s recommended type and visocity For changing crankcase oil contact your closest Regal dealer f o r a d d i t i o n a l information since they have the special tools and k...

Page 256: ...le end of a garden hose to the fitting and tighten it Make sure the fitting does not leak as the powerhead could overheat and cause internal damage It is best to perform this flushing procedure with t...

Page 257: ...Cosmetic Care Maintenance 7 35 Notes...

Page 258: ...ome of the items listed require technical training and tools Additional assistance is available in the outboard engine manufacturer s owner s manual Also you can contact your closest Regal dealer or m...

Page 259: ...CHAPTER 8 8 2 0 1 2 0 0 1 3 4 3 5 0 0 0 1 6 0 0 0 0 3 7 0 5 0 8 9 0 0 3 0 0 3 0 9 3 0 0 2 1 5 0 0 1 0 5 2 0 0 0 1 0 0 0 3 0 0 0 8 6 1 A B C 1 3 0 5 0 D E 0 0 0 0...

Page 260: ...N R N H N T R L K L H I f f G _ U Q R O H N T R G H I J N R U Q I _ b Q I _ g _ H I J O _ T I S d G R K G J S R T H G H H G O P I S b Q I _ h Q f Z b G Q _ H K i G J S a H G J H N R b _ T T S I S R N...

Page 261: ...q x q q y q s r s t v s v v s t x q w x y x z s t q s s t w x y x z s t q s s t v x u q q v s y q q t y q q s s t z q q q v s q t x y x z s w s t v x z q t q s s t z q y x q q q t y q q v q q v s s t...

Page 262: ...Troubleshooting 8 5...

Page 263: ...CHAPTER 8 8 6...

Page 264: ...Troubleshooting 8 7...

Page 265: ...CHAPTER 8 8 8 0 1 0 2 3 4 5 6 2 4 6 7 8 9 2 3...

Page 266: ...P D A J R C A P K L S H T U D J O D P D A B C D E F G C H I E D J D K L J A D H C M N C C J D J O D P D A M K A D Q C D Q K C R D A K V C M J O D P D A J K W C X C R C A P K L K W C C O H I L L D K O...

Page 267: ...arm buzzer sounds can vary The engine sounds an alarm icon lights in the case of one of the following causes Low Oil Pressure Engine Overheating POSSIBLE CAUSES MAY INCLUDE 1 Cooling system clogged 2...

Page 268: ...all relevant information in the owner s pouch Special winterization procedures are necessary for the boat equipment and systems Use the enclosed checklists to help you identify areas of concern and m...

Page 269: ...brasion and corrosion o Spray all exterior parts with a rust preventative OUTBOARD UNIT o Perform maintenance as referenced in the outboard manufacturer s owners manual Contact your Regal dealer o Rem...

Page 270: ...visual inspection to ensure boat is balanced properly on the trailer cradle or blocks o Cover boat with appropriate cover Tie down for protection from rain snow and or wind Prop up cover to provide p...

Page 271: ...r tank 6 Turn on fresh water pump switch 7 Open water faucet and purge until a steady stream of nontoxic antifreeze flows from the faucet If equipped do the same to the transom shower Turn the fresh w...

Page 272: ...n plug o Install battery and tighten all terminals o Check all equipment switches alarms gauges and breakers for proper operation o Add necessary chemicals and water to chemical head o Add water to fr...

Page 273: ...CHAPTER 9 Notes...

Page 274: ...air shocks which will assist in supporting the load As a rule of thumb 5 to 7 percent of the total trailer load should be on the trailer tongue Check all lights to ensure they all work properly You m...

Page 275: ...10 2 CHAPTER 10 TRAILER TERMINOLOGY TAIL LIGHT FENDER SAFETY CHAINS COUPLER PARKING JACK AXLE BUNK PAD FRAME ROLLER TYPICAL TRAILER SHOWN...

Page 276: ...Trailering 10 3 TYPICAL TONGUE SECTION TYPICAL WHEEL PARTS DESCRIPTION LEAF SPRING HUB BEARING LUG NUT WHEEL BOW CHAIN WINCH CABLE WINCH STAND TONGUE JACK MASTER CYLINDER BRAKE ACTUATOR COUPLER...

Page 277: ...and secure it with tape so it doesn t loosen and dangle on the road Check the trailer lug nuts for the proper torque Use a foot pound wrench and torque in a star sequence to the correct poundage as r...

Page 278: ...are tire 4 Lug wrench 5 Jack stand 6 12 volt air compressor found at automotive box stores 7 Spare bearing protector 8 Extra tie down straps 9 Trailer light bulbs 10 Brake pads and brake fluid 11 Grea...

Page 279: ...ssible anticipating your stops and giving yourself plenty of room for turning and stopping Avoid any quick turns or sudden jerks of the steering wheel Remember to maintain safe speed limits It takes l...

Page 280: ...dditional fenders to keep the sides of the boat from banging against the ramp walls use those as well Unhook the stern tie downs and the winch line to the bow Unplug the trailer harness connector so t...

Page 281: ...In 1 driver swings the rig near the launching ramp In 2 the driver cuts the vehicle toward the driveway In 3 the driver cuts the vehicle wheels to the left and then backs into the ramp as the trailer...

Page 282: ...cted to the cold water On roller or bunk style trailers back up until the aft roller is just at the water level This allows you to hook up the winch cable and to start cranking the boat on to the trai...

Page 283: ...ed on the trailer After pulling your boat away from the ramp be sure to go through all the checks involved before departure Reinstall the harness connector and check the lights brakes safety chain win...

Page 284: ...bove the part of the boat on a vessel which is above the interior of the boat Aft After aft is the boat section toward the stern or back of the boat Amidships toward the center of the boat from either...

Page 285: ...he boat to the lowest part of the boat which indicates how much water is required to float the boat FasTrac a proven hull bottom design which incorporates a full mid beam step that reduces drag by for...

Page 286: ...tation device required for each person aboard Port the left side of the boat when facing forward an easy way to remember the difference between port and starboard is that both port and left have four...

Page 287: ...f to fill up a tank Transom the vertical part of the stern Trim the boat s balance when properly loaded Wake the path of a boat left astern in the water Windward the direction from which the wind blow...

Page 288: ...hion 165 Bow Thruster 166 Bow Walk Through Doors 167 Bridge Clearance 67 Buoys Markers 67 D Dealer Responsibilities 16 Decomissioning 269 Depth Gauge 84 179 Direct Current Protection 106 Distress Sign...

Page 289: ...M Maneuvering 134 Maintaining PFD S 31 Masthead Light 38 Metal Cleaning 231 Minimum Equipment 41 Mooring Cover 171 F Fenders 128 Fiberglass 225 Filters 252 Fire Extinguishers 32 First Aid 147 Fishing...

Page 290: ...y Labels 24 Pre departure Questionnaire 120 Propellers 81 233 Pyrotechnic Devices 34 R Radio Communication 37 Rear View Mirror 198 Recommissioning 272 Required Safety Equipment 310 Right Of Way 59 Rul...

Page 291: ...dshield 221 Windshield Wiper 222 Winterizing 268 Wiring Color Codes 104 Y Yacht Plate 15 Z Zinc Anodes 249 T Tachometer 85 Technical 292 Toilet 119 210 212 Towing 143 Trailering 274 Transducer 108 Tra...

Page 292: ...s standard and optional equipment systems along with the technical information is subject to change without notice For more information contact your nearest authorized Regal dealer For the location of...

Page 293: ...12 2 FUEL FILL HOSE ANTI SIPHON VALVE FUEL FEED HOSE FUEL VENT HOSE FUEL FILL TYPICAL DOMESTIC COMPLIANT FUEL SYSTEM FUEL TANK SINGLE OR TWIN OUTBOARD S CARBON CANISTER FUEL SENDER...

Page 294: ...Technical Information 12 3 TYPICAL LABELS LOCATIONS Power Tower...

Page 295: ...INDUSTRIES 2300 JETPORT DRIVE ORLANDO FLORIDA 32809 TEL 407 851 4360 DATE APPROVED BY DRAWING TITLE DRAWN BY REVISION PROPRIETARY AND CONFIDENTIAL THE INFORMATION CONTAINED IN THIS DRAWING IS THE SOLE...

Page 296: ...ROPERTY OF REGAL MARINE INDUSTRIES ANY REPRODUCTION IN PART OR AS WHOLE WITHOUT THE WRITTEN PERMISSION OF REGAL MARINE INDUSTRIES IS PROHIBITED 1 OF 1 REVISION 2300 JETPORT DRIVE ORLANDO FLORIDA 32809...

Page 297: ...ESERVED PAGE REGAL MARINE INDUSTRIES DRAWN BY 2300 JETPORT DRIVE ORLANDO FLORIDA 32809 TEL 407 851 4360 1 OF 1 PROPRIETARY AND CONFIDENTIAL THE INFORMATION CONTAINED IN THIS DRAWING IS THE SOLE PROPER...

Page 298: ...Y OF REGAL MARINE INDUSTRIES ANY REPRODUCTION IN PART OR AS WHOLE WITHOUT THE WRITTEN PERMISSION OF REGAL MARINE INDUSTRIES IS PROHIBITED 1 OF 1 REVISION 2300 JETPORT DRIVE ORLANDO FLORIDA 32809 TEL 4...

Page 299: ...Technical Information...

Page 300: ...he forward and aft bulkheads No Mounting Brackets on the sides PAGE REGAL MARINE INDUSTRIES DRAWN BY 2300 JETPORT DRIVE ORLANDO FLORIDA 32809 TEL 407 851 4360 REVISION PROPRIETARY AND CONFIDENTIAL THE...

Page 301: ...EST 17 16 15 14 13 12 11 10 9 8 UWM06L 6 4 2 Part Number BILL OF MATERIALS UWM06W BOW STBD SPEAKER TUB BOW PORT SPEAKER TUB UWM06A UWM06B UWM06C UWM06E UWM06F UWM06G UWM06H UWM06J UWM06K UWM06M UWM06N...

Page 302: ...ON 37 44 UWM15H 25 UWM15F 42 41 UWM15D UWM15G 23 UWM15J UWM15L UWM15P UWM15Q 26 UWM15X UWM15Y UWM15Z COMPANION FLIP FLOP BACKREST UWM15B UWM15A 29 UWM14C UWM14B DASH BROW 18 ENGINE HATCH PORT OB PANEL...

Page 303: ...SOLE PROPERTY OF REGAL MARINE INDUSTRIES ANY REPRODUCTION IN PART OR AS WHOLE WITHOUT THE WRITTEN PERMISSION OF REGAL MARINE INDUSTRIES IS PROHIBITED REVISION 2300 JETPORT DRIVE ORLANDO FLORIDA 32809...

Page 304: ...PLUG INSERTS INTO BOAT BOW RECEPTACLE 1 2 3 4 16 GAUGE GREEN 16 GAUGE YELLOW 16 GAUGE BROWN 16 GAUGE WHITE TRAILER HARNESS 16 GAUGE BLACK 16 GAUGE GREEN 16 GAUGE YELLOW BLACK TRAILER CONNECTOR PLUG B...

Page 305: ...Technical Information Note Locate per Splash...

Page 306: ...Technical Information...

Page 307: ...K BOND 8 GRN 10 RING FLEX BILGE PUMP DT06 2S FLEX UNDER WTR LT 16 BLU GRN RECEPT 16 BLK PIN BULLETS DT06 2S FLEX FLEX DT06 2S FLEX GROUND BUSS 8 GRN FUEL TANK BOND 10 BLK FIRE BOTTLE 14 BLK BILGE PUMP...

Page 308: ...N 14 ORN BLK 14 BLK 25 UF FEM DOCKING LT 14 BLU 16 BLK BUTTS WIPER WINDLASS SOLENOID 16 GRN 16 BLU 250 UF FEMALES WINDLASS SWITCH 16 ORN 16 GRN 16 BLU 250 UF FEMALES SEAT LTS 16 BLU WHT 16 BLK BUTTS C...

Page 309: ...8 RING XSOME AMP SPKR LT 16 BLU YEL 16 BLK 25 UF MALES 16 CLR PORT 8 RING 16 BLU AMP ON FERRULE PIN 16 CLR STBD 8 RING 16 CLR RED PORT 8 RING SUBWOOFER 16 RED CLR 16 CLEAR 8 RINGS 16 CLR STBD 8 RING...

Page 310: ...Technical Information TYPICAL HULL HARNESS BREAKOUT...

Page 311: ...Technical Information TYPICAL SWITCH PANEL BREAKOUT...

Page 312: ...Technical Information TYPICAL DASH CHARTPLOTTER BREAKOUT...

Page 313: ...Technical Information TYPICAL GARMIN YAMAHA NEMA 2000 NETWORK...

Page 314: ...TION IN PART OR AS WHOLE WITHOUT THE WRITTEN PERMISSION OF REGAL MARINE INDUSTRIES IS PROHIBITED REVISION DRAWN BY REGAL MARINE INDUS PAGE DRAWING TITLE APPROVED BY DWG NO DATE 0 2 11 2016 2300 JETPOR...

Page 315: ...Gas Ram Telescoping Ladder Cleats Flag Post Mount 2 11 2016 1 OF 2 PROPRIETARY AND CONFIDENTIAL THE INFORMATION CONTAINED IN THIS DRAWING IS THE SOLE PROPERTY OF REGAL MARINE INDUSTRIES ANY REPRODUCT...

Page 316: ...DATE DWG NO APPROVED BY DRAWING TITLE ALL RIGHTS RESERVED PAGE REGAL MARINE INDUSTRIES DRAWN BY 2300 JETPORT DRIVE ORLANDO FLORIDA 32809 TEL 407 851 4360 REVISION PROPRIETARY AND CONFIDENTIAL THE INF...

Page 317: ...N PART OR AS WHOLE WITHOUT THE WRITTEN PERMISSION OF REGAL MARINE INDUSTRIES IS PROHIBITED 1 4 1 4 MID AREA TYP P S AFT AREA TYP P S BOW SECTION R 1 4 R 1 4 Hull Trim 2 Shear Knuckle Height 2 1 4 Min...

Page 318: ...TITLE ALL RIGHTS RESERVED PAGE REGAL MARINE INDUSTRIES DRAWN BY 2300 JETPORT DRIVE ORLANDO FLORIDA 32809 TEL 407 851 4360 REVISION PROPRIETARY AND CONFIDENTIAL THE INFORMATION CONTAINED IN THIS DRAWIN...

Page 319: ...THE WRITTEN PERMISSION OF REGAL MARINE INDUSTRIES IS PROHIBITED REVISION 2300 JETPORT DRIVE ORLANDO FLORIDA 32809 TEL 407 851 4360 DRAWN BY REGAL MARINE INDUSTRIES PAGE ALL RIGHTS RESERVED DRAWING TI...

Page 320: ...EL 407 851 4360 DATE APPROVED BY DRAWING TITLE DRAWN BY REVISION PROPRIETARY AND CONFIDENTIAL THE INFORMATION CONTAINED IN THIS DRAWING IS THE SOLE PROPERTY OF REGAL MARINE INDUSTRIES ANY REPRODUCTION...

Page 321: ...PROPERTY OF REGAL MARINE INDUSTRIES ANY REPRODUCTION IN PART OR AS WHOLE WITHOUT THE WRITTEN PERMISSION OF REGAL MARINE INDUSTRIES IS PROHIBITED 1 OF 1 GN 15 Helm Floor 1 7 2 3 Seated Low Eye Positio...

Page 322: ...IS DRAWING IS THE SOLE PROPERTY OF REGAL MARINE INDUSTRIES ANY REPRODUCTION IN PART OR AS WHOLE WITHOUT THE WRITTEN PERMISSION OF REGAL MARINE INDUSTRIES IS PROHIBITED REVISION 2300 JETPORT DRIVE ORLA...

Page 323: ...IS DRAWING IS THE SOLE PROPERTY OF REGAL MARINE INDUSTRIES ANY REPRODUCTION IN PART OR AS WHOLE WITHOUT THE WRITTEN PERMISSION OF REGAL MARINE INDUSTRIES IS PROHIBITED REVISION 2300 JETPORT DRIVE ORLA...

Page 324: ...Technical Information...

Reviews: