background image

48

  |  Declaration Of Conformity

38.  DECLARATION OF CONFORMITY

Manufacturer:


CEI Conrad Electronic International (HK) Limited

License holder:


CEI Conrad Electronic International (HK) Limited

Address:


 18th Floor, Tower 2, 
Nina Tower, No. 8 Yeung Uk Road, 
Tsuen Wan, New Territories, Hong Kong 

We declare on our own responsibility, that the product:

Product description:

   RC EYE NovaX 350

Model: 


88012RC

is in conformity with following directives and standards or regulations:

ETSI EN 300 328 V1.8.1 (2012-06)
ETSI EN 301 489-17 V2.2.1 (2012-09)
R&TTE (1999/5/EC)

CE marking on product:       

Hongkong, 

8 Jun 2015

CEI Conrad Electronic International (HK) Limited 

18th Floor, Tower 2, Nina Tower, No. 8 Yeung Uk Road, 

Tsuen Wan, New Territories, Hong Kong 

Place and date of issue

Manufacturer/Authorized representative name and signature

39.  PRODUCT SUPPORT

Visit  http://www.rclogger.com/support

  or  call  +852  2559  2662  for  product  support. 

Additionally,  visit  our  Online  Ticket  System  at 

http://support.rclogger.com

  for  any  RC 

Logger inquiry.

40.  LEGAL NOTES

These  operating  instructions  are  published  by  CEI  Conrad  Electronic  International 

(HK) Limited, 18th Floor, Tower 2, Nina Tower, No. 8 Yeung Uk Road, Tsuen Wan, New 
Territories, Hong Kong. 

All  rights  including  translation  reserved.  Reproduction  by  any  method,  e.g.  photocopy, 
microfilming, or the capture in electronic data processing systems require the prior written 
approval by the editor. Reprinting, also in part, is prohibited. The operating instructions 
reflect the current technical specifications at time of print.

© 2015 by CEI Conrad Electronic International (HK) Limited

88012RC_88014RC_v2_0815_02_m_en_(3)_M1

Summary of Contents for NovaX 350

Page 1: ...88012RC ArF 88014RC RtF NovaX 350 Operating instructions M1...

Page 2: ...2 EVER WONDERED WHAT INNOVATION LOOKS LIKE NovaX 350...

Page 3: ...issioning 13 15 3 During Operation 13 15 4 Outdoor flying locations 13 15 5 Batteries 13 15 5 1 General information 13 15 5 2 LiPo batteries 14 15 6 Miscellaneous 15 16 SAFETY FEATURES AND ACCIDENT PR...

Page 4: ...fails 28 27 3 Switching between learning calibration 28 27 3 1 Starting and ending a calibration procedure 28 27 3 2 Front LED colours when calibrating 29 27 4 Binding transmitter and receiver 29 27...

Page 5: ...ntroduction 42 32 2 Attaching the camera 42 32 2 1 Action mounts 42 32 2 2 Double sided tape 42 32 2 3 Alternative mounting methods 42 32 3 Attaching a gimbal 42 32 3 1 Gimbal platform 42 32 3 2 Conne...

Page 6: ...T INSTRUCTIONS See chapter section 15 Safety instructions on page 12 See chapter section 26 3 Installing the legs on page 25 See chapter section 26 4 Installing the PPM receiver on page 26 See chapter...

Page 7: ...Calibration on page 26 then 2 Learning see chapter 27 Calibration on page 26 1 Gyro see chapter 27 Calibration on page 26 then 2 Compass see chapter 27 Calibration on page 26 See chapter section 28 Te...

Page 8: ...safely and to your full satisfaction For easier handling the operating instructions maintenance manuals are divided up into different modules Each set of instructions is labelled with its correspondi...

Page 9: ...e maintaining a fresh different and extremely manoeuverable construction allowing even the most challenging acrobatic flight There is sufficient available surface to mount your favourite camera system...

Page 10: ...1 x 5200 mAh 3S 40C LiPo Battery Pack 1 x Propeller Set ABS plastic 1 x Washer and screw set for carbon fibre propellers 89106RC 1 x Allen key 2 5 mm 1 x Landing Gear Set Long 1 x Landing Gear Set Sho...

Page 11: ...Set 89100RC NovaX Battery Pack 69017RC LiPo 2 3S Balance Charger 89102RC NovaX Transmitter 89103RC NovaX GPS 89104RC NovaX Spinner Set 89105RC NovaX Bumper Set 89106RC NoveX Propeller Set carbon fibre...

Page 12: ...Product The device is not a toy Keep it out of the reach of children and pets Do not leave packaging material lying around carelessly These may become dangerous playing material for children If it is...

Page 13: ...ation can cause incorrect responses Do not direct your model towards spectators or yourself Motor electronics and flight battery may heat up during operation Wait 5 to 10 minutes before recharging or...

Page 14: ...nadvertently and cause damage or injury Rechargeable LiPo batteries are very susceptible to moisture due to the chemicals they contain Do not expose them to moisture or liquids Risk of explosion Do no...

Page 15: ...V per cell is reached e g 3 2 V Alternatively optical undervoltage displays are also recommended 15 5 2 3 Correct dimensioning As the current drawn rises the battery pack warms and the usable capacity...

Page 16: ...d 16 2 Accident prevention The NovaX 350 is a professional toy Professional in this respect means having sufficient knowledge of its functions and being aware of the possible dangers involved Careless...

Page 17: ...RICAL AND ELECTRONIC CONNECTIONS AND COMPONENTS 18 1 Wire slack It is important to avoid wire slack You can eliminate wire slack by twisting the wires Note Fig 1 Fig 1 18 2 Short cicuiting The power b...

Page 18: ...not take off 20 PCB BOARD CH R h RT R37 R4 R12 R3 R1 R8 R2 R9 R10 R32 R33 R35 R34 R6 R13 C14 C17 C9 D2 C3 R25 L30T L302 R26 C1 E19 E18 R11 F3 PPM_IN X1 C1 C2 C13 U1 R7 R6 SWD R30 C16 R14 D1 CON C24 S...

Page 19: ...7 8 9 10 11 12 13 14 2 3 4 5 6 1 Propeller 2 Motor arm 3 Rotor 4 Motor mount front red 5 Landing leg detachable 6 Front LED 7 Canopy 8 T joint 9 Landing rubber 10 Rear LED 11 Elliptical 12 Motor moun...

Page 20: ...20 Dimensions 22 DIMENSIONS 22 1 Short legs 283 mm 283 mm 250 mm 169 mm 58 mm 2 0 3 m m 3 4 7 m m...

Page 21: ...Dimensions 21 22 2 Long legs 283 mm 283 mm 250 mm 241 mm 130 mm 2 0 3 m m 3 4 7 m m...

Page 22: ...tes a flight status in which the NovaX 350 neither rises nor falls so that the upwards directed uplift force is equal to the downwards directed weight 23 6 Mode 1 Mode 2 Mode 1 and Mode 2 refer to the...

Page 23: ...oving After removing the canopy the PCB boards are exposed Do not touch any electronic components Electrostatic discharge causes damage Never remove the metal shield Never use metal screws in the cano...

Page 24: ...0 25 2 Charging For charging use the supplied balance charger 69018RC only supplied with 88014RC RtF or a charger capable of charging the NovaX 350 flight battery Read the operating instructions suppl...

Page 25: ...hat assembly does not require any special knowledge and can easily be completed in a few steps Nevertheless you are strongly advised to read through the respective chapters before you start to install...

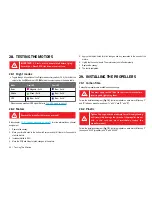
Page 26: ...tick the receiver on the NovaX 350 s underside Connect the PPM and telemetry cable to the corresponding header pins on the receiver 3 5 Replace the camera platform and tighten the nuts 4 6 Affix one a...

Page 27: ...Calibration 27 2 1 90 90 90 1 2 3 4 5 6 Fig 6...

Page 28: ...nect the flight battery and re connect it 3 Restart the procedure Successfully completed calibration procedures can be skipped 27 3 Switching between learning calibration You do not need to perform th...

Page 29: ...follow the given examples By default the NovaX 350 is configured to MODE 2 If your transmitter does not provide two 3 way toggle switches please refer to the workaround explained in 27 5 4 Futaba tran...

Page 30: ...us solid not active blinking active 7 Start the calibration procedure The blue LED starts to blink 88014RC RtF Observe 27 5 2 88014RC 89102RC Auxiliary switch assignment on page 31 8 Learn the channel...

Page 31: ...he given explanation where A shows channel 5 settings in normal flight GPS mode is activated and B the channel settings when R T H is triggered 27 5 3 2 Programming R T H Regardless of the transmitter...

Page 32: ...POINT FUNCTION THR CUT END POINT 2 2 LIMIT AUX1 0 100 6 100 135 AUX2 135 100 7 100 135 AUX3 135 100 8 100 135 AUX4 135 100 100 135 Fig 11 27 6 Calibrating the gyro You MUST perform this step with pre...

Page 33: ...ove the canopy 12 Complete the procedure 27 8 ESC Electronic speed controller ESC calibration is performed during production and does only need to be performed again after replacing the ESC If you enc...

Page 34: ...ds to start the motors 3 Increase throttle to 50 4 Move the PCB and listen for pitch changes in the motors 5 Apply stick inputs listen for pitch changes and any anomalies in the sound of the motors 6...

Page 35: ...alling The Propellers 35 Blue L Left R Right Red Front Rear Red Black Fig 14 Front Rear Red Black 4x 8045R 8045 2 5 mm M3 x 5 mm Cap nut L Left R Right or Label Blue Red 8045R 8045 2 5 mm M3 x 5 mm Fi...

Page 36: ...red altitude Use the mode as following 1 Activate the Basic mode 2 Lift the NovaX 350 up to the desired altitude Move the throttle towards its centre position 3 Activate the Altitude mode on your tran...

Page 37: ...H switch in position 0 or 1 respectively Activated R T H switch in position 1 or 2 respectively 30 5 3 Procedure When triggered returning to home follows a simple two step procedure the NovaX 350 is a...

Page 38: ...n flights Does not permit flips Custom Pos 3 Custom agility levels and I R P C settings Set in EYECONTROL app Replaces either AP or Sport agility The user can set the agility according to their prefer...

Page 39: ...f the NovaX 350 s position in flight In other words if the pilot takes off with the NovaX 350 s nose facing away from them stick input always will affect the course relative to the take off position F...

Page 40: ...re for 2 seconds Move the throttle stick into the left bottom corner and hold it there for 2 seconds 31 4 1 Directional checks It is crucial to confirm the proper functioning of the transmitter before...

Page 41: ...drifting Drifting refers to movement out of position when in hover flight without aileron or elevator input Refer to your transmitter s operating instructions for more information 31 4 5 Gradual learn...

Page 42: ...le sided tape A convenient way to mount a camera is with double sided tape Ensure the tape s adhesive force can hold the weight of the camera also during disturbances You are advised to consult a prof...

Page 43: ...eal operating temperature slower as compared to under favourable conditions such as room temperature Under such cold conditions your unit may tend to drift in any direction increasing gradually Small...

Page 44: ...ers on page 34 34 DISPOSAL 34 1 General In order to preserve protect and improve the quality of environment protect human health and utilise natural resources prudently and rationally the user should...

Page 45: ...nterference received including interference that may cause undesired operation 36 2 Statement according to FCC part 15 21 Warning Changes or modifications to this unit not expressly approved by the pa...

Page 46: ...l safe PPM failed Loss of RF signal White Blinks continuously 0 5 Hz Flight Check Error GPS compass failed Start up main board self test Red Blinks continuously 1 Hz Pressure sensor failed Gyro failed...

Page 47: ...he process White Blinks continuously 1 Hz Continuous single beeps 1 Hz White Blinks continuously 5 Hz Continuous single beeps 2 Hz White Blinks continuously 0 5 Hz Beep at each stage of process Red Bl...

Page 48: ...ng Kong Place and date of issue Manufacturer Authorized representative name and signature 39 PRODUCT SUPPORT Visit http www rclogger com support or call 852 2559 2662 for product support Additionally...

Page 49: ...49...

Page 50: ...50...

Page 51: ...51...

Page 52: ...52 www rclogger com...

Reviews: