34
| Testing The Motors
28. TESTING THE MOTORS
IMPORTANT! All tests must be completed before flying.
Ensure the » NovaX 350 stands on a level surface.
28.1 Flight modes
>
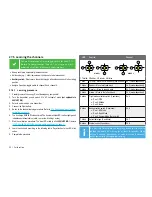
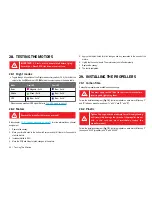
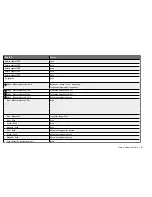
Toggle through all positions of the flight mode auxiliary switch (Ch 5). Verify that the
colour of the front
(6)
and rear LED
(10)
match the colours given in the below table.
Mode
Front LED
Rear LED
Basic
Magenta – Solid
Blue – Solid*
Altitude
Green – Solid
Blue – Solid*
GPS
Blue – Solid*
Blue – Solid*
* When receiving excellent GPS signal. Refer to
‘30.4 GPS mode’ on page
36
.
28.2 Motors
Remove the propellers before you proceed!
Study chapter
‘27.5.1 Learning procedure’ on page
30
for more information on channel
assignment.
1.
Remove the canopy.
2.
Move your throttle stick to the bottom left corner and hold it there for 2 seconds to
start the motors.
3.
Increase throttle to 50 %.
4. Move the PCB and listen for pitch changes in the motors.
5.
Apply stick inputs, listen for pitch changes and any anomalies in the sound of the
motors.
6.
Lightly tap the control board. The motors must shut off automatically.
7.
Replace the canopy.
8. The test is completed.
29. INSTALLING THE PROPELLERS
29.1 Carbon fibre
Carbon fibre propellers are available as an accessory.
You must apply Loctite
®
(Blue) to the screw threads before
inserting and tightening them.
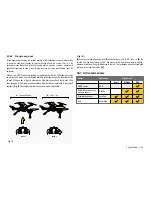
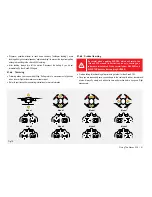
Follow the installation diagram
[ Fig. 14 ]
. Install a propeller on each motor. Match up ”L”
and ”R” labels on propeller and boom (”L” with ”L” and ”R” with ”R”).
29.2 Plastic
Tighten the cap nut with moderate force! Overtightening
will irreversibly damage the thread of the propeller mount
axle. In this case you must immediately replace the
propeller mount!
Follow the installation diagram
[ Fig. 15 ]
. Install a propeller on each motor. Match up ”L”
(boom) and ”8045” (propeller) and ”R” and ”8045R”.
Summary of Contents for NovaX 350
Page 1: ...88012RC ArF 88014RC RtF NovaX 350 Operating instructions M1...
Page 2: ...2 EVER WONDERED WHAT INNOVATION LOOKS LIKE NovaX 350...
Page 21: ...Dimensions 21 22 2 Long legs 283 mm 283 mm 250 mm 241 mm 130 mm 2 0 3 m m 3 4 7 m m...
Page 27: ...Calibration 27 2 1 90 90 90 1 2 3 4 5 6 Fig 6...
Page 49: ...49...
Page 50: ...50...
Page 51: ...51...
Page 52: ...52 www rclogger com...


