4
Hawkeye® Nozzle Control and Sidekick Pro ICD Setup: Tools Menu Settings Definitions
31
HAWKEYE® NOZZLE CONTROL AND SIDEKICK PRO ICD SETUP
SYSTEM SETTINGS TAB - PRESETS
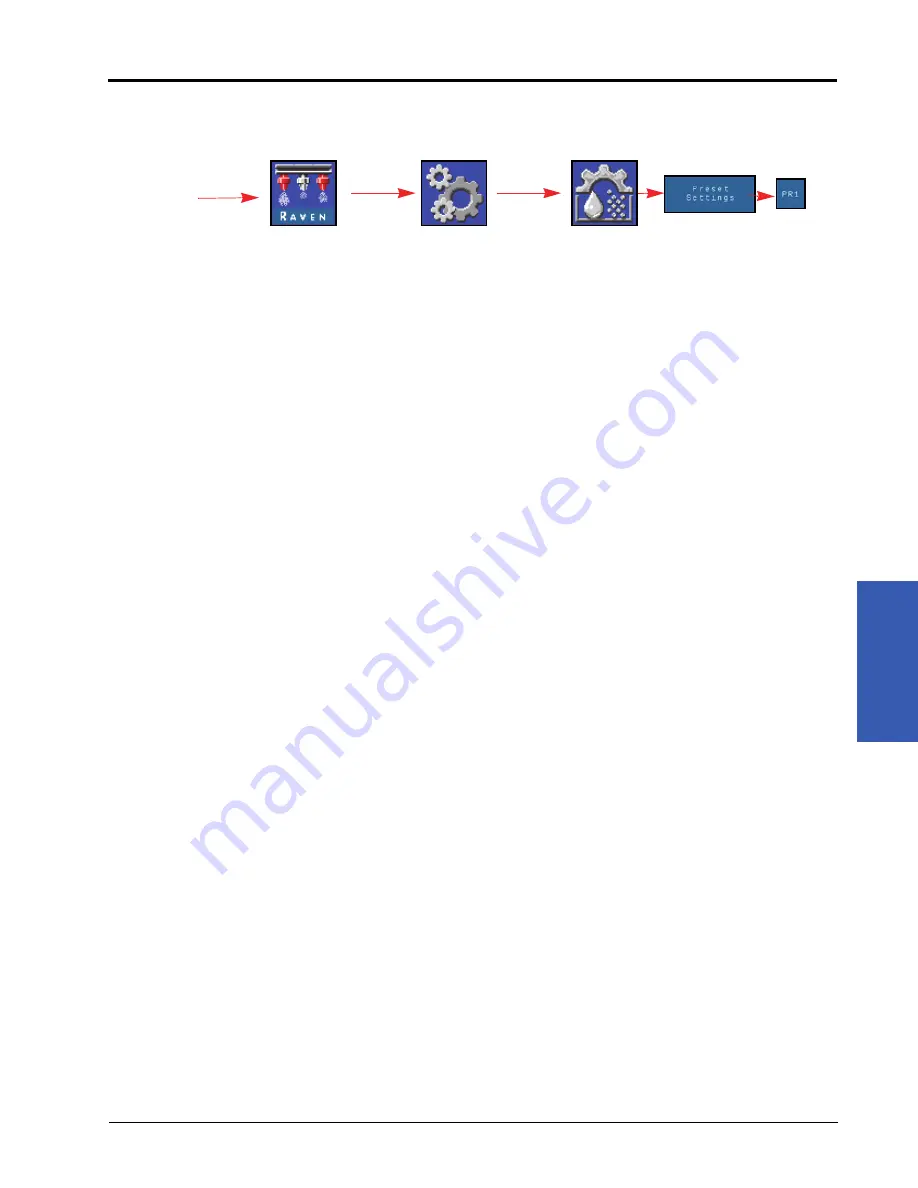
To access the Preset Setup Menu:
1. Open the UT Menu and select the Hawkeye
®
Menu button.
2. From the home screen, select the Tools Menu softkey along the right side of the display.
3. Select the System Settings tab along the top of the display.
4. Select the Preset Setup button. The following information may be available depending if the Hawkeye
®
or
Sidekick product tab is selected:
5. Select the desired product tab along the top of the display to change the products preset settings.
RATE 1 AND 2 PRESETS
Enter non-zero rate presets to allow the equipment operator to quickly switch between the set rates during field
operations in the automatic product control mode. In some nozzle control modes, the pressure presets are
disabled.
NOTE:
Refer to the Quick Access Softkeys section on page 42 for additional assistance with using the rate
preset and ± bump buttons during field operations. In manual control mode, the rate preset and ±
bump buttons will be replaced with the pump PWM percent ± bump buttons.
PRESSURE 1 AND 2 PRESETS
Enter non-zero pressure presets to allow the equipment operator to quickly switch between the set pressures
during field operations in the automatic product control mode. Pressure presets are disabled in some nozzle
control modes.
NOTE:
Refer to the Quick Access Softkeys section on page 42 for additional assistance with using the
pressure preset and ± bump buttons during field operations. In manual control mode, the pressure
preset and ± bump buttons will be replaced with the nozzle PWM percent ± bump buttons.
RATE AND PRESSURE ± BUMP VALUES
Sets the increment by which either the target rate or target pressure will increase or decrease when using the
bump softkeys during an active application. In some nozzle control modes, the pressure bump is disabled.
A separate bump value may be set for the rate and pressure control features. Refer to the Use Gauges to Toggle
Quick Key Selection section on page 32 for assistance with toggling between rate and pressure bump displays on
the home screen.
NOTE:
Review the Quick Key Setup Options section on page 32 and enable the ± option in the Quick Keys
area to display the rate or pressure bump softkeys when viewing the home screen.
• Rate 1 and 2 (Hawkeye
®
and Injection)
• Pressure 1 and 2 (Hawkeye
®
)
• Rate ± Bump (Hawkeye
®
and Injection)
• Pressure ± Bump (Hawkeye
®
• Quick Key Setup
• Use Gauges to Toggle Quick Key Selection
Hawkeye Menu
Tools Menu
System
Settings
Preset
Setup
UT Menu
Product
Select
Summary of Contents for ISO Product Controller II
Page 10: ...CHAPTER 1 viii ISO Product Controller II and Hawkeye Operation Manual...
Page 16: ...CHAPTER 1 6 ISO Product Controller II and Hawkeye Operation Manual...
Page 22: ...CHAPTER 2 12 ISO Product Controller II and Hawkeye Operation Manual...
Page 50: ...CHAPTER 4 40 ISO Product Controller II and Hawkeye Operation Manual...
Page 92: ...APPENDIX A 82 ISO Product Controller II and Hawkeye Operation Manual...
Page 95: ...P N 016 0171 584 H 85 FIGURE 3 Generic Cabling for Self Propelled Sprayer...
Page 97: ...P N 016 0171 584 H 87 FIGURE 5 Generic Cabling for Pull Type Sprayer with Existing Raven CAN...
Page 99: ...P N 016 0171 584 H 89 FIGURE 7 20 Spacing Generic Cabling...
Page 111: ...P N 016 0171 584 H 101...
Page 112: ...APPENDIX D 102 ISO Product Controller II and Hawkeye Operation Manual...
Page 116: ...APPENDIX E 106 ISO Product Controller II and Hawkeye Operation Manual...
Page 120: ...APPENDIX F 110 ISO Product Controller II and Hawkeye Operation Manual...
Page 128: ...APPENDIX G 118 ISO Product Controller II and Hawkeye Operation Manual...
Page 134: ...APPENDIX H 124 ISO Product Controller II and Hawkeye Operation Manual...


