


10 | iProductionManager
52 / 112
Operating instructions
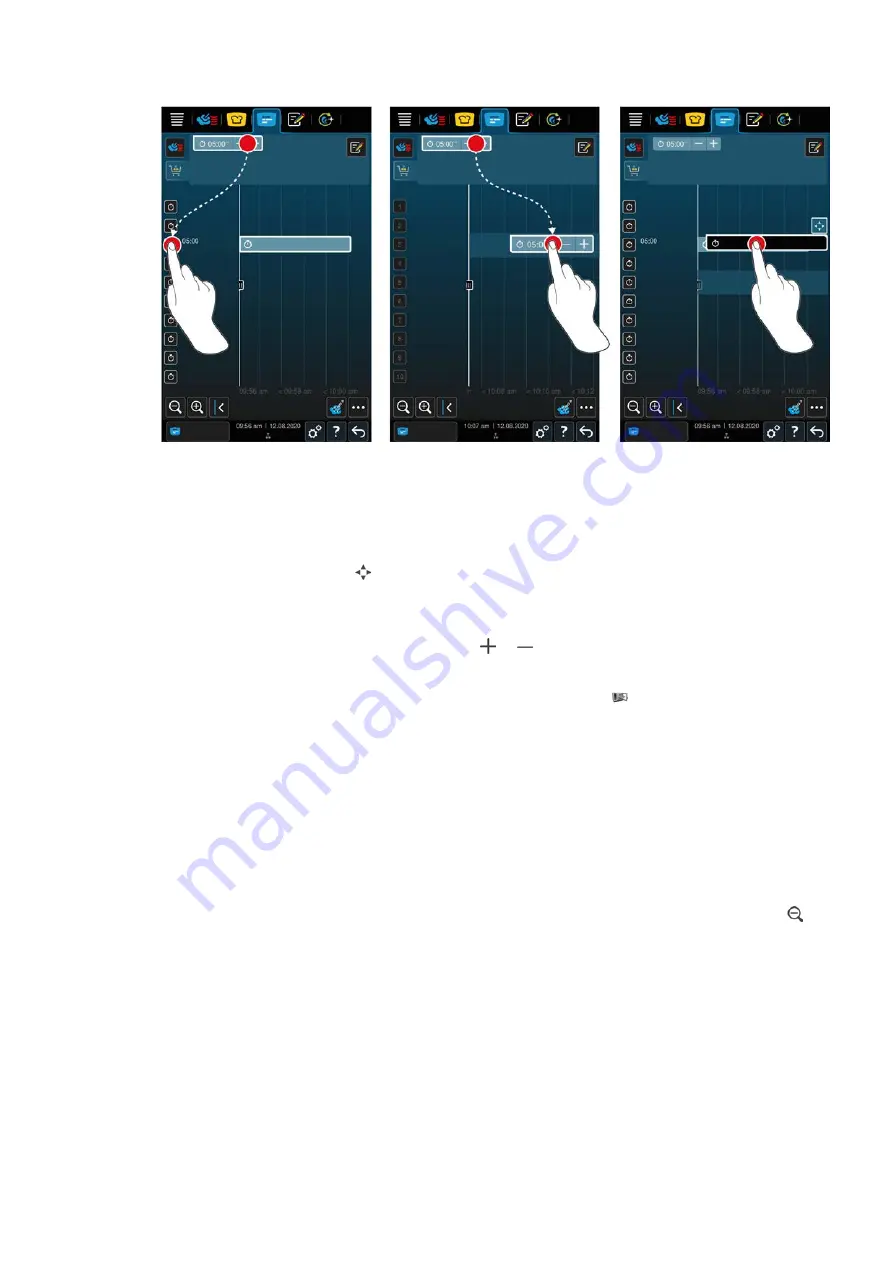
1. To place the timer at the current time, first press the timer on the ticket board and then on the desired rack
level.
>
The timer is placed at the current time.
2. To place the timer in the future, drag the timer to the desired rack level and desired start time.
3. To move the timer to another rack level and to change the start time, press and hold the timer.
>
The symbol will be displayed:
4. Drag the timer to the desired position.
5. To extend or shorten the duration of the timer, briefly press on the timer.
6. Either turn the central dial or press on the buttons:
or
>
After a brief waiting period, the settings will be applied.
>>
When the timer expires, you will be asked to unload the unit. The symbol
appears next to the rack level. The
cooking time is 00:00.
10.4
Place ticket
a
You have created manual tickets [
50] or a ticket board [
51].
1. Drag a ticket to the desired rack level.
>
For best orientation, the rack level where you want to place the ticket is highlighted in blue. As a further help,
the time is shown on the ticket.
>
If the rack level is marked in yellow or red, you cannot place the ticket without moving the already placed
tickets. Click here for more information: Combination check [
2. If you have placed several tickets, review the time axis to get an overview. To do this, press this button:
The following options are available to optimise the placement of tickets:
n
n
n
n
If you place tickets at the actual time, a vertical yellow or blue bar appears:
n
A yellow bar indicates that the cooking chamber is heating up.
n
A blue bar indicates that the cooking chamber is cooling down using the cool-down function.
n
The width of the bar indicates how long it takes to heat up or cool down.


