


The Image Acquire application can now save exams in Part 10 Format. This feature
should not normally be used. To turn on the feature, check the “Part 10 Format” check
box. All images saved by Image Acquire will then be saved in Part 10 Format. Part 10
Format images have a different DICOM header and file naming convention. A
DICOMDIR file is also generated when the Exams are saved. All exams burned to a
CD with the CD Burner facility are in Part 10 format.
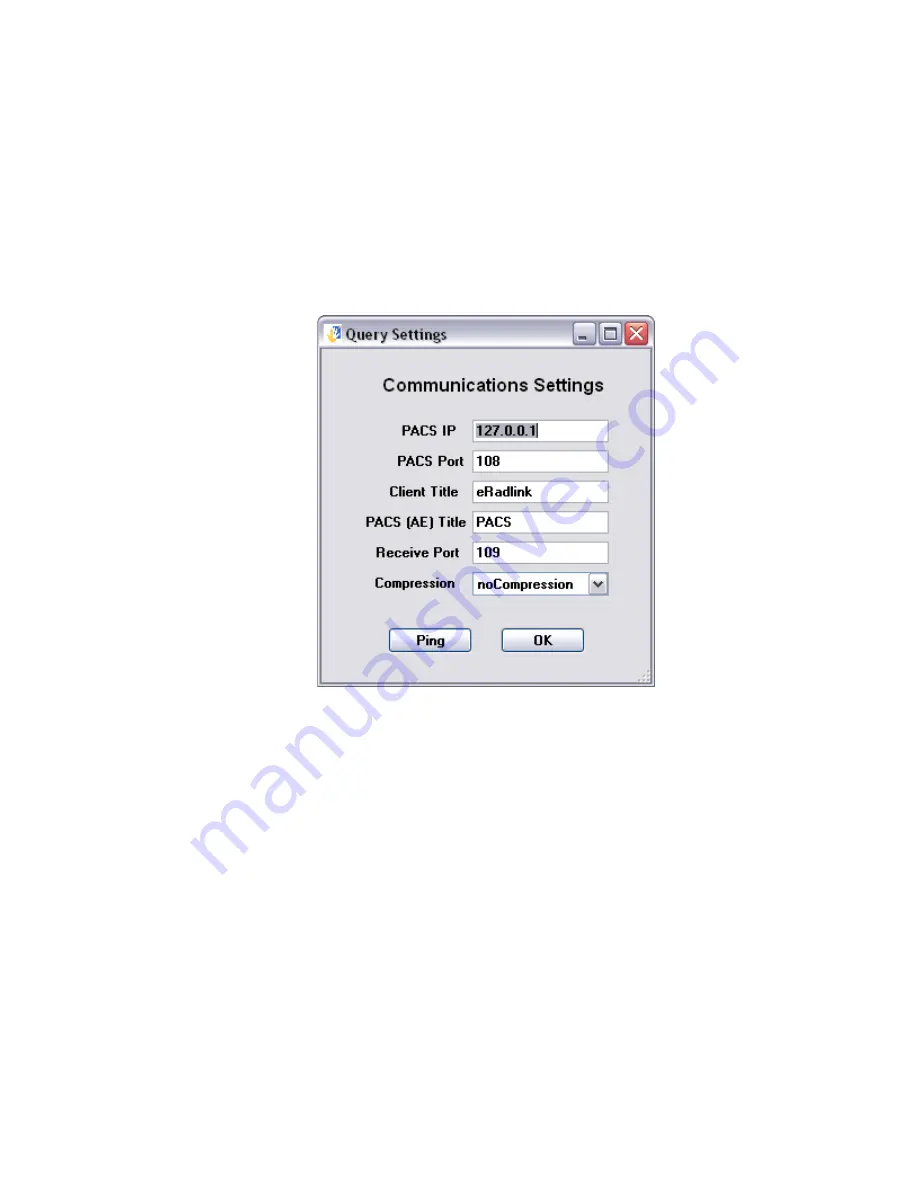
One must first enter the settings for PACS study retrieval at both the client side as well
as the PACS system.
Figure 3-48 – PACS Query Retrieval Settings Screen
The following parameters need to be entered:
PACS IP
– This is the IP of the PACS server.
PACS Port
– This is the port the PACS server listens for requests. Typically the
port is port 104.
Client Title
– This is the name that the PACS system will need to return the r
equested study.
Receive Port
– This is the port that the PACS system will return the study on.
The port number must be unique to the client machine.
After the client side settings are entered, click the “Ping” button . This will send a
DICOM Ping to the PACS server to test connectivity.
To set up the PACS server, a destination will need to be added. This is the destination
corresponding to the Client machine that requested the study (the Radlink System). To
do this on Centricity one first opens that application. Then select the menu item
Connection
à
Destinations. The following screen appears:
59


