background image

20. Whilst on the

Cloud Connection

page, insert your Installer ID into the box and save changes - this

will enable the matrix to be linked to your monitoring account. If you have not set up an installer ID,
please contact Snap One support to obtain the password. Alternatively, please refer to the 'Quick
Star Guide' for further instructions.

21. Within this interface are many setup options - please refer to the Web Interface Setup Guide for
further details.

Summary of Contents for P8-HDBT2-U-FFMJ108-S

Page 1: ...neo XMR Video Matrix Product User Guide ...

Page 2: ...page 10 Setup on page 12 Web Interface Setup on page 21 Monitoring Portal on page 39 EDID Management on page 43 Concept Wiring Guideline on page 50 Driver Integration on page 52 Audio Routing on page 63 Troubleshooting on page 69 Specification on page 72 Additional on page 76 Firmware Updates on page 74 Warranty Procedure on page 77 ...

Page 3: ...nsmission l Full HDCP 2 3 Support l 6x HDMI Inputs l 6x HDBaseT Class C DSC Outputs l 2x HDMI Outputs l 8x Audio Output Zones l 4x Audio Input Zones l Audio Return Channel l Audio Breakout of Input Sources l Automatic EDID Management l Includes user friendly WebUI control access l Easy integration with third party control systems ...

Page 4: ...he option of Optical and Digital Coax The neo XMR goes the distance supporting full 4K 60 4 4 4 8bit or 4K 60 4 2 2 12bit up to 100 meters 320 feet with audio breakout Dolby Digital compliance and multiple video control methods IN THE BOX KIT l 1x neo XMR Chassis l Rack Mounting Kit l Power Cord l Phoenix Connectors Note The items listed above comes in a kit Our customers might receive a different...

Page 5: ...ely List of compatible IR receiver l Episode Electronic Tabletop Plasma LED Proof IR Sensor with LED Feedback EE IR RCVR TT l Episode Electronics Surface Mount Plasma LED Proof IR Receiver with LED Feedback EE IR RCVR SM IR Flasher IR transmitter is required for additional IR functions and sold separately List of compatible IR transmitters l Episode Electronics IR Flasher with LED Feedback IRF 1 l...

Page 6: ...portant when installing a Pulse Eight product keep the products ventilated Any electronic equipment will generate heat A well ventilated area helps to disperse the heat If placed in a poorly ventilated area your equipment may heat up and cause minor irreparable damage to the circuitries Allowing systems to run for prolonged periods under high temperatures will break down circuitry and chipset It a...

Page 7: ...lease see the troubleshooting section C Cloud LED Indicates the matrix is able to connect to the Pulse Eight Remote Monitoring Portal green if there is an issue red D Power Connector Power connector with OFF ON switch Use supplied cord to connect the power E IR Receiver and Transmitter Ports Connect as required The IR Out port is to be used to connect input devices using the supplied IR Emitters T...

Page 8: ...input These cables should then be connected to the Source device Blu ray player etc J Reset Factory reset please use only when instructed by our customer service team K Ethernet Connect to network required for connection to Web Interface Third Party Control and Cloud Remote Monitoring Portal L Audio Inputs Optical and Digital Coax options for connecting audio only source devices M HDMI IR In Conne...

Page 9: ... sink device i e TV D HDBaseT Input Connect the appropriate Cat5e or higher grade cable to each the input of the receiver these cables should then be connected to one of the HDBaseT outputs on the matrix The LEDs will illuminate to indicate a link and power is being received E HDMI Output Connect the appropriate high speed HDMI cable and connect to the sink device F RS232 Connect via 3 5mm Adapter...

Page 10: ... are not supported Due to the inherent properties of a CCA this will cause an HDBaseT performance issue SHIELDED CABLES If you prefer shielded FTP cables please ensure compatible shielded features are used such as grounding termination A badly terminated cable can cause interference instead of eliminating it CABLING BEST PRACTICE Our recommended and best practice policy is to use a straight cable ...

Page 11: ...roperties It is important to check building regulations to guarantee that you are in accordance with the laws of your territory IR FLASHER RECEIVER The neo X P8 HDBT2 U FFMJ1210 S neo XMR P8 HDBT2 U FFMJ108 S neo XSR P8 HDBT2 L FFMJ66 S uses a 12 V powered IR board designed specifically to work with 12 V IR flasher receiver See Product Description for compatible IR receiver and flasher Do not mix ...

Page 12: ...the ventilation openings on the side of the product enclosure CONNECTING THE VIDEO INPUTS 3 Connect HDMI cables from your video sources e g Blu Ray player to the HDMI inputs of the matrix Note It is recommended for ease of setup to connect devices from Input 1 to Input 8 first 4 Connect the compatible IR Flasher Emitter Transmitter over the source device s IR window and attach to the Flasher port ...

Page 13: ...tput port you require Note It is recommended for ease of setup to connect devices from Output 1 to Output 8 although this is not necessary 6 Complete the connection by attaching the other end of the Cat cable to a supplied neo Receiver s HDBaseT In port The receiver should be situated at the output end i e TV ...

Page 14: ...nd forward as per the diagram Note Use only neo Ultra Receiver P8 HDBT2 U RX S or neo UltraSR Receiver P8 HDBT2 L RX S as they provide the same compatible 12 V IR receiver transmitter to the video matrix Note Please make sure to use a compatible 12 V IR receiver flasher on this product Please refer to IR FLASHER RECEIVER under Cabling and Compatible Devices under Product Description ...

Page 15: ...DMI cables Note Can also be used in conjunction with a neo HDMI Extender Set sold separately for reaching further distances CONNECTING THE AUDIO INPUTS 10 The neo XMR features 4 zones of independent audio inputs Connect your audio source device directly to either the digital coax or optical ports Inputs 9 12 ...

Page 16: ...e monitoring features of the product TURNING ON THE MATRIX 13 Insert the supplied power cord and plug into the AC mains 14 Turn ON the power switch 15 As it powers ON the front panel LEDs System Health Network Cloud will illuminate momentarily before it begins its initialisation sequence Note The initialisation process takes between 20 seconds and up to 2 minutes However it is possible that a firm...

Page 17: ...rface Please follow the steps in the Connecting to Admin Web Interface section 18 Using a computer connected to same router network access and login to the Web Interface by visiting www gotomymatrix com in your web browser 19 Activate administrative rights by clicking on the Cloud Connection tab on the left hand nav then click on the Admin link at the foot of the page ...

Page 18: ...to be linked to your monitoring account If you have not set up an installer ID please contact Snap One support to obtain the password Alternatively please refer to the Quick Star Guide for further instructions 21 Within this interface are many setup options please refer to the Web Interface Setup Guide for further details ...

Page 19: ... HDBaseT ports of the Receiver and Transmitter to ensure correct installation and connection l The Yellow LED will illuminate when connected to a video link l The Green LED will illuminate when the device is connected to the power supply ...

Page 20: ...ou are watching e g if you are routing video from the source connected to HDMI In 2 on to display connected to HDBT out 5 then any IR signal received over the HDBT port 5 will be blasted out the matrix s IR FLASHER port 2 2 The IR ports above the HDMI outputs are a little different hence why they are labelled differently INPUT is designed to receive IR signal from an external HDBaseT set directly ...

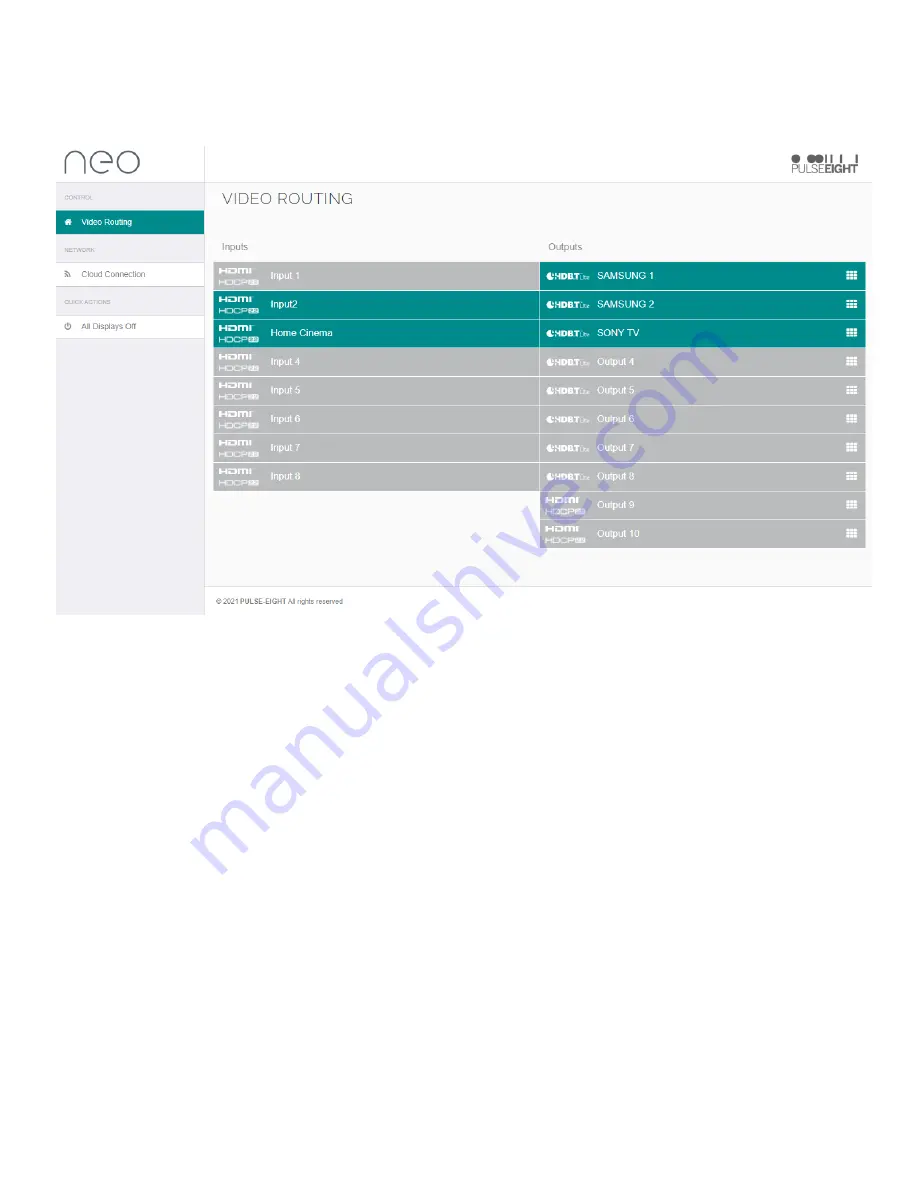
Page 21: ...terface Setup WEB UI INTRODUCTION The front page of the web interface features a user friendly drag and drop display showing all available inputs and outputs The following steps instruct how to customise this ...

Page 22: ...ing www gotomymatrix com in your web browser Activate administrative rights by clicking on the Cloud Connection tab on the left hand nav then click on the Admin link at the foot of the page Please refer to the Quick Star Guide for further instructions or contact Snap One support if they have set up a password on the system ...

Page 23: ... Connection page insert your Installer ID into the box and save changes this will enable the matrix to be linked to your monitoring account Note If you do not know your Installer ID please check your cloud monitoring portal or contact your Snap One support ...

Page 24: ... OPTIONS Once you have activated administrative rights the Video Routing page should have the following icons Input options Output options When clicked a popup with additional options for the select device will appear ...

Page 25: ...rgin l Kodi l Dish l DirecTV Hidden The toggle switch can be turned on to hide the selected input from the end user s web interface EDID Profile Drop down menu to select an alternative EDID profile for the selected device EDID Details This will bring up a page detailing the selected EDID information Enable IR 12V Enable Disable the 12 volt IR Disable changes to 5 volt IR mode Note Ensure that afte...

Page 26: ...to program Set Top Box IP control Simply select the type of device from the dropdown list and insert that device s IP address into the adjacent box Note This option only appears if the Input s name includes the Set Top Box s name i e Sky Virgin TiVo Kodi Dish The matrix also needs to reboot for the changes to take effect and for the control to work ...

Page 27: ...le Disable the 12 volt IR Disable changes to 5 volt IR mode Source Filtering Toggle switches to choose which inputs can be displayed on the selected output display Remote Module Details This will display a popup detailing the output s remote end details Link Status Indicates if the link is active Link Quality Indicated the quality of the link Click the icon to view Link Quality Test Tool Cable Len...

Page 28: ...d boxes will indicate if performing correctly along with the reading of the internal temperature sensor that will indicate if the system is overheating Under the System Health tab you will also find Advanced Diagnostics that will perform detailed tests on specific areas of your installation to identify potential faults ...

Page 29: ...R receiver is picking up noise Example of failure message The IR receiver connected to this port is occasionally picking up stray IR messages this may occasionally interrupt IR communication to the connected source device and or control system if you repeat this test and it remains in this state you may find it is tolerable but we recommend relocating the IR emitter anyway ...

Page 30: ...plain if your cables meet the above criteria but are still marked as Poor due to this spiking only happening after a few hours for a few seconds for example The Channel Errors test is a measurement of the number of errors on the channel for example packet loss and bit errors This is digital and is directly affected by the same issues mentioned in the Mean Square Error test As you can see in the Ke...

Page 31: ...ome Installer ID Enter your Installer ID to link to the Pulse Eight Monitoring Portal Note If you do not know your Installer ID please check your cloud monitoring portal or contact your Pulse Eight sales representative Connection Status This will detail if the matrix is connected to the Pulse Eight Monitoring Portal Alexa This matrix can be controlled by Alexa voice control set this up by clicking...

Page 32: ...are the systems available for Alexa control Click Connect next to the appropriate system Tell Alexa to Discover Devices your system should now be connected NETWORK SETTINGS TAB Under the Network Settings tab you will find details about the system s connection to the internet and the rest of your control systems Network Connectivity This colour coded status will notify you if the system is connecte...

Page 33: ...l on or off Auto Pause Toggle switch to enable where possible the function to pause the content when no sink device is watching a source device and resume playback when you switch back Remote Control Combo Keys Toggle switch to turn on this function If there are missing keys on the TV remote f ex Guide then this allows for using combo keys ...

Page 34: ...ontrol Settings Under the Routing Control tab you will find settings for IR control IR Routing by default listens to commands from the supplied remote control you can use alternative manufacturer profiles for integrating into existing systems or backwards compatibility Each output port can be configured to use a different IR profile if Default is set this is the profile used ...

Page 35: ...dio to follow the video routing Mode Dropdown menu to choose the option of either Active Mode to manage volume delay and ARC or Passive Mode which provides line level output only When Active Mode is selected the following options will appear ARC A dropdown menu to select audio return function choose between HDMI optical or disabled depending on the connection you have chosen on the Receiver ARC So...

Page 36: ...b you will find options for the front panel of the matrix such as turning off the status LEDs Note The status LEDs are in the bottom right of the front panel these LEDs will always appear during powerup and turn off after 30 seconds if set to Off ...

Page 37: ...ou will find manufacturing information about your product you may be asked for this information if you request help or support Note The design and features of the Web Interface is ever evolving and may be subject to changes at any time without warning ...

Page 38: ...tp monitoring pulse eight com this program will run on Windows 7 or newer only when run it will scan your network and detect the IP address of your matrix If you have multiple neo systems on the same network the discovery tool will only display the last found If you do have more than one system it is advised that you disconnect other systems first The discovery tool will display the IP address of ...

Page 39: ...dashboard will display your details including your Installer ID If you don t have an installer ID please contact your Pulse Eight representative to get an account created MY INSTALLS Under the My Installs tab you can add projects and assign your installed systems in order to easily access and monitor certain installations To create an install click the Add New button and insert the details on the ...

Page 40: ...Once created you will then be able to assign systems to the install by clicking the Add button in the Products section This will then bring up a page with a dropdown menu to select a system ...

Page 41: ...ller ID into the web interface of the system When you click on a system a system overview page will appear with details of the unit such as l Serial Number l Model Number l Status l System Temperature l Firmware Version l Current Uptime l System Status Inputs l System Status Outputs l External Network Details l Local Network Configuration l System Commands l Reboot Function ...

Page 42: ...ils any updates available for the system There is also a toggle switch to turn on Hotfix Updates whereby updates are delivered automatically to the system Installation Report displays all crucial information about the installation on one page We recommend you print this page once installation is complete to ensure the install is correct DOCUMENTATION DRIVERS Under the Documentation and Drivers tab...

Page 43: ...required by the source e g media box game console etc to identify what is the capability of the output screen The neo video matrix contains EDID presets to ease the setup configuration Here are some of the settings you can find on your EDID profile provided your video matrix firmware is updated to the latest version ...

Page 44: ...please look over the Web Interface Setup section to access Video Routing Admin section If you do not have the password to access the Admin please check with your installer or your support representative 1 Access Video Routing in the Admin portion 2 Click on the Input option ...

Page 45: ...3 Select the EDID profile 4 Make sure to click Save Changes to use that particular EDID profile ...

Page 46: ...port the resolutions supported by all the displays connected to the outputs Clone Display X Copies the same EDID as TV attached to the output X HDR UltraHD 4K 1080p 720p It sets the EDID to support 720p 1080p 4K HDR as the maximum preferred resolution supported as well as the audio support ...

Page 47: ...illustrate how EDID management would work in a setup Dynamic Settings In this scenario HDMI Input 1 will limit the resolution of the source to 1080p in accordance with the settings selected This means all displays will receive a 1080p video signal ...

Page 48: ...is scenario HDMI Input 1 will set the resolution to a maximum of 4K This means all displays will receive a 4K video signal Note that the last display which has the maximum resolution of 1080p and will display an error ...

Page 49: ...aler In this scenario HDMI Input 1 will set the resolution to a maximum of 4K This means all displays will receive a 4K video signal Note that the last display is using a 4K Downscaler SKU HDMI2 4KDS therefore still receiving a video signal ...

Page 50: ...Concept Wiring Guideline ...

Page 51: ......

Page 52: ...The first step is to download the necessary driver 1 Go to monitoring pulse eight com and login with your Installer ID If you do not have an Installer ID please get in touch with your sales representative or installer directly 2 One logged in hover over the Documentation Drivers tap at the top then navigate to the desired control system 3 Select the desired product driver and download ...

Page 53: ...te driver to control the intended hardware 1 Add the drivers by clicking on Driver at the top and then Add or Update Driver 2 Click the Search tab on the right hand side and search for the driver by the name drag the driver from the Search window into the correct Room location ...

Page 54: ...3 Click the Action tab in the matrix driver 4 Then click the Discover button then click back to the Properties tab ...

Page 55: ...ust set your Installer Id This value is used to register this system to your monitoring account so you can monitor and support the system remotely On the properties tab enter your 4 digit Installer Id and click set Setting this value will also trigger a Monitoring Pulse to be sent so it should appear in your account immediately Blue By default the matrix driver has enabled two way feedback to main...

Page 56: ...ottom left in Composer select the matrix driver from the list on the Control AV tab 7 Setting the connections is no different that any other driver however ensure that the Inputs and Outputs match the physical wiring as per the matrix ...

Page 57: ...ons available in ComposerPro for this driver l Reboot System Restarts the system immediately doing so will interrupt video routing briefly l Discover System Used to automatically discover the Device IP Address of the system where possible l Send Monitoring Pulse Trigger an immediate monitoring pulse to be sent returning current system health data to monitoring pulse eight com ...

Page 58: ...to control the volume via the neo X through CEC instead of going through the ProAmp8 web UI interface It is compatible with neo X by using the Sink Mode feature under Audio Control Make sure both neo X and the ProAmp8 are connected to the local network The system needs to detect each other to make the linking possible CONNECTING LINKED DEVICE 1 Here is the mapping of the setup ...

Page 59: ...d Device feature make sure to connect to the correct output Here is an example of the setup a S PDIF connector is connected via Input 9 on the ProAmp8 and Output 2 on the neo X Fig S PDIF Wiring between neo X and ProAmp8 ...

Page 60: ...3 Next on the neo X web UI go to Video Routing and under the Output section click on the icon ...

Page 61: ...4 Once the Output window is up select the ProAmp8 on the Linked Device section and select Input 9 as reflected as the Input on the ProAmp8 ...

Page 62: ... make sure it is working login into the ProAmp8 web UI then to Configuration and click icon to check if it is Output 2 Make sure they are connected to the neo X correct output which is Output 2 in this case ...

Page 63: ...olled completely separately from the video The system has an audio locking feature to enable continuous audio to an output zone regardless of switching video sources Note Audio will not be manipulated at this stage however if audio output are connected to stereo phono jacks the video matrix will downmix the audio automatically The process will downmix multichannel audio Dolby 5 1 not DTS to stereo...

Page 64: ...mirror 1 1 the input ports This means the audio will not switch in the event when the videos are switched around SINK MODE In Sink Mode the audio follows video routing This means the user can switch sources without having to reconfigure the wiring ...

Page 65: ...TOGGLING BETWEEN SOURCE SINK MODE 1 Under the web UI access the Audio Control section 2 On the main page toggle select either Source Mode or Sink Mode ...

Page 66: ... where Source Mode might be required instead depending on the type of install and the customer s needs Source Mode provides a fixed audio de embedding from each of the attached HDMI sources Bluray STB etc Some installers might find the need to configure their audio matrixes preamps amplifiers without the need for automatic routing or ARC In those cases Source Mode should be enabled and set it up a...

Page 67: ...the media boxes are built in but without ARC a S PDIF coaxial or stereo cable is needed to push audio out to the amplifier Fig 3 With ARC the need for additional cables are eliminated The audio is routed back to the video matrix via HDMI and then to the amplifier Fig 1 Standard traditional configuration Fig 2 Using Smart TV with an S DIF Cable Fig 3 Using Smart TV with ARC ...

Page 68: ...ARC VIA HDMI ARC in Audio Routing can be configured to use HDMI In the web UI under the ARC portion last page there s an option to choose the source ARC via HDMI ...

Page 69: ...The use of cable joins stranded patch panels wall outlands and stranded patch leads as interconnects between them can significantly reduce signal strength Use solid core straight through connections wherever possible l If you reduce the resolution of the source do you get a picture If so this suggests a conflicting resolution between source and display or a bandwidth capacity issue with your cable...

Page 70: ...ared radiation Ensure emitters and receivers are away from direct sunlight Halogen lighting and plasma screens may also interfere with IR signals EDID HANDSHAKE 1 There may be times you will need to perform an EDID Handshake on your Matrix This is often after a new piece of equipment has been introduced to your setup or any changes have occurred 2 To do an EDID Handshake 3 Turn off the Matrix and ...

Page 71: ...o the power supply INFRARED NOT FUNCTIONING 1 Make sure to use the compatible IR flasher receiver for this video matrix 2 Check and see if the LED beside the IR port is lighting up It signifies whether the IR connection is working 3 If the IR bud is not receiving or transmitting test it out with a different port or swap with another IR bud to deduce the problem 4 Note Do not mix and match 12 V or ...

Page 72: ...o Resolutions All 4K formats up to 4K 4 4 4 1080p 1080i 720p 576p 480p 24 25 30 50 59 94 60Hz 4K resolution limited to 3840 x 2160 over HDBT Supported Audio Formats PCM 2 0 LPCM 2 0 LPCM 5 1 LPCM 6 1 LPCM 7 1 Dolby Digital 2 0 Dolby Digital 5 1 Dolby Digital EX 6 1 Dolby Digital Plus 7 1 Dolby TrueHD 5 1 Dolby TrueHD 7 1 Dolby Atmos 5 1 2 Dolby Atmos 5 1 4 Dolby Atmos 7 1 2 Dolby Atmos 7 1 4 Dolby...

Page 73: ...del 12kV Air gap discharge 8kV Contact discharge Surge Protection AC Input IEC61000 4 5 class 3 Product Dimensions 17 32 x 12 44 x 5 20 3U Product Weight 10 45 lbs Matrix Box Dimensions 22 83 x 14 72 x 7 01 Operating Temp Range 0 to 35 C 32 to 95 F Operating Humidity Range 5 to 90 RH no condensation Storage Temperature 20 C to 60 C 4 F to 140 F Certification UKCA CE FCC SDoC RoHS Certain Video Mat...

Page 74: ...t mute audio when the TV got turned off l All products CEC auto pause didn t trigger in some cases l All products Pronto IR codes weren t displayed correctly in 3 9 25 l All products Web services sometimes didn t get restarted after the network connection dropped and was restored l All products Audio dropped briefly when switching video sources while audio is in source mode l All products Backgrou...

Page 75: ...port for service tags Changes l neo X Binary API command Only enable always embed support after calling audio enable_ always_embed true once Fixed l neo X Binary HDBaseT link test failed on first load l neo X Binary ARC activation issues o Matrix could route to ARC if the TV did not respond o Log would say Inactive if the logical address if the ARC source was not set yet o Better checks for de act...

Page 76: ...in web interface did not work l All products Hidden flag could not be cleared l All products Log got cleared after rebooting in some cases l All products Update network led status correctly l All products Overall stability improvements l All video matrix product Audio inputs show items that do not apply Note You may need to clear the cache for your web browser in order to see the latest firmware f...

Page 77: ...umentations Drivers section Warranty Procedure WARRANTY PROCEDURE FOR SNAP ONE CUSTOMERS Pulse Eight operate from their own design R D and manufacturing facility in Britain giving the unique opportunity to fully manage the entire production process ensuring the very best products However from time to time things do go wrong therefore every Pulse Eight system is backed by a 3 year warranty that wil...

Reviews: