7. Copy in a USB drive the file “
DolbySerialAutomation_v1.txt
” avail-
able in the FTP:
ftp://manual:[email protected]/
should you choose to use the factory default output
messages. We strongly recommend that the memory stick does only
contain this file. Then, follow the instructions of the Dolby installation
manual to import serial automation files.
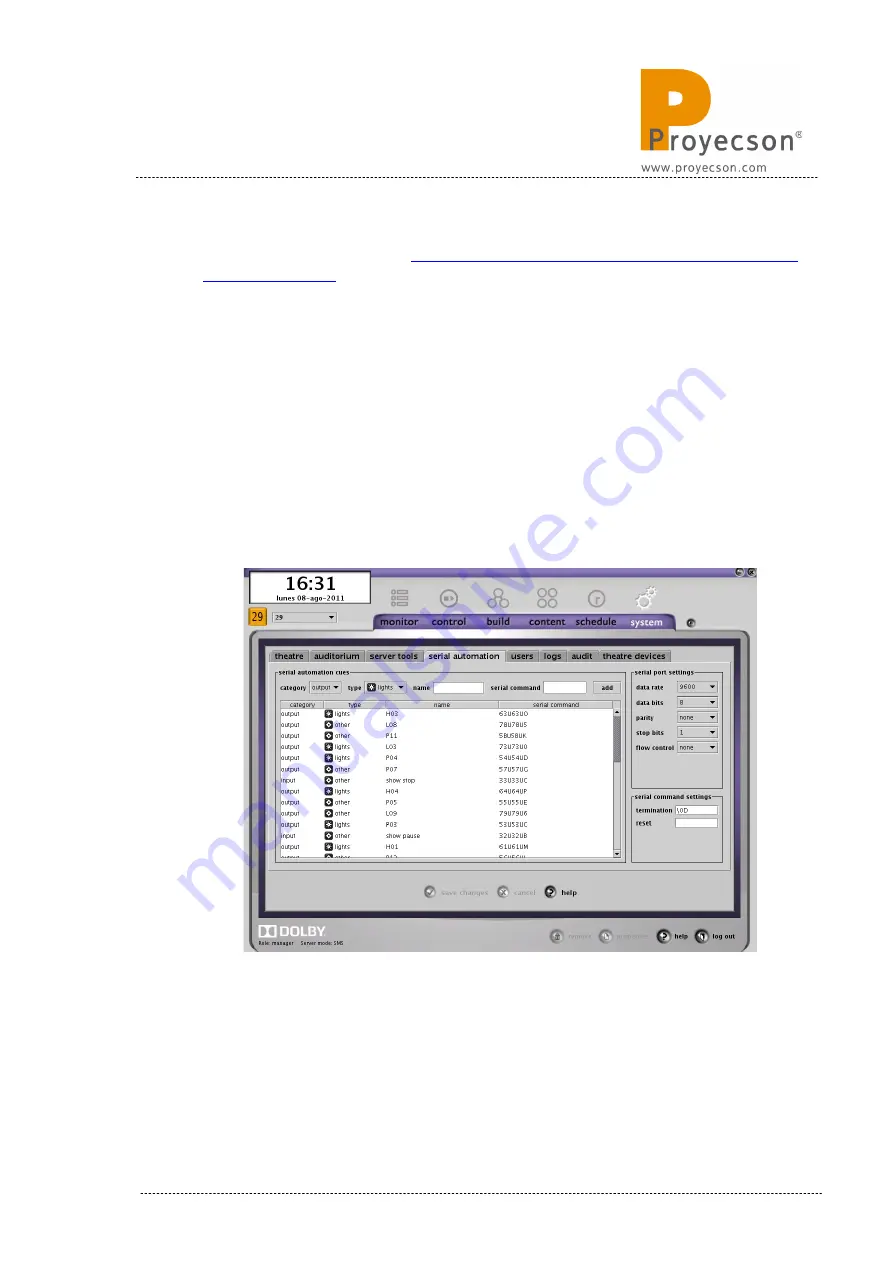
8. Once the file is imported and the server restarted, the “SERIAL
AUTOMATION” tab
will be displayed as seen on
Figure 8.1C
.
9. Now the cues should be available in the Dolby server ready to be
inserted in any show.
10.
To modify cue name, double click on the column “name”, do the
modification and save changes. There is a possibility that the name
doesn’t appear in the “
build
” menu
of the server. If such, you will
need to reboot the server.
Figure 8.1C
11.
To modify the cue type, click on the “type” column and make
your selection between the “lights”, “sound” and “other” option.
INSTALLATION MANUAL: PAA20+ V 2.0 (10/2021)
45
Summary of Contents for PAA20+
Page 1: ...INSTALLATION MANUAL PAA20 V 2 0 ...
Page 40: ...Figure 7 2 7D INSTALLATION MANUAL PAA20 V 2 0 10 2021 40 Figure 7 2 7E Figure 7 2 7F ...
Page 110: ...9 2 OUTPUT 2 CONNECTOR Figure 9 2A Picture 9 2B INSTALLATION MANUAL PAA20 V 2 0 10 2021 110 ...
Page 111: ...9 3 OUTPUT 3 CONNECTOR Figure 9 3A Figure 9 3B INSTALLATION MANUAL PAA20 V 2 0 10 2021 111 ...
Page 112: ...9 4 INPUT CONNECTOR Figure 9 4A Picture 9 4B INSTALLATION MANUAL PAA20 V 2 0 10 2021 112 ...
Page 114: ...9 5 2 INPUT WITH A POSITIVE COMMON Picture 9 5 2A INSTALLATION MANUAL PAA20 V 2 0 10 2021 114 ...


