Auto-map
Web Viewer Screen -
4
2
3
4
5
1
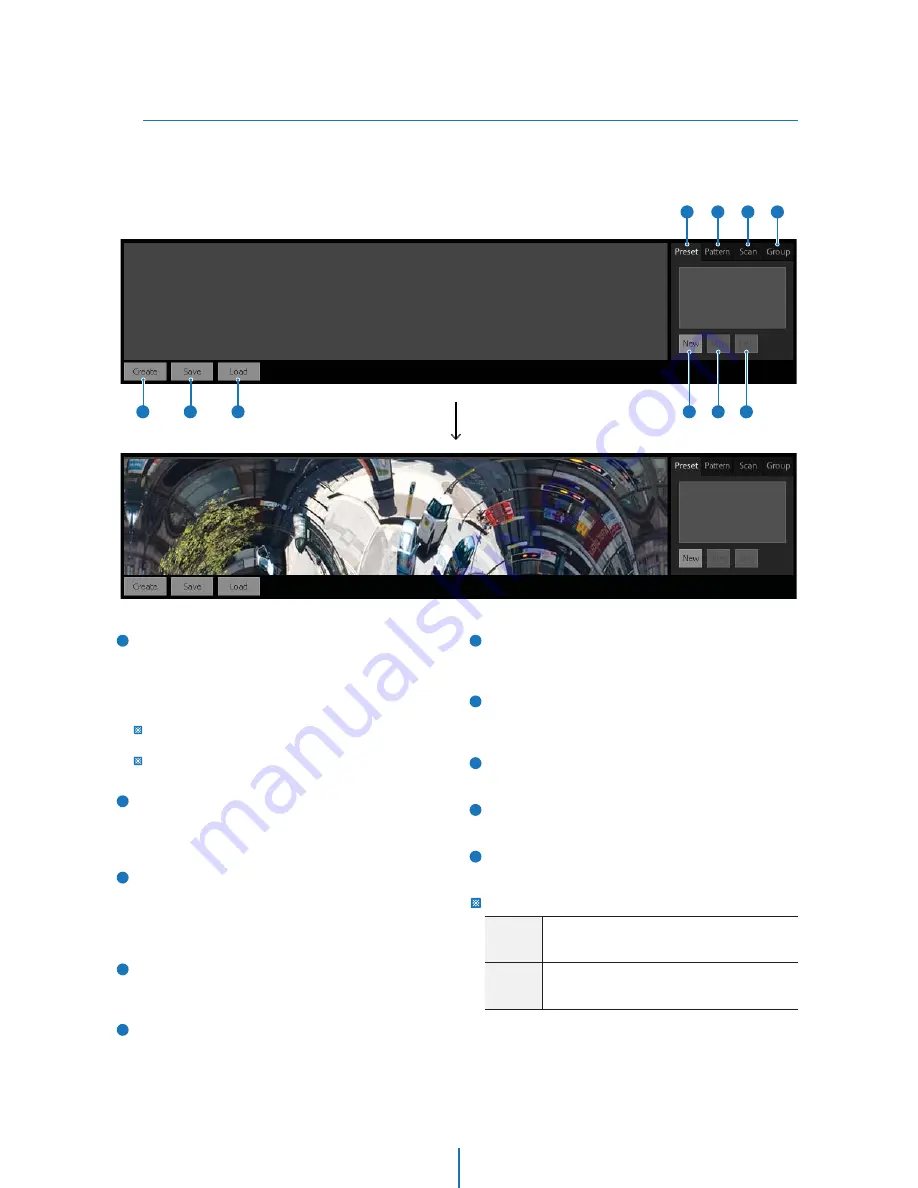
Create Map Button
If you click this button, a new map will be created on the
auto map window. Since the map is made by taking several
photo and stitching them into a map, it is recommended to
draw map when moving object is as small as possible. It will
take around 5 minutes for the completion.
To locate the most important object in the center, please, move
the camera to that object before creating the map.
When creating MAP, AE Mode will change to ‘Manual’, and it will
move back to AE mode after completing creating Map.
Save Map Button
If you click this button, the current Map data will be
uploaded to the IP Camera. By this, you can use stored map
data in the future and share it with other Clients.
Load Map Button
If you click this button, the Map data stored previously will
be downloaded from the IP Camera. If there is no map data
stored in the IP Camera, you will see only black map in the
screen.
Preset Tab Button
Shows Preset numbers in the list. The range of numbers is
1 to 1024.
Pattern Tab Button
Shows Pattern numbers in the list. The range of numbers is
1 to 128.
6
7
8
9
10
Scan Tab Button
Shows Scan numbers in the list. The range of numbers is 1 to
128.
Group Tab Button
Shows Group numbers in the list. The range of numbers is
1 to 128.
New Button. If you click this button, new popup will be
displayed for creating new preset, pattern, scan or group.
Run Button. Run selected contents of Preset, Pattern, Scan
or Group function.
Delete Button. Delete selected contents of Preset, Pattern,
Scan or Group function.
Basic Map Operation.
The Auto-map is the easiest way to control the PTZ in an intuitive manner. If you click the
Auto-map popup button in the web viewer, the auto map window will appear as shown in the
picture below.
Complete Creat
>
If you click a point of interested on the map, the
camera will move to make that point be the center
of screen while the zoom ratio is maintained.
If you draw the box by clicking and dragging the
mouse, PTZ will move to match the live video in
your box drawn to viewer screen.
Left click
Draw box
2
1
3
9
8
10
5
4
7
6


