P r i m a L u c e L a b S . p . A .
E A G L E L E U s e r M a n u a l
p a g e 1 8
NOTE
After being connected to the EAGLE's WiFi, I start Remote Desktop connection but I get
an error “Unable to connect”. How can I fix this?
This error may happen if your Mac is not connected to the internet. In this case, we must configure a manual IP
address on your Mac, when connected to the EAGLE. To be able to switch between network configurations easi-
ly/cleanly on a Mac, you should create a location for your EAGLE, and switch between locations under the Apple
menu. To create a location, do the following:
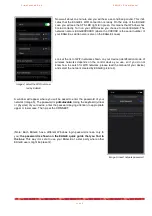
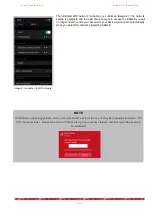
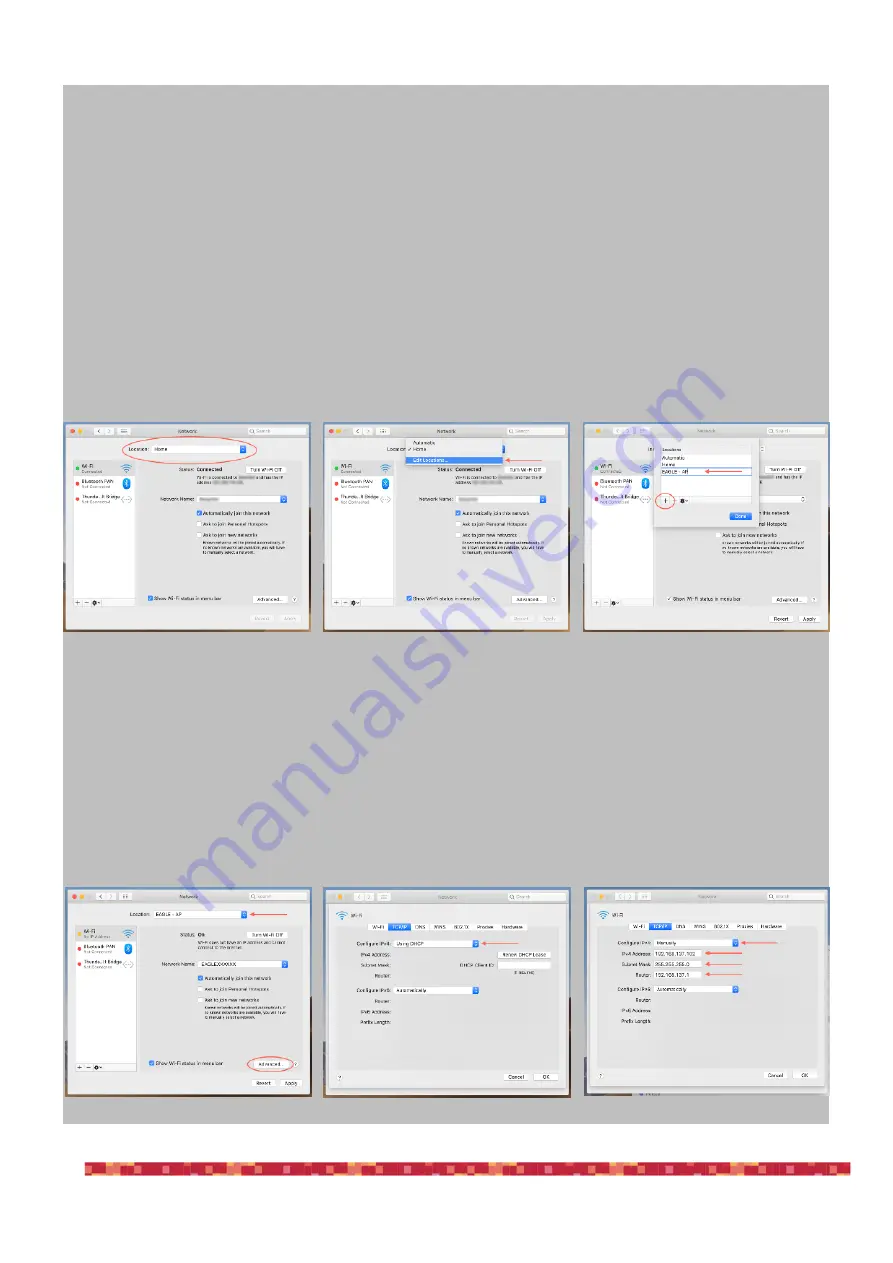
1) Open System Preferences, and go to “Network” - once there, select the pull-down menu next to “Location”.
Select “Edit Locations”. Click on the “+” symbol; to create a new location, and give it a name in the field pro-
vided.
2) Next, select the name of the WiFi network of your EAGLE. With the network selected, click “Advanced”. Click
on the “TCP/IP” tab, and click on the pulldown menu for “Configure IPv4” to change from “Using DHCP” to
“Manually”. With “Manually” selected, you must enter a valid IP address for the network of your EAGLE. The
IP address of your EAGLE’s AP interface is 192.168.137.1. An address must be selected in the same net-
work range, and it must be unique. This is done by changing the last “octet” of the network address. Your
EAGLE ends in “.1” You can select any other address starting with “.2, and going to “.254”. Remember if you
have multiple devices accessing your EAGLE, you should choose and assign a unique IP to each device. In
this example, I have chosen “.102” - so the IP address I have configured is “192.168.137.102. Configure the
netmask and router as shown. The router is the IP address of your EAGLE.


