background image

25

Installing Cartridges

This section describes how to identify cartridge types and how to install and exchange

cartridges.

Identifying Foil Cartridge and Cover Types

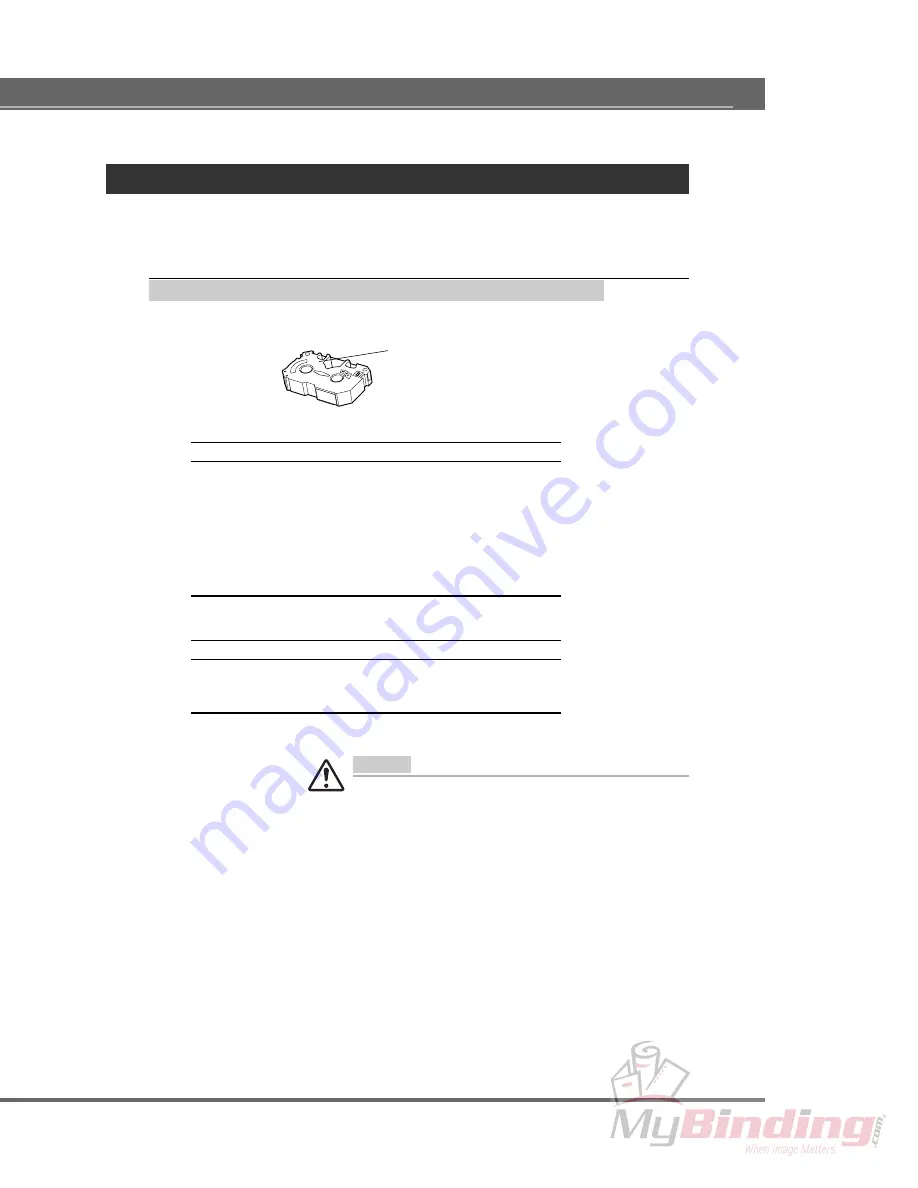
The cartridge type is indicated on the surface of each cartridge.

Premium Foil Cartridges

Premium Gold Foil cartridge

Premium Silver Foil cartridge

Premium Red Foil cartridge

Premium Blue Foil cartridge

Premium Green Foil cartridge

Premium Black cartridge

Premium White cartridge

Primer cartridge (“Undercoat”)

Cover Types

Foilfast Composition Cover

Foilfast Coated Paper Cover

Foilfast ClearCover

Caution

Remove each printed ClearCover from the output tray before the
next printed ClearCover is ejected from the printer. If the printed
ClearCovers are left in a pile for a long time, they may stick
together.

The product name appears in this area.

WINDOWS & MACINTOSH – Installing Ink Cartridges

Summary of Contents for Foilfast 21

Page 1: ...Provided By http www MyBinding com http www MyBindingBlog com Powis Foilfast 21 Printer User s Manual...

Page 2: ...F O I L F A S T P R I N T E R M O D E L 2 1 U S E R S M A N U A L...

Page 3: ...ou may not copy transfer or grant any rights in or to all or any portion of the SOFTWARE except as expressly provided herein You must comply with all applicable laws regarding the use of the SOFTWARE...

Page 4: ...tten consent of Powis Parker and all assignments in violation of this prohibition shall be null and void This Agreement is the complete and exclusive agreement of Powis Parker and you and supersedes a...

Page 5: ...on a circuit dif ferent from that to which the recei ver is connected Consult the dealer or an experienced radio TV technician for help If necessary you should consult your dealer or e xperienced radi...

Page 6: ...al of the ampere ratings on the products plugged into the extension cord do not exceed the extension cord ampere rating Also make sure that the total of all products plugged into the w all outlet does...

Page 7: ...dows 14 Connecting the printer to your computer 14 Power cord connections 15 Connecting SCSI Cables for Macintosh 16 How to attach the Macintosh interface module 16 Power cord connections 18 Connectin...

Page 8: ...l colors 39 Requirements 39 Installing the Printer Driver for Macintosh 45 Purpose of the Printer Driver 45 Preparing for Installation 45 System Requirements 45 Contents of the Installation Disc 46 In...

Page 9: ...Cleaning the Platen 87 Cleaning the Feed Roller 87 Indicator Lights Summary 88 Normal Printing Mode 88 Indicator light status 88 Alarm status shown by indicator lights 88 Troubleshooting 89 What To Do...

Page 10: ...choose your colors and print It s that easy Whether you choose our popular Foilfast composition covers or our ClearCo vers the Foilfast prints crisp bright images and text with excellent clarity We ve...

Page 11: ...local Fastback dealer along with a dated proof of purchase the dealer representative will replace it free of charge If the printer proves defective during the applicable warranty period your Fast back...

Page 12: ...8 Product Label The label for this product can be found in the location shown below Location of Label...

Page 13: ...r Foilfast Printer This chapter descr ibes how to set up y our printer the name of each par t of your printer and how it functions how to insert the cartridges and cover sheets and how to install the...

Page 14: ...ls to prevent delicate parts from being damaged while in transit Remove these packing materials before using the printer If the printer is used while these packing materials are still present damage t...

Page 15: ...fr ame that holds the small white f oam car riage packing material in place and remove the foam piece 3 Remove the tape located on the left side of the carriage b y gently grasping the tape and pullin...

Page 16: ...on When closing the front cover never slam it shut The ink car tridges can become dislodged and damage to the printer may result Situating the Printer After removing the packing material from the outs...

Page 17: ...shown below How to place the Dust Cover Use the dust cover as dust may cause a malfunction Slide the dust cover into place Bend the incised part inside as shown in the figure Bend the incised part in...

Page 18: ...nning quit all running ap plications shut down the system and turn off the power Caution Both printer and computer must be unplugged before connect ing or disconnecting the printer cable Otherwise dam...

Page 19: ...wer cord into a suitable AC power source such as a wall socket or power strip Caution Power to the printer is completely cut off only when the cord is unplugged Place the printer where you can easily...

Page 20: ...nected Unplug the power cord from the power source and the printer 2 Remove the rectangular plastic connector co ver located to the r ight of the printer port Grab the tab at the bottom of the connect...

Page 21: ...it all running ap plications shut down the system and turn off the power Caution Both printer and computer must be unplugged before con necting or disconnecting the printer cable Otherwise dam age or...

Page 22: ...t to the connector F or more details refer to Specifications in the appendix Power cord connections 1 Plug the power cord into the power cord socket on the printer Make sure that the power cord is sec...

Page 23: ...on Both printer and computer must be unplugged before connect ing or disconnecting the printer cable Otherwise damage or malfunction may result 2 Connect the printer to the computer with a USB interfa...

Page 24: ...power cord into the power cord socket on the printer Make sure that the power cord is securely seated in the socket 2 Plug the free end of the power cord into a suitable AC power source such as a wall...

Page 25: ...Sheets exit the printer through this slot Caution Never reach into the printer while it is operating Injury may result Do not open the front cover while the printer is running When the front cover is...

Page 26: ...rface module Parallel interface connector The printer cable plugs into the parallel inter face connector Power cord socket The power cord plugs into this socket Foilfast Printer rear view with Macinto...

Page 27: ...ic cartridge needed for printing and moves it to the pr inting location The carriage also contains the print head Release lever This lever located to the right of the carriage and platen is used to cl...

Page 28: ...blinking press the ready insert button Press the button for three seconds or more to print a sample page You can print a sample page even when the printer is not connected to a computer error light Th...

Page 29: ...Foil cartridge Premium Blue Foil cartridge Premium Green Foil cartridge Premium Black cartridge Premium White cartridge Primer cartridge Undercoat Cover Types Foilfast Composition Cover Foilfast Coate...

Page 30: ...o the carriage Doing so may result in dam age the printer You must leave at least one cartridge holder empty for the printer to operate properly Do not install more than 7 cartridges 1 Remove the stop...

Page 31: ...idge holder slightly to the left with the cartridge Push down the right side of the cartridge Make sure that the cartridge is securely locked into the holder and that there is no slack in the foil Put...

Page 32: ...he cartridge Removing a cartridge is similar to installing it Hold the cen ter of the cartridge with your thumb and index finger Push the left latch on the cartridge holder slightly to the left with t...

Page 33: ...placing it in the feeder The printer may feed two sheets together if the sheets are stuck together Use only one type of sheet at a time Place a stack of not more than 10 composition covers or 1 Clear...

Page 34: ...uide to the proper size Leave about 0 02 between the edge of the sheet s and the feed guide The stopper will prevent the sheets from rising Note If the space is too wide sheets may feed diagonally If...

Page 35: ...ent only the print settings that match the func tionsofyourFoilfastprinterwillbevalid System Requirements The system requirements for the printer driver software are as follows Computer IBM PC AT or c...

Page 36: ...on the Power Turn on the power by performing the following steps 1 Push the power button on the printer to turn it on 2 Turn on your computer Turning off the Power When you finished printing turn off...

Page 37: ...cartridges are shown with radio buttons in the Select Cartridge s area in Pr int properties Click the radio button next to the color you wish to use The default selection is Gold Foil Multiple Inks 2...

Page 38: ...e Premium White cartridge Primer cartridge Undercoat The primer cartridge is required when pr inting on ClearCo vers and it ma y improve the pr int quality on other co ver types The primer cartridge w...

Page 39: ...e before placing it in the feeder The printer may feed two sheets together if the sheets are slightly stuck together Use only one type of sheet at a time Place a stack of not more than 10 composition...

Page 40: ...too wide a sheet may feed diagonally If the space is too narrow a sheet may not feed Step 4 Set Up the Printer Driver for Printing 1 Select Print from the File menu to open the Print dialog box then c...

Page 41: ...37 3 Select Single Ink from the Print Mode menu for single foil color printing 4 Click the appropriate radio button to select the cartridge s you wish to use WINDOWS Printing Operations...

Page 42: ...jor Functions and Operations 5 Set the size orientation and number of copies as desired 6 When you complete the setup click OK to close the dia log box Step 5 Print Click OK in the Print dialog box to...

Page 43: ...o vers and it ma y improve the pr int quality on other co ver types The primer cartridge will be used for printing when the Undercoat checkbox is checked Foilfast Compatible Covers Foilfast Compositio...

Page 44: ...he foil colors As much as possible try to select colors that resemb le the foil colors to be printed In applications that do not ha ve many color choices such as word processors closely related colors...

Page 45: ...lacing it in the feeder The printer may feed two sheets together if the sheets are slightly stuck together Use only one type of sheet at a time Place a stack of not more than 10 composition covers or...

Page 46: ...too wide a sheet may feed diagonally If the space is too narrow a sheet may not feed Step 4 Set Up the Printer Driver for Printing 1 Select Print from the File menu to open the Print dialog box then c...

Page 47: ...rint Mode menu 4 Check the check boxes under Select Cartridge s to indi cate your desired colors Note Even though you have set the color of an area to your de sired color the area will not be printed...

Page 48: ...jor Functions and Operations 5 Set the size orientation and number of copies as desired 6 When you complete the setup click OK to close the dia log box Step 5 Print Click OK in the Print dialog box to...

Page 49: ...g used in order to ensure accur ate printing results To take advan tage of the many features of the printer select the Foilfast printer driver before creating your documents Preparing for Installation...

Page 50: ...the following files Foilfast printer driver USB Class Driver USB equipped system only Queue Monitor background printing application before System 7 6 1 only Queue Watcher background printing extensio...

Page 51: ...menu Selecting the PPI Foilfast Printer Driver If you want to print using the Powis Parker Foilfast Printer you should select the Powis Parker Foilfast Printer printer driver in the Chooser bef ore y...

Page 52: ...h to use The factory device setting is 6 To change SCSI device num bers refer to Specifications in the Appendix Note If you have more than one SCSI bus in your Macintosh SCSI 6 BUS 1 or similar will b...

Page 53: ...forming the following steps 1 Push the power button on the printer to turn it on 2 Turn on your computer Turning off the Power When you have finished printing turn off your printing devices by perform...

Page 54: ...using one cartridge All selectable cartridges are shown with radio buttons in the Select Cartridge s area in Pr int properties Click the radio button next to the color you wish to use The default sel...

Page 55: ...tridge Undercoat The primer cartridge is required when pr inting on ClearCo vers and it ma y improve the pr int quality on other co ver types The primer cartridge will be used for printing when the Un...

Page 56: ...et to misfeed Fan the stack once before placing it in the sheet feeder The printer may feed two sheets together if the sheets are slightly stuck together Use only one type of sheet at a time Place a s...

Page 57: ...e Printer Driver for Printing 1 Select Page Setup from the File menu to open the Page Setup dialog box 2 Set any necessary settings such as Size or Orientation depending on the document to be printed...

Page 58: ...1 Major Functions and Operations 2 Select your cover type from the Media menu 3 Select Single Ink from the Mode menu 4 In the Select Cartridge s area click the radio button s next to the colors you w...

Page 59: ...55 5 Select Options and number of copies as desired 6 When you complete the setup click Print to close the dia log box Step 5 Print 6 Click Print in the Print dialog box MACINTOSH Printing Operations...

Page 60: ...n ClearCo vers and it ma y improve the pr int quality on other co ver types The primer cartridge will be used for printing when the Undercoat checkbox is checked Foilfast Compatible Covers Foilfast Co...

Page 61: ...l i o F r e v l i S l i o F d e R d e R l i o F e u l B e u l B l i o F n e e r G n e e r G e t i h W e t i h w o t e s o l c y a r g a y a r g t h g i L k c a l B k c a l b l a m r o N Foil color Da...

Page 62: ...misfeed Fan the stack once before placing it in the feeder The printer may feed two sheets together if the sheets are slightly stuck together Use only one type of sheet at a time Place a stack of not...

Page 63: ...may not feed Step 4 Set Up the Printer Driver for Printing 1 Select Page Setup from the File menu to open the Page Setup dialog box 2 Set any necessary settings such as Size or Orientation depending...

Page 64: ...3 Select Multiple Inks from the Mode menu 4 In the Select Cartridge s area click the radio buttons next to the colors you wish to use Note Even though you have set the color of an area to your de sire...

Page 65: ...er than those specified by the application Caution The foil color that is assigned may differ from your intended foil color so be sure to check the Preview window before printing 9 When you are satisf...

Page 66: ...62 Chapter 1 Major Functions and Operations...

Page 67: ...s This chapter describes each of the pr inter driver settings required for controlling the printing operations Read it to learn the specific setup details f or different printing modes Chapter 2 The F...

Page 68: ...the following ways Select Print from the File menu and then click Properties in the Print dialog box Select Page Setup from the File men u Click Printer in the P age Setup dialog box and then click P...

Page 69: ...f or comp covers HIGH is the def ault setting and w e rec ommend it for best results WINDOWS Print Settings Paper Size Click the down arrow and select the desired sheet siz e from the displayed list T...

Page 70: ...cartridge selection is Gold Foil Multiple Ink multiple foil colors This print mode allo ws a document to be pr inted in multi color using any selected car tridges When you select Multiple Ink mode all...

Page 71: ...number and the n um ber of printed bands OPTION SETTING dialog box Click the Restore Def ault button while holding do wn the Ctrl and Alt keys to see more printing options Micro Feed During pr inting...

Page 72: ...he system software and can be opened from the Finder or from within an application When you use the Powis Parker Foilfast for the first time or when you switch to the Foilfast after using another prin...

Page 73: ...ast printer is displayed in the upper right portion of the Chooser window after you select click the PPI Foilfast driver on the left side When more than one Foilfast printer is connected to the SCSI o...

Page 74: ...select the On radio button to enable background pr inting or the Off b utton to disab le it When the softw are is first installed background printing is off Note Background printing cannot be selecte...

Page 75: ...n select one of the following page sizes Letter 8 5 x 11 in Legal 8 5 x 14 in Half Letter 5 5 x 8 5 in A4 210 x 297 mm A5 148 x 210 mm B5 182 x 257 mm Custom Page Sizes Edit Button To create custom pa...

Page 76: ...if you type in 5 mm the size will be set to 5 mm Reduce or Enlarge The Page Setup dialog also contains a Reduce or Enlarge bo x in which you can enter percentages ranging from 25 to 400 The document i...

Page 77: ...ion you are using For these set tings refer to you application s user s manual Media Cover Type From the Media menu in the Page Setup dialog box you can select one of the cover types listed below Foil...

Page 78: ...print a document in multiple colors Select Mul tiple Inks in the Select Cartridge s area in Print properties All selectable car tridges are shown with checkboxes You must select at least 1 and no mor...

Page 79: ...Defined dialog allo ws you to designate the proper ties for printing on customer cover types The following print setting options will be saved with your specified cover type name Micro Feed adjustmen...

Page 80: ...o buttons in the Select Cartridge s area in Pr int properties Click the radio button next to the color you wish to use The default selection is Gold Foil Multiple Inks 2 or more colors This print mode...

Page 81: ...or level Use the left and right arrow buttons in the Preview window to scroll through the pages To display a specific page number click in the page number bo x and type in the number of the page you w...

Page 82: ...ing 1 To use background printing select the Chooser from the Apple menu When the Chooser window appears click on the PPI Foilfast printer driver icon in the left half of the windo w A list of at tache...

Page 83: ...e order of print jobs in the queue and cancel print jobs The Queue Monitor appears only when bac kground printing is on When back ground printing is on and y ou choose Pr int to star t printing a docu...

Page 84: ...ox is checked the Queue Monitor win dow will be displayed during printing In the When printer needs attention section of the Preferences dialog box you can select what aler ts will be displa yed when...

Page 85: ...obs in the queue can be cancelled by clicking on the Cancel Pr inting button To cancel any of the print jobs in the queue highlight the documents in the Queue box and then click on the Cancel Printing...

Page 86: ...inting stops for some reason an error message is displayed If an error message appears while you are changing printer settings correct the settings according to the error message If an error message o...

Page 87: ...The Appendix describes maintenance and troubleshoot ing procedures and the basic specifications of the pr inter Appendix...

Page 88: ...leaning steps described below 1 Unplug the printer Make sure you unplug the printer before cleaning it 2 Clean the outside of the printer Use a soft cloth to wipe the outside of the printer to a void...

Page 89: ...e benzene thinner or other volatile materials as they may damage the printer components Do not get the inside of the printer wet 1 Push the front cover release button and gently lower the front cover...

Page 90: ...ont cover release button and gently lower the front cover 2 Gently apply the tape to dirty spots on the platen and rub your finger over the tape Caution Do not touch or remove the white pad on the lef...

Page 91: ...age Press the ready insert button on top of the printer to move the carriage to the safety position 4 Clean the feed roller Wipe the f eed roller metal shaft roller with a cotton s wab dipped in isopr...

Page 92: ...n i d e l l a t s n i s e g d i r t r a c e g a i r r a c e h t n o y d a e r l a r o r r e m s i n a h c e M r e t n i r p e h t n i d e t c e t e d s a w r o r r e n A m s i n a h c e m n e p o r e...

Page 93: ...t What to do when an error occurs When a printer error occurs the error light flashes and the error message dialog box appears on your computer s screen power ready error on off fast blinking 1 Check...

Page 94: ...is already in the pr inter and no data is being receiv ed ready light is on press the ready insert button to eject the sheet Canceling an alert To cancel an alert for anything other than a hardware or...

Page 95: ...and gently open the front cover 3 Press the release lever and gently pull out the jammed paper Jams can be caused b y a dirty platen Clean the platen f ollow ing the directions in the Cleaning the Pl...

Page 96: ...recognized 10 Print Quality 11 Connection Method 12 Other problems and operations 1 Power does not come on Is the power cord disconnected Make sure the power cord is plugged into an outlet as w ell a...

Page 97: ...tly installed Install the printer driver from the Installation Disc Is the cable disconnected When one of the followings occurs it is possible that the cable is broken or disconnected 1 The gauge in t...

Page 98: ...par ticular cartridge repeatedly causes prob lems try a different cartridge Is the head dirty Clean the head b y following the directions in this guide f or cleaning the printer and head The platen of...

Page 99: ...ve is extremely fragmented Clean up your files and defragment the disk by periodically running a utility like DEFRAG that comes with Win dows 6 Paper is not feeding correctly or not ejecting correctly...

Page 100: ...feeding Is the error light blinking When the sheet is not f ed error light is b linking press the ready insert button If the sheet is not fed even by pressing the ready insert button the sheet feed ro...

Page 101: ...ront cover all the way Is something sitting on top of the printer The printer may malfunction when there are things stac ked on top or press ing it from the side Do not place anything on top of the pr...

Page 102: ...directional communication use a uni directional interface setting I would like to use multiple printer ports for connections If the computer is AT compatible up to three ports LPT1 to LPT3 can be use...

Page 103: ...heet is not feeding correctly or not ejecting correctly from the sheet feeder 9 Printer makes strange noises when the power is turned on and the error lights blink 10 Mechanism or cartridge error 11 F...

Page 104: ...Chooser Is QuickDraw GX enabled If QuickDraw GX is installed disable it by following these steps 1 Select Control Panels from the Apple menu 2 Open the Extensions Manager 3 Deselect QuickDraw GX in th...

Page 105: ...d on Before printing make sure the printer is turned on Were the printer and computer turned on in the wrong order Turn the printer on before turning on the computer Is the front cover closed properly...

Page 106: ...ick on the printer name and SCSI The printer may not be selected correctly if you do not click on the printer name Do you have enough hard drive space The Foilfast requires work space on the hard disk...

Page 107: ...h as RAM Doubler or virtual memory memory may not be correctly recognized for color printing When color printing is not working disable these utilities and try again Do you have enough disk space Make...

Page 108: ...mposition covers or 1 ClearCover Is your cover too thick or too thin Composition co vers should be betw een 16 18 5 points thic k 0016 00185 inches Clear covers should be between 6 5 7 5 points thic k...

Page 109: ...hts blink Has the carriage packing material been removed Refer to Chapter 1 of this guide for detailed unpacking instructions Has the packing tape on the case been removed Refer to Chapter 1 of this g...

Page 110: ...and try again If the message recurs try a different cartridge 11 Cartridges are not correctly recognized Is the bar code on the cartridge dirty Clean the bar code Is the cartridge installed in the hol...

Page 111: ...g in the Page Setup dialog box This value may be specified between 25 and 400 percent The preview doesn t change even though I change the reduction or en largement The preview will not change siz e wi...

Page 112: ...t Coated Paper Cover Foilfast ClearCover Dimensions inches Approximately 18 2 width x 11 8 depth x 7 5 height Weight 11 lbs 8 oz 5 2 kg Power supply 100 230 Vac 50 60Hz Interface Parallel SCSI optiona...

Page 113: ...0 ON OFF OFF OFF No 1 OFF ON OFF OFF No 2 ON ON OFF OFF No 3 OFF OFF ON OFF No 4 ON OFF ON OFF No 5 OFF ON ON OFF No 6 Factory default settings ON ON ON OFF No 7 SCSI device number 7 is reser ved for...

Page 114: ...ack cartridge Premium White cartridge Primer cartridge Undercoat Foilfast Compatible Covers Foilfast Composition Cover Foilfast Coated Paper Cover Foilfast ClearCover Options SCSI Interface for Macint...

Reviews: